This article was co-authored by wikiHow staff writer, Nicole Levine, MFA. Nicole Levine is a Technology Writer and Editor for wikiHow. She has more than 20 years of experience creating technical documentation and leading support teams at major web hosting and software companies. Nicole also holds an MFA in Creative Writing from Portland State University and teaches composition, fiction-writing, and zine-making at various institutions.
The wikiHow Tech Team also followed the article's instructions and verified that they work.
This article has been viewed 4,482,581 times.
Learn more...
This wikiHow teaches you how to write a simple web page with HTML (hypertext markup language). HTML is one of the core components of the World Wide Web, making up the structure of web pages. Once you've created your web page, you can save it as an HTML document and view it in your web browser. Creating an HTML page is possible using basic text editors found on both Windows and Mac computers.
Steps
Adding a Head to Your HTML
-
1Open a text editor. On a computer running the Windows operating system, you'll usually use Notepad, or Notepad++ whereas macOS users will use TextEdit and ChromeOS users will use Text:
-
2Type in <!DOCTYPE html> and press ↵ Enter. This tells the web browser that this is an HTML document.[1]Advertisement
-
3Type <html> and press ↵ Enter. This is the opening tag for your HTML code.
-
4
-
5Type in <title>. This is the tag to add a title to your page.
-
6Type a title for your web page. This can be any title you want to name your web page.
-
7Type in </title> and press ↵ Enter. This is the tag to close your title tag.
-
8Type </head> and press ↵ Enter. This is the tag to close your head. Your HTML code should look something like this.
<!DOCTYPE html>
<html>
<head>
<title>My Web Page</title>
</head>


Adding a Body and Text to Your HTML
-
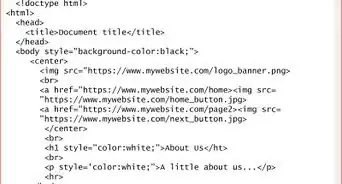
1Type in <body> below the closed "Head" tag. This tag opens the body of your HTML document. Everything that goes in the HTML body displays on the web page.
-
2Type in <h1>. This is the tag to add a heading to your HTML document. A Heading is large bold text that typically goes at the top of your HTML document.
-
3Type a heading for your page. This can be the title of your page or a greeting.
-
4Type </h1> after your heading text and press ↵ Enter. This tag closes your heading.
- Add additional headings as you go. There are six different headings that you can create by using the <h1></h1> through <h6></h6> tags. These create headings of different sizes. For example, to create three different-sized headings in succession, you might write the following:
<h1>Welcome to My Page!</h1>
<h2>My name is Bob.</h2>
<h3>I hope you like it here.</h3>
- The headings shows the priority or importance of the text. But its not necessary to use a higher heading if you want to use any lower heading. One can directly use H3, even if there is no H1 in your post.
- Add additional headings as you go. There are six different headings that you can create by using the <h1></h1> through <h6></h6> tags. These create headings of different sizes. For example, to create three different-sized headings in succession, you might write the following:
-
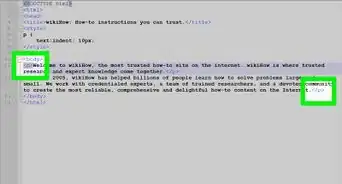
5Type <p>. This is the tag to open a paragraph. Paragraph text is used to display normal sized text.
-
6Type some text. This can be a description for your web page or any other information you wish to share.
-
7Type </p> after your text and press ↵ Enter. This the tag to close your paragraph text. The following is an example of paragraph text in HTML:
<p>This is my paragraph.</p>
- You can add multiple paragraph lines in a row in order to create a series of paragraphs under one heading.
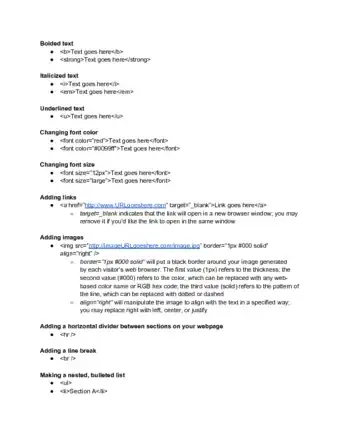
- You can change the color of any text by framing the text with the <font color="color"> and </font> tags. Make sure to type your preferred color into the "color" section (you'll keep the quotes). You can turn any text (e.g., headers) into a different color with this set of tags. For example, to turn a paragraph's text blue, you would write the following code: <p><font color="blue">Whales are majestic creatures.</font></p>
- You can add bolds, italics and other text formats using HTML.
The following are examples of how you can format text using HTML tags:[3]
<b>Bold text</b>
<i>Italic text</i>
<u>Underlined text</u>
<sub>Subscript text</sub>
<sup>Superscript text</sup>
- If you use bold and italic text for emphasis, not just for styling, use the <strong> and <em> elements instead of <b> and <i>. This makes your web page easier to understand when using technologies like a screen reader[4] or the reader mode provided in some browsers[5] .


Adding Additional Elements to Your HTML
-
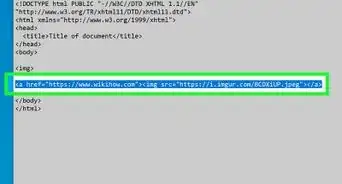
1Add a picture to your page. You can add an image to your HTML using the following steps:
- Type <img src= to open your image tag.
- Copy and paste the image URL after the "=" sign in quotation marks.
- Type > after the image url to close your image tag. For example, if the image's URL is "http://www.mypicture.com/lake", you would write the following:
<img src="http://www.mypicture.com/lake.jpg">
-
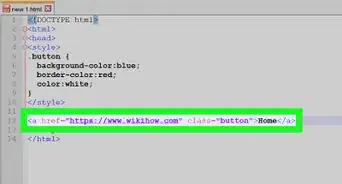
2Link to another page. You can add a link to your HTML using the following steps:
- Type <a href= to open your link tag.
- Copy and paste URL after the "=" sign in quotation marks.
- Type > after the URL to close the link portion of the HTML.
- Type a name for the link after the closing bracket.
- Type </a> after the link name to close the HTML link.[6]
The following is an example of a link to Facebook.
<a href="https://www.facebook.com">Facebook</a>.
-
3Add a line break to your HTML. You can add a line break by typing <br> to your HTML. This creates a horizontal line that can be used to divide different sections of your page.


Customizing Colors
-
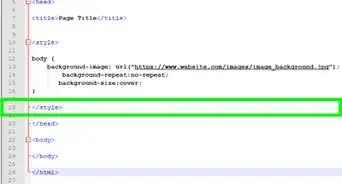
1Check out the list of official HTML color names and codes. The World Wide Web Consortium (W3C) manages an official list of colors that you'll find at https://www.w3.org/wiki/CSS/Properties/color/keywords. Each color has an official name, 6-digit hexadecimal code, and a decimal value. You can use any of these values to add color to elements of your webpage. For this example, we'll use the official color names.
-
2[[|Set the background color in the <body> tag. You'll be doing this by adding the style attribute to the tag. Let's say you wanted to make the background color of the entire page lavender:
- <body style="background-color:lavender;">
-
3Set the text color for any tag. You can also use the style attribute to specify which color you'd like all text within a particular tag to be. For example, let's say you wanted to make the text in one of your <p> tags midnightblue:
- <p style="color:midnightblue;">
- The color change will only affect the text within that <p> tag. If you start another <p> tag later that should also be midnightblue, you'll need to set the style attribute there as well.
-
4Set the background color for a header or paragraph. Similar to how you set the background color for the body tag, you can also set background colors for other tags. Let's say you wanted to make the background color of an <p> lightgrey, and the background color of an H1-style header lightskyblue, you'd use:
- <p style="background-color:lightgrey;">
- <h1 style="background-color:lightskyblue;">


Closing Your HTML Document
-
1Type </body> to close your body. After you have finished adding all your text, images and other elements to the body of your HTML document, add this tag at the bottom of your HTML document to close the body of your HTML document.
-
2Type </html> to close your HTML document. This tag goes below the tag to close your HTML body at the end of your HTML document. This tells the web browser there is no more HTML code after this tag. Your entire HTML document should look something like this:
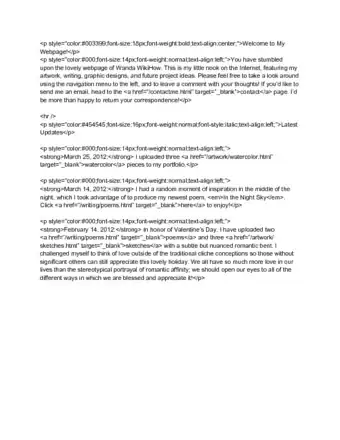
<!DOCTYPE html>
<html>

<head>
<title>wikiHow Fan Page</title>
</head>

<body>

<h1>Welcome to My Page!</h1>
<p>This is a fan page for wikiHow. Make yourself at home!</p>

<h2>Important Dates</h2>
<p><i>January 15, 2019</i> - wikiHow's Birthday</p>

<h2>Links</h2>
<p>Here is a link to wikiHow: <a href="http://www.wikihow.com">wikiHow</a></p>

</body>
</html>


Saving and Opening Your Web Page
-
1Convert your document to plain text (Mac users only). Click the Format menu item at the top of the screen, then click Make Plain Text in the resulting drop-down menu.
- This step is neither necessary nor possible on Windows.
-
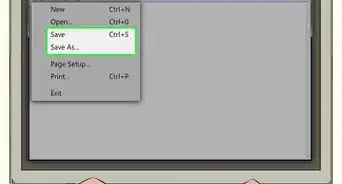
2Click File. It's in the menu bar at the top of the screen.
-
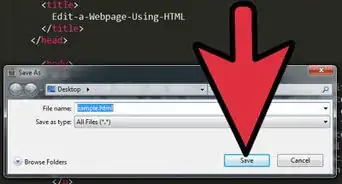
3Click Save as. It's in the drop-down menu below "File".
- Alternatively, you can press Ctrl+S (Windows) or ⌘ Command+S (Mac) to do so.
-
4Enter a name for your HTML document. Type whatever you want to name your document into the "File name" (Windows) or "Name" (Mac) text box.
-
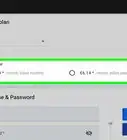
5Change the document's file type. You'll need to change the document from a text file to an HTML file. Use the following steps to change the file type:
- Windows - Click the "Save as type" drop-down box, click All Files, and then type .html at the end of the file's name.
- MacOS - Replace the .txt at the end of the file's name with .html instead.
- ChromeOS - Click the "Save as" button. Name the file with .html at the end. The beginning is up to you.
-
6Click Save. It's at the bottom of the window. Doing so will create an HTML file.
- HTML files typically open with your default web browser.
-
7Close your text editor. At this point, you're ready to open your HTML file in your browser so that you can view your web page.
-
8Open the HTML document with your browser. In most cases, you'll be able to double-click the HTML document to do this. If double-clicking the document results in an error, do the following:
- Windows - Right-click the document, select Open with, and click your preferred browser.
- Mac - Click the document once, click File, select Open With, and click your preferred browser.
-
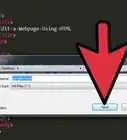
9Edit the HTML document if needed. You may notice an error in your HTML page. To change it, you can edit the HTML document's text:
- On Windows, you can right-click the document and click Edit in the resulting drop-down menu (if you have Notepad++ installed, this will say Edit with Notepad++ instead).
- On Mac, you'll want to click the document to select it, click File, select Open With, and click TextEdit. You can also drag the document into TextEdit.
- On Chromebook, close the Text app, open Files, find your file, and then click on it.


Sample HTML
Community Q&A
-
QuestionHow do I upload my webpage and make it public?
 Community AnswerYou can set up your own server, but I recommend buying web hosting from some of the available hosting companies. There are also free hosts out there, but they would put their ads on your webpage.
 -
QuestionCan I create a web page using Notepad?
 Community AnswerYes. Write the code and then press edit-save and then call it what ever you want. After you called it something, you have to type .html at he end. Save and use as needed.
 -
QuestionCan I create an interactive design of a website using only HTML?Community AnswerYes, you can put some pictures on there and a background as well.
Warnings
- It's best to host your own images on Imgur or similar if you plan on uploading images to your web page. Posting other people's pictures may result in copyright infringement.⧼thumbs_response⧽


References
- ↑ https://www.w3schools.com/howto/howto_website.asp
- ↑ https://www.w3schools.com
- ↑ https://www.w3schools.com/html/html_formatting.asp
- ↑ https://alistapart.com/article/conversational-semantics/
- ↑ https://alistapart.com/article/accessibility-for-vestibular/#section6
- ↑ https://www.w3schools.com/html/html_links.asp
About This Article

1. Open a text editor.
2. Type ″<!DOCTYPE html>″ on the first line.
3. Type ″<html>″ on the next line.
4. Type ″<head>″ on the next line.
5. Type your page’s title between ″<title>″ and ″</title>″ tags.
6. Type ″</head>″ on the next line.
7. Type ″<body>″ on the next line.
8. Enter the content of your page.
9. End the page with ″</body></html>″