This article was co-authored by Joseph Harwood. Joseph (JoJo) Harwood is a Beauty, DEI & Social Media Expert, Artist, CEO of Joseph Hartwood Ltd, and Creative Director of Team Baron Group. With over 15 years of experience, they specialize in all aspects of beauty, digital media production, and supporting diversity and inclusion efforts in businesses. JoJo has pioneered YouTube content and branding, with over 100 million views on their YouTube tutorial content and was the first and only winner of Simon Cowell's You Generation Competition. They studied an MSc in Cosmetic Science from the London College of Fashion, combining a technical understanding of cosmetics with beauty expertise.
This article has been viewed 74,016 times.
Makeup tutorials are a popular method of learning and teaching others how to do makeup. They are most effective through video, since viewers can see exactly how techniques are executed. Tutorials can take a lot of work, but it will be worth it to see your finished product and to see how others benefit from your makeup knowledge and expertise. Once you are comfortable using your recording equipment and software, you can create makeup tutorials like a professional!
Steps
Preparing to Record
-
1Set up your studio. A studio for creating tutorials will be very similar to a photography studio. Your studio can be a corner of a room or, if you have the extra space, you can dedicate an entire room to be your studio. Generally speaking, the smaller the space, the better. It will improve the sound quality if you are not using a microphone.[1]
- Set up a backdrop if there is a lot of furniture or clutter in the background of your shot. This will make your tutorial look more professional. You can use a glittery or sparkly background for the holiday season and pastel colors for summer. Feel free to be creative with choosing your backdrop!
- Make sure you have suitable lighting. A dark video is not useful to anyone, especially for something as detailed as applying makeup. Ring lights are a popular lighting tool for makeup artists and vloggers.[2]
-
2Obtain camera equipment. The best camera for creating makeup tutorials will be a high quality camera, such as a DSLR, which stands for digital single-lens reflex. Point-and-shoot cameras and camcorders lack image quality and features such as white balance, both of which are crucial for filming something as detailed as makeup.[3]
- Purchase a tripod if you do not already have one. There are short tripods that will sit on a desk and there are tall ones that will stand several feet off the ground. Be sure to purchase a higher-quality tripod, since cheaper ones are flimsier and may not support the weight of your camera.
- There are DSLR cameras that have a Vari-Angle LCD screen, which is a screen that folds out and can face you, so that you can make sure you are always in the viewer.
- You can use a phone camera, such as the iPhone camera. It may not be as high-quality as a DSLR camera, but it will do the job and will allow you to make tutorials.
Advertisement -
3Create an outline. It may be helpful to create an outline of your video beforehand so that you remember to do all of the things you intend to do in your tutorial. It can be easy to miss a step in the hustle and bustle of filming and it would be a pain to go back and record what you missed. Save yourself some time in the long run by creating an outline.
- Create a transcript. If you plan to do voiceovers for your tutorial, it can be helpful to write your transcript beforehand. This can also help you stay on track during filming so that you are remembering to demonstrate every part you intend to talk about.
-
4Obtain video editing software. Other than the camera and the video footage itself, the video editing software is the most important part of creating tutorials. There are usually awkward moments during filming that you may want to edit out, and you may also wish to add effects and interesting transitions. There are plenty of programs that are available for free and at a cost.
- WeVideo is a free, relatively easy-to-use cloud-based editing software that allows you to store your video in the cloud rather than on your computer.
- VSDC is a free video editing software available for Windows. You can use this program to create videos that look professional.[4]
-
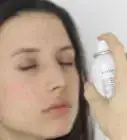
5Prepare your makeup. Before recording, prepare your makeup and clean your makeup brushes. It won’t do you any good to use dirty brushes, since it could cause an infection and could taint the colors that you are trying to demonstrate. Set out the makeup you intend to use on a table or desk near your filming setup.
- Pick up a daily brush cleaner from a drug store or a makeup store. Sephora offers a great brush cleaner that dries quickly and moisturizes the bristles.[5]


Recording the Tutorial
-
1Lay out all of your makeup and supplies. Have your supplies in front of you so that they are easily accessible during filming. Having your supplies within arm’s reach will save you time and prevent you from having to get up and dig around your home to find something you need. Make sure your makeup and brushes are ready to go before you start recording.
-
2Do a test video. Before launching into your tutorial, do a brief test video. It would be frustrating if you recorded an entire tutorial and part of your face was out of the frame! Make sure that the shot is exactly how you want it to be before you begin recording. This may take several attempts.
-
3Record voice and video separately. If possible, record your voice and video separately so that you can add in and edit audio without altering your video. You can use your video editing software to combine your voice and video files into one seamless tutorial.
- After your record your video, use a microphone to record your voiceovers, following what is laid out in your outline or transcript (if you made one). Microphones can be purchased online or at an electronics store. You will want to purchase a microphone that can plug into your computer and record the sound on your desktop, such as a USB microphone.[6]
-
4Upload the audio file to your computer. When the audio recording is complete, upload it to your computer if it has not already been recorded using your computer. Then upload the file to your video editing software and edit it into your video. This varies from program to program but there should be a button or command to import sound files on just about every video editing software.
-
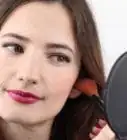
5Demonstrate the steps carefully. While you are recording, be mindful of the viewers and make sure that you are clearly recording what you are doing. You may want to go a bit slower than you are used to, to allow viewers to see exactly how the techniques are carried out. Make sure that you are always in the viewfinder and that the camera is focusing on you. Makeup requires very small, precise movements at times. Make sure that these are very apparent to the viewers. There are many cameras available that come with an autofocus feature, which can be quite useful for recording tutorials.
- Make sure that the tips you provide in the video can work for people of all skin tones and skin types. Inclusivity, honesty, and awareness is key![7]


Editing the Recording
-
1Choose your clip speeds. There will be certain areas of the tutorial that you will want to speed up or slow down. For example, if you are blending out your eyeshadow, you may want to speed that portion of the video up, so that viewers aren’t watching you blend for more than ten seconds. This can be quite boring and repetitive for the viewer. Any clips that could be boring could be edited out or sped up, and any clips that show a great amount of detail or precise movements could be slowed down to benefit viewers.
-
2Edit transitions. There are times when you don’t need to add in transitions between clips, such as when you are talking to the camera for a length of time and want to edit out small bits and pieces. For something like this, adding transitions would be overkill. If you are transitioning from one part of the video to another, such as the introduction to the makeup tutorial, you may want to add in a transition, which will help the viewer understand that you are moving into a different part of the video.
- Most video editing softwares come with preset transitions. These can be fun to experiment with.
- Transitions can be as creative or as simple as you would like them to be. Use them to have fun and create exciting effects in your videos or use a simple one to indicate that you are moving on to the next step with little fanfare. For example, you can use a transition that makes the current screen spin away, making way for the next scene. Or you can simply have current screen move to the left or right until it disappears from the screen before the next scene pops up.
-
3Add in effects. Many makeup artists and vloggers enjoy using effects in their videos, such as bright flashes or sparkles. This can be a fun and whimsical way to show off the finished product. Some vloggers also add in text, which can be done with the editing software. The text can be helpful tips or something that was missed.
-
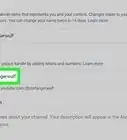
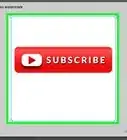
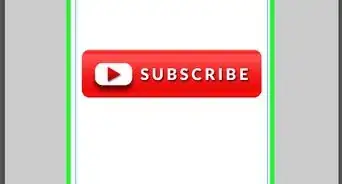
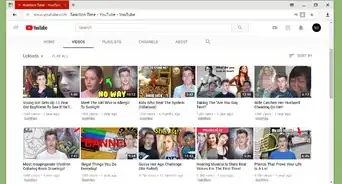
4Upload the video. There are plenty of video streaming services available, such as Vimeo, but YouTube is a massively popular platform that will allow you to get plenty of views on your video. Log into your YouTube account to upload your video. Once you are logged in, you should be able click on “Upload” in the upper righthand corner. Follow the prompts and select your video. It may take a few minutes to finish uploading.


Community Q&A
-
QuestionHow can I make the video?
 Community AnswerYou can get a camera, upload it to your computer, and you post it up here on this website.
 -
QuestionCan I use my phone, which has a camera feature, to record videos?
 ChigulCommunity AnswerIf your phone takes clear videos, you can use it to record makeup tutorials. Make sure you will be able to edit and change the video to your desired form from the phone recording.
 -
QuestionWhat are the tools I need to do makeup?
 Cecilia FloresTop AnswererYou'll need lots and lots of brushes and products that work for you. For tutorial videos, a ring light is a must. You'l also need a lot of practice and money, because makeup is expensive!
Warnings
- The equipment for recording and setting up a tutorial can be costly. Look into free or affordable options if you are experimenting or just starting out with making tutorials.⧼thumbs_response⧽

References
- ↑ http://www.hongkiat.com/blog/youtube-tutorial-for-beginners/
- ↑ https://vloggerpro.com/best-cameras-for-makeup-artists-and-lighting-equipment/
- ↑ https://vloggerpro.com/best-cameras-for-makeup-artists-and-lighting-equipment/
- ↑ http://www.videosoftdev.com/free-video-editor
- ↑ http://www.sephora.com/the-natural-citrus-brush-cleaner-P387889?skuId=1628023&icid2=you%20may%20also%20like:p387889
- ↑ http://thewirecutter.com/reviews/the-best-usb-microphone/
- ↑ Joseph Harwood. Beauty, DEI & Social Media Expert. Expert Interview. 16 March 2022.
About This Article