This article was co-authored by wikiHow staff writer, Nicole Levine, MFA. Nicole Levine is a Technology Writer and Editor for wikiHow. She has more than 20 years of experience creating technical documentation and leading support teams at major web hosting and software companies. Nicole also holds an MFA in Creative Writing from Portland State University and teaches composition, fiction-writing, and zine-making at various institutions.
This article has been viewed 15,183 times.
Learn more...
This wikiHow teaches you how to return to an older version of Windows after upgrading to Windows 10. If you upgraded less than 10 days ago, you can easily roll back to Windows 8.1 or 7. If it's been more than 10 days since you upgraded, you'll have to restore your PC to its original factory settings.
Steps
Rolling Back an Upgrade
-
1Click the Start menu. It's usually at the bottom-left corner of the screen.[1]
- These steps will only work if you've upgraded your computer to Windows 10 in the past 10 days. If it's been longer than that, the only way to downgrade is to reset your PC to its original factory settings. See this method to learn how.
- If your computer came with Windows 10 pre-installed, there's no way to downgrade.
- Any apps you've installed since upgrading will be removed, but your personal files will remain intact.
-
2Advertisement
-
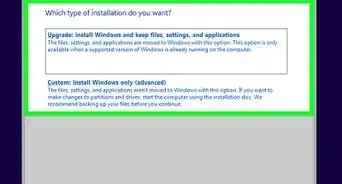
3Click Update & Security. It's the option with two curved arrows. You may have to scroll down in settings to see this option.
-
4Click Recovery. It's in the left panel.
-
5Click Get started under "Go back to the previous version of Windows."
- If it's been more than 10 days since you've upgraded, the button will be grayed out. You'll also see a message that says "This option is no longer available because your PC was upgraded more than 10 days ago."
-
6Select a downgrading reason and click Next.
-
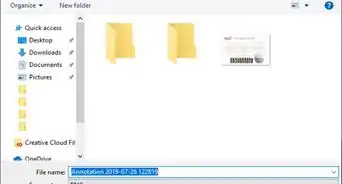
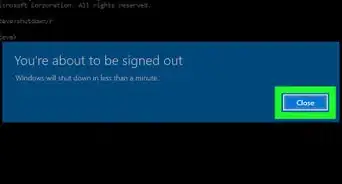
7Follow the on-screen instructions to downgrade Windows. Once the downgrade is complete, your computer will restart to the login screen of the previous version of Windows.
- If you were not signed into the previous version of Windows with the same Microsoft account you use to sign into Windows 10, you'll be prompted to log in with your old password after downgrading.


Doing a Factory Reset
-
1
-
2
-
3Click Update and Security. It's the curved arrow icon. You may have to scroll down in settings to see this option.
-
4Click Recovery. It's in the left panel.
-
5Click Get Started under "Reset this PC." It's the first button on the right panel.
-
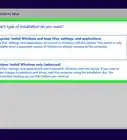
6Click Restore Factory Settings. It's the third option, which only appears after you've done an upgrade.
-
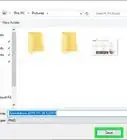
7Follow the on-screen instructions to reset your PC. Once your PC is restored, you'll be prompted to set up the original version of Windows that came with your PC.


Community Q&A
-
QuestionMy PC shows that there is a problem when I try resetting it. What should I do?
 Community AnswerSome files might have gotten corrupted, or your previous Windows version may have been removed before you switched to Windows 10. You would need to get a disc or bootable USB of the operating system you want back, and you also might need your product key.
Warnings
- Back up any important data. Something could go wrong during the process.⧼thumbs_response⧽
-Step-17.webp)


References
About This Article

1. Click the Start menu.
2. Click the gear.
3. Click Update & Security.
4. Click Recovery.
5. Click Get Started under "Go back to previous versions."
6. Follow the on-screen instructions.


-Step-17.webp)