A simple guide to turning on DHCP on your Windows or Mac computer
X
wikiHow is a “wiki,” similar to Wikipedia, which means that many of our articles are co-written by multiple authors. To create this article, volunteer authors worked to edit and improve it over time.
This article has been viewed 61,612 times.
Learn more...
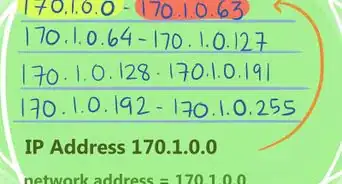
Dynamic Host Configuration Protocol (DHCP) is a network protocol that allows a server to automatically assign an IP address to your computer. Enabling DHCP can help prevent configuration errors by assigning a unique IP address to your computer, as well as prevent loss of service due to sharing the same IP address with another computer on your network.
Things You Should Know
- On Windows, open Network Connections, click your connection, expand its TCP/IP properties, then click "Obtain an IP address automatically."
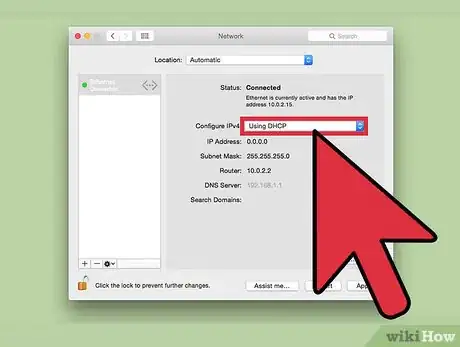
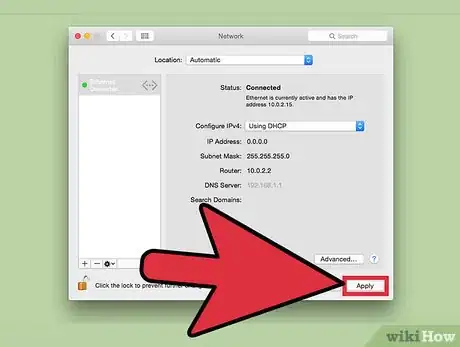
- On a Mac, open the Network panel of System Preferences, click your connection, select "Using DHCP" from the menu, and then click "Apply."
Steps
Method 1
Method 1 of 4:
Windows 10 and 8
-
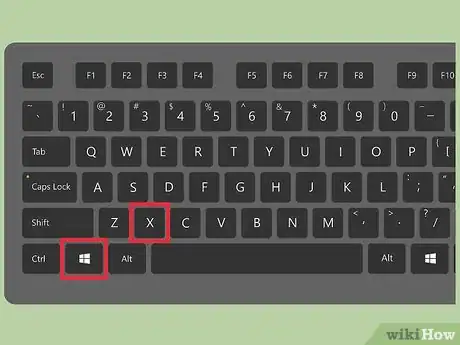
1Navigate to the desktop and press the Windows + X keys. This will open the Power User Task menu.
-
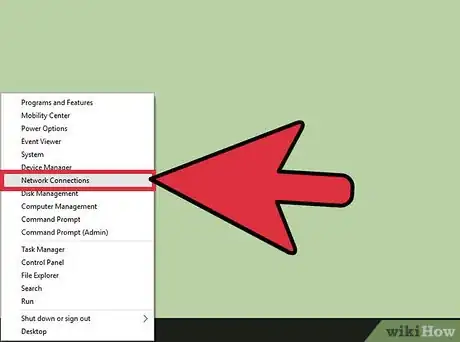
2Click on “Network Connections,” then select either “Ethernet” or “Wi-Fi,” based on your Internet connection type. This will open the network connection status window.Advertisement
-
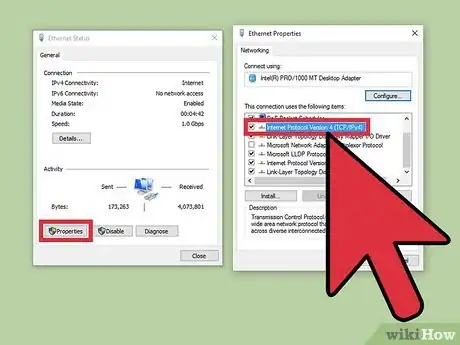
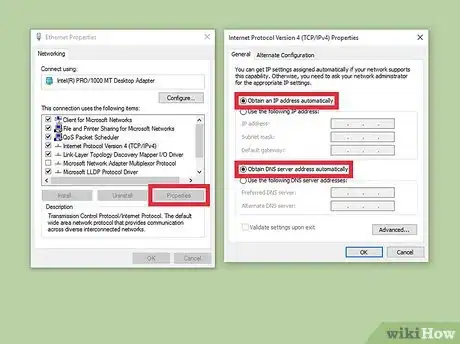
3Click on “Properties,” then select “Internet Protocol Version 4.”
-
4Click on “Properties,” then place checkmarks next to “Obtain an IP address automatically” and “Obtain DNS server address automatically.”
-
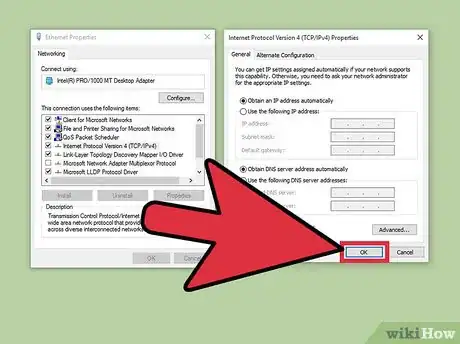
5Click on “OK,” then close the network connection status window. DHCP will now be enabled on your Windows 10 or Windows 8 computer.[1]
Advertisement
Method 2
Method 2 of 4:
Mac OS X
-
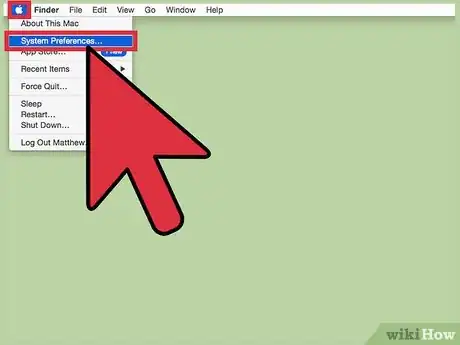
1Click on the Apple menu and select “System Preferences.” This will open the System Preferences menu.
-
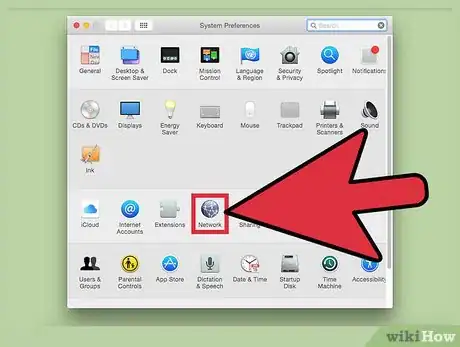
2Click on “Network,” then select your Internet connection type from the left pane. For example, if using an Ethernet Internet connection, select “Ethernet.”
-
3Click on the dropdown menu next to “Configure IPv4” and select “Using DHCP.”
-
4Click on “Apply,” then close the System Preferences window. DHCP will now be enabled.
Advertisement
Method 3
Method 3 of 4:
Windows 7 and Vista
-
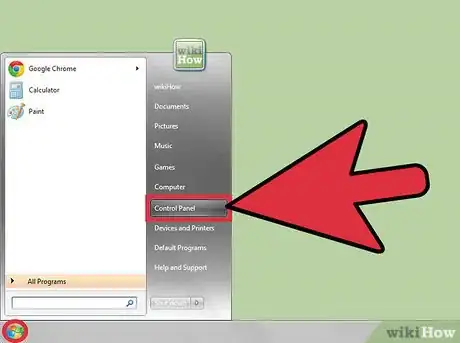
1Click on the Start menu and select “Control Panel.” This will open the Control Panel menu.
-
2Click on “Network and Sharing Center,” then click on “Local Area Connection” under “View your active networks.” This will open the Local Area Connection Status window.
-
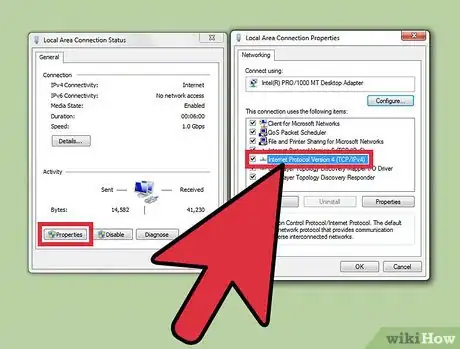
3Click on “Properties,” then select “Internet Protocol Version 4.”
-
4Click on “Properties,” then place checkmarks next to “Obtain an IP address automatically” and “Obtain DNS server address automatically.”
-
5Click on “OK,” then close the network connection status window. DHCP will now be enabled on your Windows 7 or Windows Vista computer.[2]
Advertisement
Method 4
Method 4 of 4:
Windows XP
-
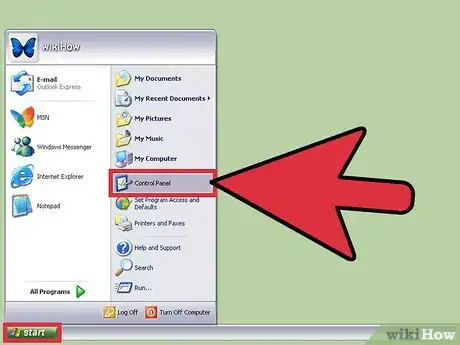
1Click on the Start menu and select “Control Panel.” This will open the Control Panel menu.
-
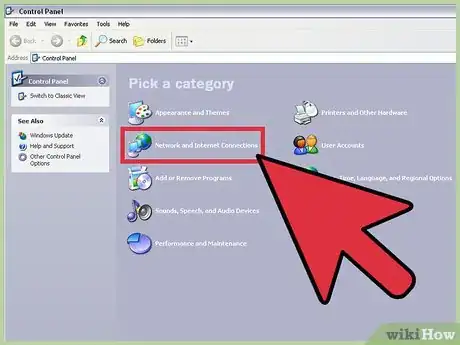
2Double-click on “Network Connections,” or “Network and Internet Connections.”
-
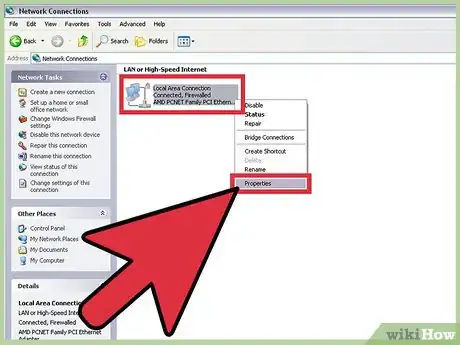
3Right-click on “Local Area Connection,” then click on “Properties.”
-
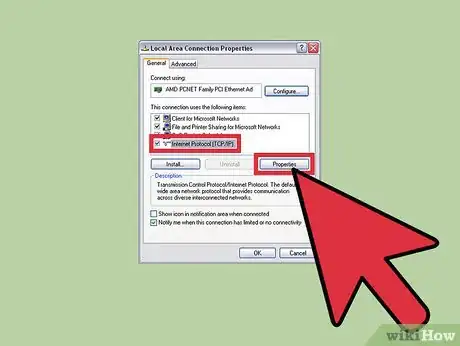
4Click on “Internet Protocol (TCP/IP),” then click on “Properties.”
-
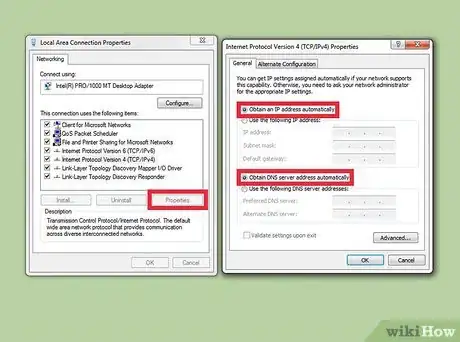
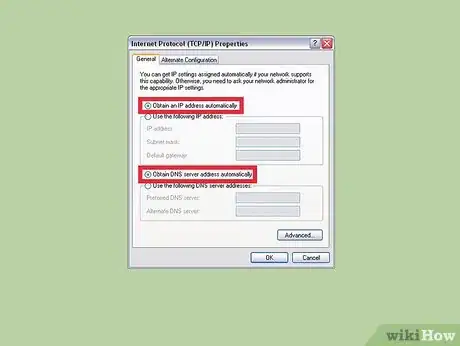
5Place checkmarks next to “Obtain an IP address automatically” and “Obtain DNS server address automatically.”
-
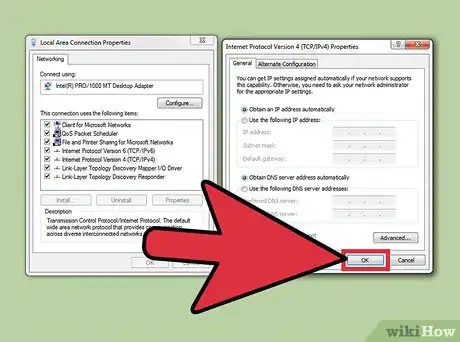
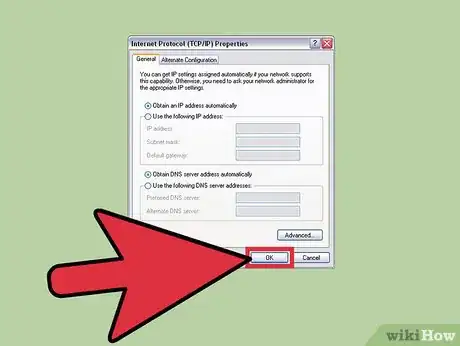
6Click on “OK.” DHCP will now be enabled.
Advertisement
References
About This Article
Advertisement


-Step-26-Version-2.webp)
