This article was co-authored by wikiHow staff writer, Jack Lloyd. Jack Lloyd is a Technology Writer and Editor for wikiHow. He has over two years of experience writing and editing technology-related articles. He is technology enthusiast and an English teacher.
The wikiHow Tech Team also followed the article's instructions and verified that they work.
This article has been viewed 634,454 times.
Learn more...
This wikiHow teaches you how to create a transparent "fade" effect for a photo in Photoshop. This is possible on both Windows and Mac computer versions of Photoshop.
Steps
-
1Open Photoshop. This app's icon resembles a blue "Ps" on a black background.
-
2Open an image in Photoshop. This should be the image to which you want to apply a "fade" effect. To do so:
- Click File
- Click Open...
- Select a photo.
- Click Open
Advertisement -
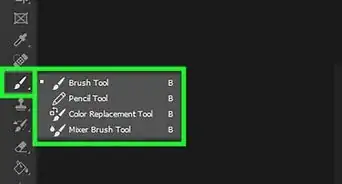
3Click the "Quick Selection" tool. It's an image of a paint brush with a dotted line next to it. You'll find this option in the far-left toolbar.[1]
- You can also just press W to bring up the tool.
-
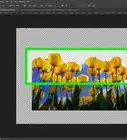
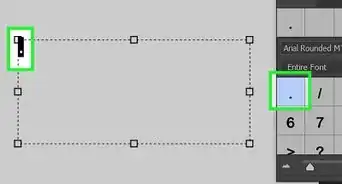
4Select the entire photo. Click the photo once with the "Quick Selection" tool equipped, then press either Ctrl+A (Windows) or ⌘ Command+A (Mac) to select the whole photo. This will ensure that no part of your photo is left out of the fade process.
-
5Click the Layer tab. It's at the top of the window. A drop-down menu will appear.
-
6Select New. This option is at the top of the Layer drop-down menu.
-
7Click Layer Via Cut. It's in the New pop-out menu. You should see a "Layers" window appear in the bottom-right corner of the window.
-
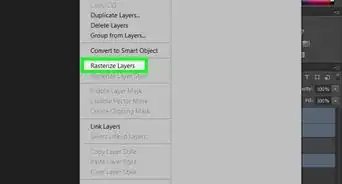
8Select the picture's main layer. Click the Layer 1 option in the "Layers" window.
- If there is a layer entitled "Background" or something similar below the main layer, first select it and press the Delete key.
-
9Click the "Opacity" drop-down menu. It's in the upper-right side of the "Layers" window. You should see a slider appear.
-
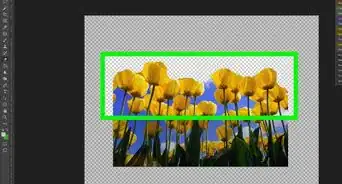
10Lower the photo's opacity. Click and drag the slider to the left to lower the photo's opacity, thus creating a fade effect.
- If your photo becomes too transparent, you can drag the slider back to the right to finesse the transparency.
-
11Add another photo if you like. If you want to fade the first photo into another photo, do the following:
- Drag another photo into the main Photoshop window, then drop it there.
- Click the photo, then click Place when prompted.
- Click and drag the first photo's layer to the top of the "Layers" menu.
- Adjust the first photo's opacity as needed.
-
12Save your photo(s). Click File, click Save, enter a name, save location, and file format, click OK, and click OK on the Photoshop pop-up window. Your faded photo (or set of photos) will be saved in your preferred file location.


Warnings
- Any action in Photoshop will most likely require a bit of trial-and-error, as no two Photoshop projects are identical.⧼thumbs_response⧽


References
About This Article
1. Select the entire image.
2. Click the Layer tab.
3. Go to New > Layer Via Cut.
4. Select the main layer.
5. Click the "Opacity" drop-down menu.
6. Decrease the opacity.