X
This article was co-authored by wikiHow staff writer, Jack Lloyd. Jack Lloyd is a Technology Writer and Editor for wikiHow. He has over two years of experience writing and editing technology-related articles. He is technology enthusiast and an English teacher.
The wikiHow Tech Team also followed the article's instructions and verified that they work.
This article has been viewed 1,200,878 times.
Learn more...
This wikiHow teaches you how to set up a website host on your own computer. You can do this on both Windows and Mac computers by using a server creator called MAMP, though you must first take a few steps to ensure that your computer is ready to begin hosting.
Steps
Part 1
Part 1 of 3:
Preparing to Host a Website
-
1Make sure your Internet service contract allows hosting. Many Internet service providers (ISPs) expressly forbid personal hosting unless you have a business plan, which often costs significantly more than a standard use plan. This shouldn't be an issue if your site only generates a few hits per month, but any kind of significant traffic will draw attention to your hosting.
- If your ISP prohibits home-hosting, either upgrade your plan to one that allows hosting or switch to a different ISP before you continue.
- Failing to heed your ISP's policy for home-hosting can result in anything from getting your Internet turned off to having to pay fines.
-
2Ensure that your equipment can handle hosting. In order to host a website, you must have a computer on and connected to the Internet 24 hours per day, seven days per week. This is easier to accomplish with a secondary, older computer than it is with your primary computer.
- Restarting your computer to update will occasionally be necessary. During these updates, your website will be inaccessible.
Advertisement -
3Update your computer. Make sure that your computer is up-to-date with the latest operating system, security features, and drivers. Make sure you update your Windows computer or update your Mac computer before continuing.
-
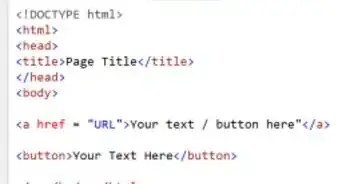
4Move your website's source code onto your computer. If your website's source code isn't already in a file on your computer, copy it from your web service's settings into a text document on your computer and save it as a PHP file.
- If the website's source code is stored on your computer, make sure you know where to find it.
- If you haven't yet programmed your website, you'll need to do so before continuing.
-
5Download the MAMP program. MAMP is a free website hosting application that works on both Windows and Mac machines. To download MAMP:
- Go to https://www.mamp.info/en/.
- Click DOWNLOAD below the "Free" version.
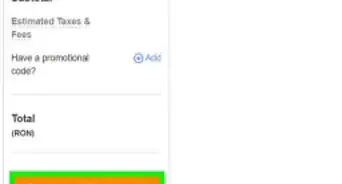
- Click the orange Download button.
- Wait for the file to finish downloading.


Advertisement
Part 2
Part 2 of 3:
Setting up Hosting on Windows
-
1Double-click the MAMP setup icon. It looks like a white elephant on a grey background.
-
2Click Yes when prompted. This will open the MAMP installer.
-
3Complete the setup process. To do so:
- Select a language and click OK
- Click Next
- Uncheck the "MAMP PRO" box and click Next
- Check "I accept" and click Next
- Click Next three times, then click Install
-
4Go to your website's source code document. While MAMP is installing, find the document on your computer that you pasted the website's source code into earlier. To do so:
- Open Start
- Open File Explorer
- Click the document's folder in File Explorer's left-hand sidebar.
- Select the document by clicking it.
-
5Copy the source code document. Press Ctrl and C at the same time to copy the selected source code document.
-
6Double-click the MAMP icon. It resembles a white elephant on a grey background.
- Make sure you aren't clicking the setup icon here.
-
7Click Cancel when prompted. You'll see a warning about port 80 appear; clicking Cancel on the warning window dismisses it.
-
8Click Preferences…. This gear-shaped icon is on the left side of the MAMP window. Doing so opens the Preferences window.
-
9Click the Ports tab. It's at the top of the Preferences window.
-
10Click Set MAMP ports to default. This button is in the middle of the page. Doing so will reset the ports that MAMP uses, which will resolve the port 80 error.
-
11Click the Web Server tab. It's at the top of the Preferences window.
-
12Click Open. This button is near the bottom of the window.
-
13Paste the source code document into the folder. Press Ctrl and V at the same time. The source code document will appear in the MAMP root folder.
-
14Click OK on the MAMP window. This will save your settings.
-
15Close and re-open MAMP. Click Quit in the bottom-left corner of the MAMP window, then double-click the MAMP icon to re-open MAMP.
-
16Click Start Servers. It's on the right side of the MAMP window. Doing so will start the MAMP server with your website's source code and port preferences. Your website should now be live; people will be able to access it by entering your public IP address into a search engine.
- Unless you pay for a static IP service, your local IP address—and, by extension, your website's address—will change from time to time.
- You cannot use your local IP address to view the website from your own network, since entering it will just take you to your router's page.


Advertisement
Part 3
Part 3 of 3:
Setting up Hosting on Mac
-
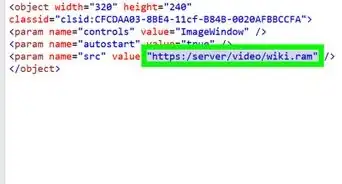
1Double-click the MAMP setup file. It resembles a brown box.
- If you receive a warning message that says the file can't be opened, verify the download before continuing.
-
2Complete the MAMP installation process. To do so:
- Click Continue on each of the first three pages.
- Click Agree
- Click Install for all users of this computer, then click Continue
- Click Install
- Enter your Mac's username and password, then click Install Software
-
3Wait for MAMP to finish installing. This process will likely take around five minutes.
-
4Open Finder. Click the blue, face-shaped app in your Mac's Dock.
-
5Go to your website's source code document. Click the folder in which the source code document that you copied or created earlier is located.
- You may have to click through several folders to get to the document, depending on where you saved it.
-
6Copy the document. Click the document to select it, then click Edit and click Copy.
-
7Click Applications. This folder is on the far-left side of the Finder window.
-
8Double-click the MAMP folder. It's in the middle of the Applications folder.
-
9Double-click the htdocs folder. You'll find this folder in the middle of the MAMP folder. This folder is where your website's resources, including the source code document, go.
-
10Paste the source code document into this folder. Click Edit, then click Paste Item.
-
11
-
12Click Preferences…. This gear-shaped icon is on the far-left side of the MAMP window.
- If you receive an error window, first click OK to exit the window.
-
13Click the Ports tab. It's at the top of the Preferences window.
-
14Click the Set to default button. You'll find this in the middle of the Ports tab. Doing so resets the ports that MAMP uses, which will prevent your website from being blocked by your router's default firewall.
-
15Click OK. It's at the bottom of the page. This saves your settings.
-
16Close and re-open MAMP. Click Quit, then click the MAMP icon again to re-open MAMP.
-
17Click Start Servers. It's on the right side of the MAMP window. Doing so will start the MAMP server with your website's source code and port preferences. Your website should now be live; people will be able to access it by entering your public IP address into a search engine.
- Unless you pay for a dynamic IP service, your local IP address—and, by extension, your website's address—will change from time to time.
- You cannot use your local IP address to view the website from your own network, since entering it will just take you to your router's page.


Advertisement
Community Q&A
-
QuestionHow do I host a webpage on a purchased domain?
 MicheleTop AnswererThe server where you bought the domain probably offers hosting services but usually at a cost. If you want to do it for free, have your domain redirected to whatever free web service you decide to use for your website. Remember, free sites are limited in the number of pages and can have a lot of ads. On the other hand, hosting your own website as in Method 2 above, or having your site hosted where you bought and keep the domain, allows you to pretty much create as many pages as you want, without any advertising you don't put up for yourself.
 -
QuestionWhat should I do if when I put in the IP address but it says, "invalid IP address"?
 Community AnswerCheck if you got the IP correct; IPv4 changes once in a while when wireless.
 -
QuestionCan I still add or edit things to my HTML website after I've already published it?MicheleTop AnswererWebsites can always be edited, as many times as you like. You just have to go back into whatever you used to create the website, edit it, then republish it.
Advertisement
Warnings
- For self-hosted sites, your site will go down if you lose your internet connection, your computer loses power, or your system crashes.⧼thumbs_response⧽
- Note that if you host your website on your PC, your site is likely to respond more slowly than traditionally hosted sites.⧼thumbs_response⧽
Advertisement


About This Article
Jack Lloyd
wikiHow Technology Writer
This article was co-authored by wikiHow staff writer, Jack Lloyd. Jack Lloyd is a Technology Writer and Editor for wikiHow. He has over two years of experience writing and editing technology-related articles. He is technology enthusiast and an English teacher. This article has been viewed 1,200,878 times.
How helpful is this?
Co-authors: 39
Updated: January 31, 2023
Views: 1,200,878
Categories: Creating and Enhancing a Website
Advertisement