This article was co-authored by wikiHow Staff. Our trained team of editors and researchers validate articles for accuracy and comprehensiveness. wikiHow's Content Management Team carefully monitors the work from our editorial staff to ensure that each article is backed by trusted research and meets our high quality standards.
This article has been viewed 20,495 times.
Learn more...
This wikiHow teaches you how to download the official installer file for AutoCAD from the Autodesk website, and install the program on your computer. Autodesk's official AutoCAD download requires a paid subscription, but you can get it for free on the education website if you're a student or educator. If you're using Windows, you can also use the Autodesk Download Manager to install AutoCAD without downloading a separate installer file.
Steps
Downloading the Installer
-
1Open your Autodesk account in your browser. Go to https://manage.autodesk.com in your internet browser, and sign in to your Autodesk account.
- This is the same account you're subscribed to AutoCAD. If you don't have an Autodesk account, click CREATE ACCOUNT here to create a new personal account.
- If you don't have an AutoCAD subscription, you can view the available plans, and start your membership at https://www.autodesk.com/products/autocad/subscribe.
- If you're a student or educator, you can complete your education profile and download AutoCAD for free at https://www.autodesk.com/education/free-software/autocad.
-
2Click All Products & Services on the left-menu. This option is at the top of a blue navigation panel on the left-hand side. This will open a list of all your subscriptions, and available downloads.Advertisement
-
3Click View downloads next to AutoCAD. This will open your download options.
- With the package versions of AutoCAD, you will first have to click View items here to see the individual product downloads.[1]
-
4Select the version, platform, and language you want to download. Make sure to select the correct version of OS your computer is running here, and select the program language you want to use.
-
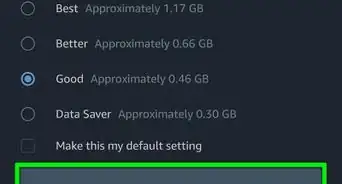
5Select your download method. You can select Download Now (Windows) to use Autodesk Download Manager or Browser Download (Windows, Mac) to download with the standard web browser features.[2]
- This will start downloading the installer file to your computer.
- If you're prompted, select a saving location for the installer file.
- Versions released in 2019 and later will allow you to select Install Now here. This will complete your download and installation in one single session.[3]
- After downloading the installer file, please scroll down to the installation method for your operating system. The installer file will install the program on all Windows and Mac systems.


Using the Windows AutoCAD Installer
-
1Find and double-click the installation file on your computer. This will open the installation wizard in a new window, and start the setup process.
-
2Click the Install button. This button is labeled "Install on this computer" in the lower-right corner of the installer window.
-
3
-
4Click the Install button. This button is in the lower-right corner of the installation window. It will start installing all the selected programs on your computer.
-
5Click the Finish button. When your installation is finished, you'll see a list of all the installed programs. Click this button to close the installer.


Using the Windows Autodesk App
-
1Open the Autodesk desktop app on your computer. The Autodesk desktop app looks like a green-and-blue "A" icon. You can find it on your Start menu.
- The desktop app is only available on Windows.
- You don't have to download the installer file to install AutoCAD from the Autodesk desktop app. The app will install the program without a separate installer download.
-
2Sign in to your Autodesk account. If you're not automatically signed in to Autodesk in the desktop app, enter your registered email and password to sign in.
- Make sure to use the same account you're subscribed to AutoCAD with.
-
3
-
4Click the Install button. This is a blue button below AutoCAD on the My Products page. This will instantly install AutoCAD on your computer in one step.
- You can click the green Launch button here when your install is finished, and open the app.


Using the Mac AutoCAD Installer
-
1Find and double-click the installation file on your computer. Find the DMG setup file in your Downloads folder, and double-click on it. This will open the installer's contents in a new window.
-
2Double-click the Install Autodesk AutoCAD for Mac.pkg file. This item looks like a cardboard box icon. It will start the installer in a new window.
-
3Click Continue until the installation. The installation wizard will prompt you to start the installation when you're set up.
- When you're prompted, click Agree on the License page.
- Optionally, you can change your installation location on the Destination Select page.
-
4Click the Install button on the bottom-right. This will start the installation, and install AutoCAD on your Mac.
- If you're prompted, enter your Mac's username and password to proceed to the install.
-
5Click Close on the bottom-right. When your installation is finished, click this button to close the installer.


-Step-23.webp)


References
About This Article

1. Download the installer from your Autodesk account or education website.
2. Launch the installer file on your computer.
3. Agree to the license terms in the installation.
4. Click the Install button when prompted in the installer.
5. Click Finish or Close at the end.