X
wikiHow is a “wiki,” similar to Wikipedia, which means that many of our articles are co-written by multiple authors. To create this article, volunteer authors worked to edit and improve it over time.
This article has been viewed 30,077 times.
Learn more...
Knooking allows you to create knit fabric using a tool that looks very similar to a standard crochet hook. The practice combines elements of both knitting and crocheting to create an entirely new type of yarn craft.
Steps
Part 1
Part 1 of 3:
Creating the Foundation
-
1Thread the cord through the eye. Insert the nylon cord into the eye of the knook hook, pulling roughly 6 inches (15 cm) of cord through to the other side.
- A knook hook looks like a standard crochet hook, but there should be an eye on the side opposite the hooked end. This is the eye or hole you'll be threading the cord through.
- If you start with a knook kit, the nylon cord should be included. Otherwise, choose nylon cord that is roughly the same thickness as your yarn, if not a little thinner.
-
2Tie a slip knot onto the hook. Using your yarn, tie a standard slip knot onto the hooked end of the knook hook.
- This is the same type of slip knot you would use with a standard crochet hook.
- To make the slip knot:
- Grab approximately 5 inches (12 cm) of yarn.
- Wind the attached end of the yarn over the section you just grabbed, creating a loop.
- Push yarn from the attached side under and through the loop, creating a second loop. Pull to tighten the first loop around the second.
- Place the second loop over the top end of the knook hook. Pull to tighten this second loop onto the hook.
Advertisement -
3Work a foundation of chain stitches. Crochet a series of chain stitches to serve as the foundation row of your knook work.
- Maintain even tension on the yarn as you work so that your chain stitches will be even.
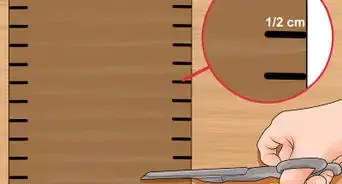
- The length of the chain will vary depending on the project, but if you only want to practice, consider making a chain that is at least longer than the length of the knook hook.
- The chain stitches you need to create here are the same chain stitches you would create for a standard crochet project.
- To make a chain stitch:
- Wrap the yarn around the top of the hook from back to front.
- Pull this yarn-over through the loop already on your hook. This completes the stitch.
-
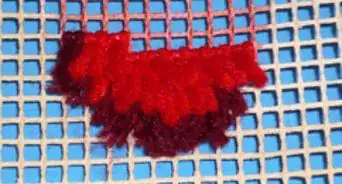
4Pick up each of the stitches. Insert the hook into the first chain lying adjacent to the hook. With the hooked portion facing down, catch the yarn on the hook, then pull the yarn back through to the other side of the chain.[1]
- This action should put a second loop on your hook. You will need to keep this loop on your hook while picking up the remainder of your foundation chain stitches.
- Continue picking up each stitch by following the same procedure (insert the hook into the chain, catch the yarn, pull the yarn back through to the front). Repeat across the entire chain until you have picked up each chain stitch.
-
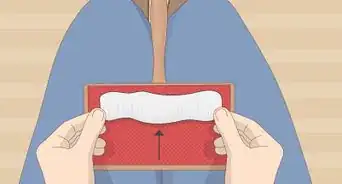
5Slide the stitches onto the cord. Turn the knook hook around, then carefully slide all of the picked up stitches off your hook and onto the nylon cord attached to the end.[2]
- Depending on how long your foundation row is, some of the stitches may fall off the hook and onto the cord before this step. That is not a problem. During this step, you merely need to push any stitches still on your hook onto the cord.
- Note that the nylon thread will still be attached to you hook, but the hook will be free from yarn after this step. The short end of the cord should hang free, as well.
- Once all of your foundational stitches are on the cord, you can begin to knook the main body of the work using a purl stitch or a knit stitch.


Advertisement
Part 2
Part 2 of 3:
Purl Stitch
-
1Insert the hook into the front of the stitch. Insert the tip of the hook into the first stitch on your nylon cord, pushing it through from the front of the stitch to the back.
- The hooked tip should face down as you insert it.
- Remember that the cord should still be attached to the hook, but the yarn will not be attached to the hook at the start of this process.
-
2Pull the yarn through. Catch the yarn with the hooked tip, then pull it back through to the front of the row.
- Keep the working yarn to the front (inside) of the row as you stitch.
- When you catch the yarn and pull it through the loop, you will need to turn the hook to draw the yarn toward the front (inside) of the stitch. The process should create a small bump (called a “purl bump”) at the base of the stitch.
- This action completes the purl stitch you started in the previous step. Keep the loop you just created on your hook after you finish the purl stitch.
-
3Purl stitch across the row. Repeat the purl stitch across the entire row of loops. Follow the same procedure when creating each purl stitch and keep all of the loops on the hook after each individual stitch.[3]
- You may need to guide the loops down the length of the hook as you complete each one.
- Note that some of these loops may fall off the end of the hook and onto the other side of the cord. If it happens, that is okay, and you do not need to worry about correcting it.
-
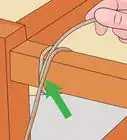
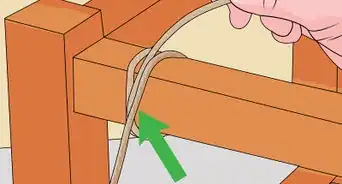
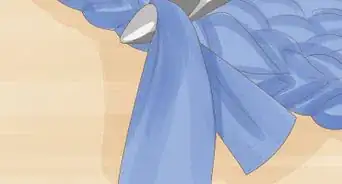
4Pull the cord out of the previous row. Once you have an entire row of purl stitches on your hook, turn the hook around and pull the nylon cord out of the foundation row.
- Locate the point at which the nylon cord exits the foundation row and enters the first formal row. Tug at the bend, pulling out only the side of cord strung through the foundation row.
- Make sure that the cord remains strung through the loops of the row you just created.
- After pulling away the cord, push all of the loops still on your knook hook onto the cord. There should be no more loops on your hook after this step.
-
5Purl stitch across the next row. Work one purl stitch into each of the stitches created for your previous row. Continue to create purl stitches until you reach the end of the row.
- The purl stitches you create for this row should be identical to those you created for the previous row.
- Keep each loop on your hook after creating each purl stitch.
- In essence, the rows should be identical.
-
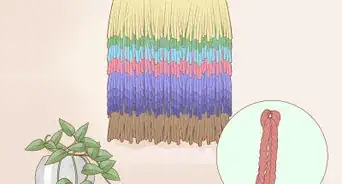
6Repeat as needed. Repeat the entire process as needed until the work reaches your desired length.
- After working purl stitches across an entire row, turn the knook hook and pull the cord out of the previous row. The cord must still run through any loops that fell off your hook while completing your previous set of purl stitches.
- After pulling the cord out of the old row, push any remaining loops off your knook hook and onto the cord.
- Once the loops are on the cord, you are ready to purl stitch another row.
-
7Bind off the final row. When working on the final row of purl stitches, you will need to bind off each purl stitch as you create it.
- Insert the hook into the first stitch. Catch the yarn and pull it back through to the front of the work, creating a normal purl stitch. Keep the loop on your hook.
- Purl stitch into the second stitch. Instead of keeping this loop on your hook, however, you need to catch the look of this stitch with the hook and pull it through the first loop. This binds off one stitch and leaves one loop on your hook.
- Repeat the process down the rest of the row. Purl stitch into the next stitch, then pull the resulting loop through the first loop on your hook, binding off the stitch you just created.
-
8Tie the final stitch. Once you reach the end of the row, cut the yarn, leaving a tail of 4 inches (10 cm). Pull this tail through the last loop on your hook and weave any excess into the stitches to hide it.
- There should be no yarn left on the hook after this step.
- After the entire work has been fastened off, pull out any remaining nylon cord.


Advertisement
Part 3
Part 3 of 3:
Knit Stitch
-
1Insert the hook into the back of the stitch. Slip the tip of the hook into the first stitch on the cord. The hook should go in from the back of the stitch to the front.
- Keep the hooked tip face down.
- At the start of the process, the cord should be attached to the hook. The yarn will not be attached to the hook, though.
-
2Pull the yarn through. Grab the yarn with the hooked tip. Use the hook to pull this yarn through to the back side of the stitch.
- Keep the working (attached) yarn to the back (outside) of the row as you knit.
- You may need to twist the hook slightly as you pull the yarn through the stitch.
- Completing this stitch completes the knit stitch you started in the previous step. The loop this knit stitch creates should remain on your hook.
-
3Knit across the row. Knit stitch once into each of the remaining stitches of the row.
- Each knit stitch should be made by following the same procedure used to create the first one.
- You may need to guide the loops down the hook as you complete them. Some may fall off the end of the hook and onto the cord as you work.
-
4Pull out the cord. After completing a full row of knit stitches, turn the hook around. Pull the cord out of the foundation row while keeping it strung through the loops of the row you just created.
- After pulling the cord out of the foundation row, push any of the loops still remaining on your hook onto the cord. This should free the yarn from the hook, but the cord should still be attached to the hook.
-
5Knit across the next row. Knit once into each of the stitches created in your previous row. Work across the entire row in this manner.
- These knit stitches will be identical to those made in your previous row.
- Each knit stitch will create a loop. Leave all of these loops on your hook until you reach the end of the row.
-
6Repeat as desired. Work identical rows of knit stitches until the work reaches your desired length.
- Upon reaching the end of a row, turn the knook hook and pull the cord out of the previous row. Then, push the loops of your current row off the hook and onto the cord.
- When the loops of your most recent row are gathered on the cord, you can begin knitting your next row.
-
7Bind each stitch in the final row. For the final row of your work, you need to bind off each knit stitch as you create it.
- Knit stitch as usual into the first and second stitch of the row, drawing up loops for both stitches. Instead of leaving both loops on the hook, pull the second loop you created through the first.
- Knit stitch into each stitch after this. For each knit stitch, pull the loop you create through the loop on your hook. Repeat this action across the entire row.
-
8Fasten the final stitch. Upon reaching the end of the final row, cut the yarn, leaving roughly 4 inches (10 cm) of excess hanging loose. Use the hook to pull this tail of yarn through the last loop on your hook, fastening off the entire work.
- Weave any excess yarn into the back of your stitches to hide it.
- Pull any remaining cord out of the work. Both the hook and the cord should be completely detached from the work.


Advertisement
Community Q&A
-
QuestionHow do I increase a stitch?
 T. ChinsenTop AnswererIncreasing a stitch is done the same way as regular knitting; the easiest method is to wrap the yarn around the hook. It can also be done by knitting the front and back of a stitch.
 -
QuestionHow do I do it with two hooks?T. ChinsenTop AnswererTwo hooks will be the same as regular knitting, except that instead of regular knitting needles you have hooks on the tips. It is a specialty item that can be purchased. Knook knitting is a way to knit without using a pair of knitting needles and making a project more portable by eliminating long knitting needles.
Advertisement
Things You'll Need
- Knook hook
- Nylon cord
- Yarn
- Scissors

References
About This Article
Advertisement