This article was co-authored by Gonzalo Martinez. Gonzalo Martinez is the President of CleverTech, a tech repair business in San Jose, California founded in 2014. CleverTech LLC specializes in repairing Apple products. CleverTech pursues environmental responsibility by recycling aluminum, display assemblies, and the micro components on motherboards to reuse for future repairs. On average, they save 2 lbs - 3 lbs more electronic waste daily than the average computer repair store.
There are 7 references cited in this article, which can be found at the bottom of the page.
The wikiHow Tech Team also followed the article's instructions and verified that they work.
This article has been viewed 158,343 times.
There are several ways to permanently delete files depending on what kind of device you're using. This tutorial addresses the best ways to remove such files for mobile devices, notebooks and computers using a variety of operating systems (including Windows, iOS, Android and Linux). Thanks to specialized software and user-friendly procedures, it's easier than ever to delete sensitive information and/or clear the way for much-needed storage space.
Steps
iPhone/iPad - Using iPhone Data Eraser
-
1Download iPhone Data Eraser to your computer or notebook. Use a computer or notebook that can be connected to your iPhone via a USB port. You can find the iPhone Data Eraser software at http://www.recover-iphone-ios-8.com/iphone-data-eraser.html. Be sure that you check the "Mac" circle next to the "Supported OS:" text. Then either click the "Free Trial" option or purchase the product.[1]
- iPhone Data Eraser will work with iPhones (versions 6/5s/5c/5/4s/4/3GS), iPads (including the 1/2/Mini/New iPad) and iPods (including Classic/Touch/Nano/Shuffle).
-
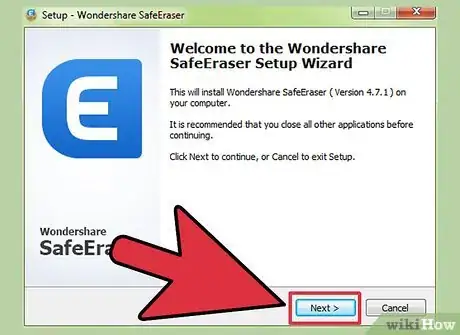
2Install iPhone Data Eraser. Simply click on the download location and wait for the file to open. Then drag the "Wondershare SafeEraser" icon over to the Applications folder that appears next to it in the installation window. The program will then appear as "Wondershare SafeEraser" in your Applications folder unless you opt to move it elsewhere.Advertisement
-
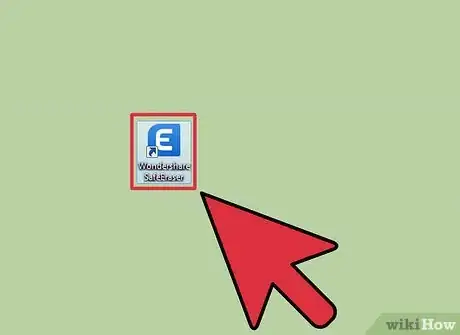
3Launch iPhone Data Eraser. Locate the file under Applications or wherever you chose to store it. Click it to open and launch.
-
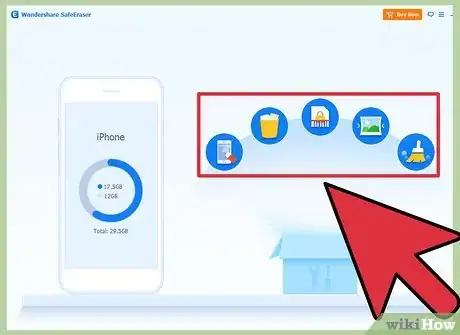
4Connect your iPhone (or iOS mobile device). You'll want to connect your mobile device to your computer or notebook's USB port with a cord. Once connected, iPhone Data Eraser will detect your mobile device display an interface that shows your used and free storage space.
-
5Select your preferred cleanup option. You'll notice four options listed alongside the introductory "Hello iPhone" screen. Each of the four options offers a different level of file removal.
-
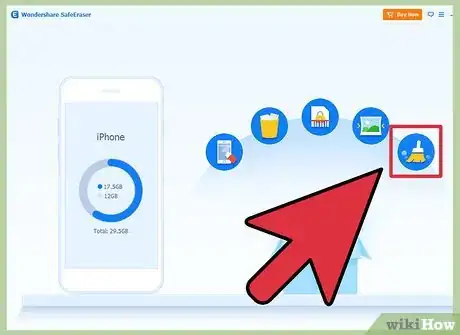
6Choose the "Express Cleanup" option. This removes junk files from your iOS device. After clicking this option, select the "Start Scan" button so that the program locates removable junk. Once completed, the scan will display various junk files and allow you to select those you'd like removed. You may view additional details about those files by clicking on the blue file-size icon to the right of each category. After sorting through the files, check the boxes next to the files you wish to remove and then click the blue "Erase now" button.
-
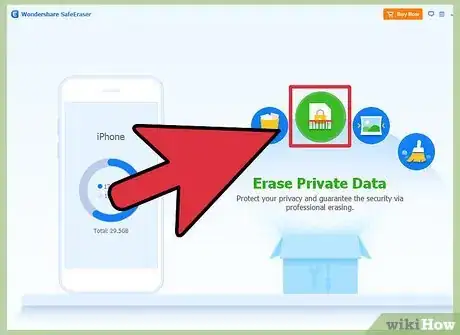
7Choose the "Erase Private Data" option. This removes your search history, cookies and a number of other forms of private information. After clicking this option, select the "Start Scan" button so that the program locates private data. Once completed, the scan will display various private files and allow you to select those you'd like removed. You may view additional details about those files by clicking on the blue file-size icon to the right of each category. After sorting through the files, check the boxes next to the files you wish to remove and then click the blue "Erase now" button. You will be prompted to type "delete" in order to confirm your request.
-
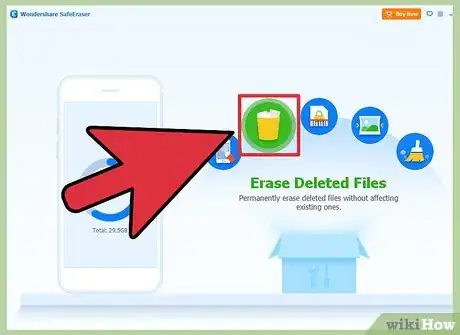
8Choose the "Erase Deleted Files" option. This removes files that have already been moved to the Trash. After clicking this option, select the "Start Scan" button so that the program locates trashed data. Once completed, the scan will display various deleted files and allow you to select those you'd like permanently removed. You may view additional details about those files by clicking on the blue file-size icon to the right of each category. All file categories will be checked for removal by default, so uncheck any boxes for files you wish to keep and then click the blue "Erase now" button. You will be prompted to type "delete" in order to confirm your request.
-
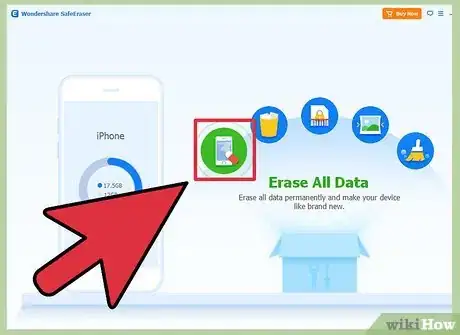
9Choose the "Erase All Data" option. This removes all personal files and restores the device to its factory condition. You'll be presented three security levels associated with different removal procedures, so read the explanations and choose that which is most appropriate for your needs. You will be prompted to type "delete" in order to confirm your request.
Android - Using Secure Delete
-
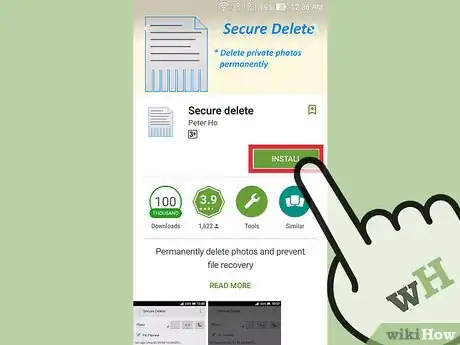
1Install Secure Delete to your Android mobile device. This free software will work with any device using Android 2.3.3 or beyond. You can locate and install it from Google Play, also located here: https://play.google.com/store/apps/details?id=com.peterhohsy.securedelete.[2]
-
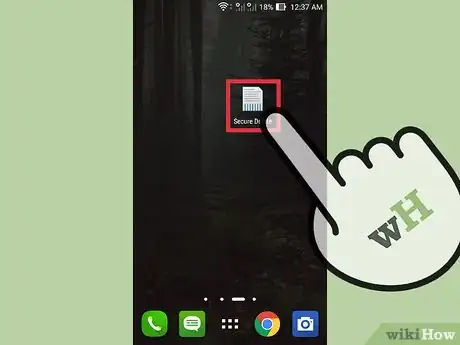
2Launch Secure Delete. Once it's been installed to your device, you'll find it alongside your other applications and have the opportunity to move it to a preferred location. Simply click the Secure Delete app to open it.
-
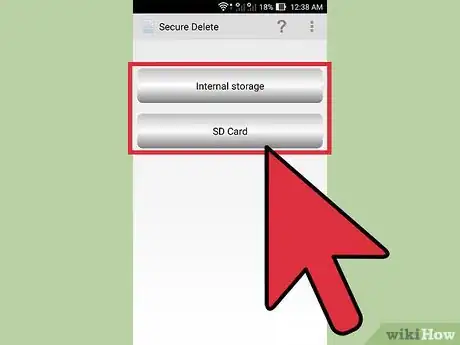
3Select the type of files you wish to remove. Secure Delete includes a dropdown menu at the top of the screen. Click this menu and choose to search for Photo, App folder, SDCard or Download files. The program will display a list of file folders that were found on your device.
-
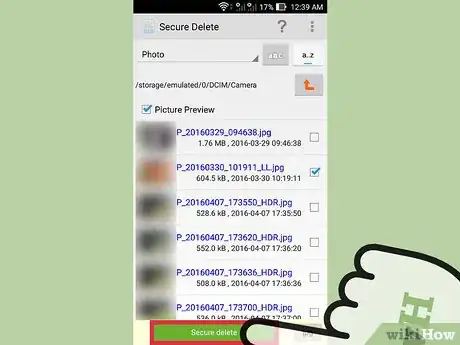
4Select the specific files you wish to remove. You'll see boxes to the right of each file. Simply check the respective boxes of files you want to permanently delete.
-
5Permanently delete selected files. Once you've selected each file you want removed, just click on the green "Secure delete" button at the bottom of your screen. You'll be prompted to confirm the removal, so type "Yes" and then click "OK." The deletion process may take some time, but it will permanently remove any selected files from your Android mobile device.
Windows - Using the Recycle Bin
-
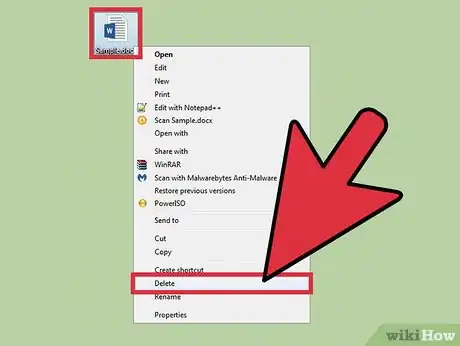
1Delete the file from its original location. Navigate to the file or folder you want to delete. Right-click on the icon and select "Delete" from the pop-up menu, or left-click once on the icon and press the Del key on your keyboard.[3]
-
2Open the "Recycle Bin." From your desktop, double-click the "Recycle Bin" icon to open it.
-
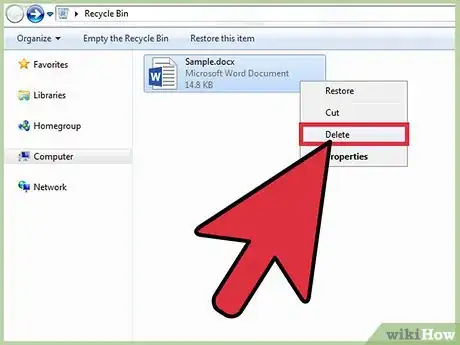
3Select the file and press Del. Navigate to the file or folder you just deleted. Left-click once and press Del on your keyboard.
-
4Alternatively, click "Empty the Recycle Bin." If you want to delete the entire contents of your Recycle Bin instead of only deleting a single file, choose "Empty the Recycle Bin" from the toolbar.
- You can also delete the contents of your Recycle Bin without opening the program up. Right-click on the Recycle Bin icon and select "Empty Recycle Bin" from the pop-up menu.
- Note that when you use this method, it does not completely wipe the file from your hard disk. "Permanently deleting" a file from the Windows Recycle Bin only deletes the link to that file, so it clears some of the space and prevents the file from being accessible to you. It does not wipe the file from your computer completely.
- To more permanently delete files from your hard disk, you'll want to pursue one of the subsequent methods and use specialized software.
Windows - Using a Keyboard Shortcut
-
1Find the file that you want to delete. Right-click on the file.
-
2Hold down the shift key, then delete the item normally. You can choose the "Delete" button, press the delete key, or right-click, then click on delete.
-
3Confirm that you want to permanently remove the file. Once you delete it, it will be gone forever.
Windows - Using Eraser
-
1Download Eraser. Eraser is one of the most popular free secure deletion utilities. Unlike the "permanent" deletion option available from the Windows Recycle Bin, this utility allows you to securely and completely delete files and folders so that they are no longer recoverable. You can download Eraser here: http://download.cnet.com/Eraser/3000-2092_4-10231814.html?[4]
- Eraser works by overwriting your information with random patterns repetitively until the data is so scrambled that the original patterns are no longer able to be retrieved.
-
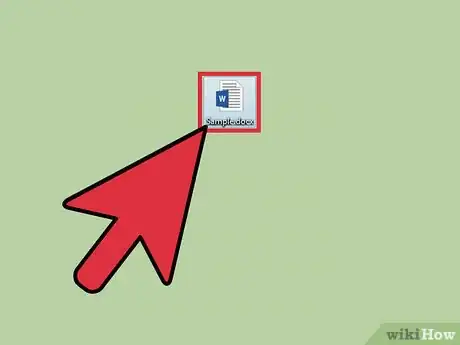
2Find the file you want to delete and right-click. Navigate to the file or folder you want to delete. Right-click on the icon to open a pop-up menu.
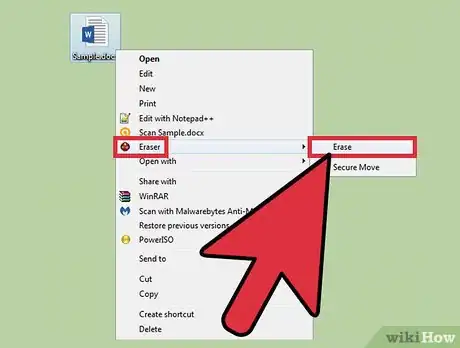
- Take a good look at your pop-up menu. It should resemble the menu you are used to seeing, but now that Eraser has been installed, you should also see an Eraser sub-menu above the "Open with" option of the menu.
-
3Choose the "Erase" option from the "Eraser" sub-menu. Hover over the "Eraser" option on the original pop-up menu until another menu pops out to the side. From this menu, select "Erase" to permanently delete that file or folder.
- The erase task will be immediately executed. When done, a pop-up window will appear to let you know that the task has been completed and that your selected files have been securely and permanently erased.
- You can also click on "Erase on Restart," which will not erase the file immediately but will do so the next time you restart your computer.
Windows - Using SDelete
-
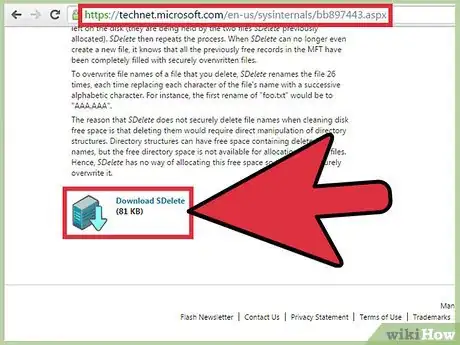
1Install Sdelete. SDelete is a downloadable command line tool produced directly by Microsoft for use with the Windows command line. You can download this tool here: http://technet.microsoft.com/en-us/sysinternals/bb897443.aspx
- This utility is another secure delete application. As with Eraser, it overwrites a file's on-disk data so thoroughly that the original data patterns become unrecoverable. It does not delete the file names located in free disk space, but it does delete all the associated file data securely and completely.
-
2Open the Command Prompt. From your "Start" menu, access the "Run" option. Type cmd into the "Open" text field and click on the "OK" button or hit ↵ Enter on your keyboard.
-
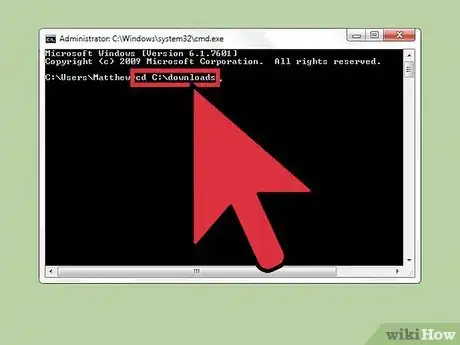
3Navigate to the SDelete tool. From within the Command Prompt, navigate to the directory in which the SDelete utility has been saved using the cd command.
- For instance, if the program is located at C:\cmdtools, type cd C:\cmdtools in the command line. Likewise, if the program is located at C:\downloads, type cd C:\downloads in the command line.
- After typing the directions to the right location, hit ↵ Enter to navigate to that directory within the prompt.
-
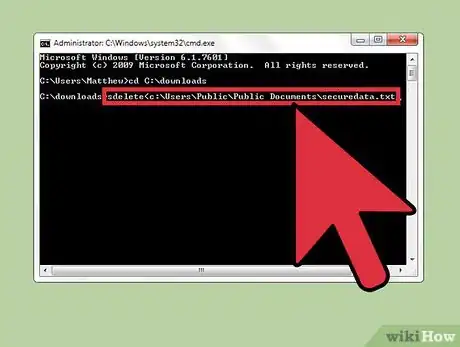
4Indicate which file or directory should be deleted. Use the SDelete tool by typing sdelete <path to file or directory>.
- In this context, <path to file or directory> refers to the Windows path you would need to follow in order to reach the file or folder you are trying to reach.
- For example, you might type <c:\Users\Public\Public Documents\securedata.txt to reach a text file labeled as securedata.txt in your computer's public documents.
-
5Press ↵ Enter. As soon as you hit ↵ Enter on your keyboard, the utility will run and delete the file or folder indicated.
- Upon completion, you will receive confirmation within the Command Prompt that your data has been permanently deleted. At this point, you can close the prompt. The task has been finished.
Mac - Using the Trash
-
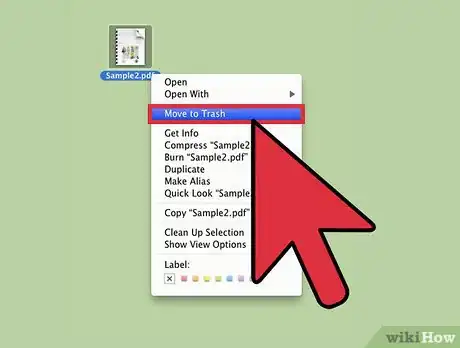
1Delete the files you want to remove. Navigate to the file or files you want permanently removed from your computer. Left-click once on the file and press Del on your keyboard or drag and drop the file into the Trash icon located on your taskbar.[5]
-
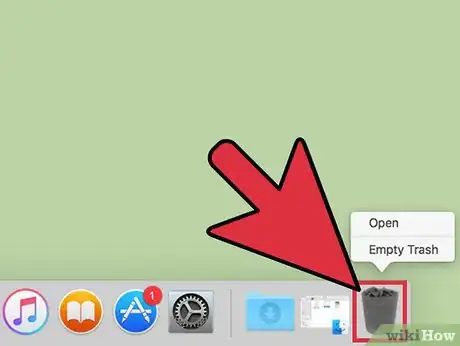
2Click and hold the trash icon. This should cause a Trash option menu to pop up. Usually, the two options that will appear are "Open" and "Empty Trash."
- On its own, the "Empty Trash" icon will only delete the link or pathway to the data in your Trash. This will clear some room on your hard disk, but it does not permanently delete the data, so that data can still be recovered later on if you only use the standard "Empty Trash" option.
-
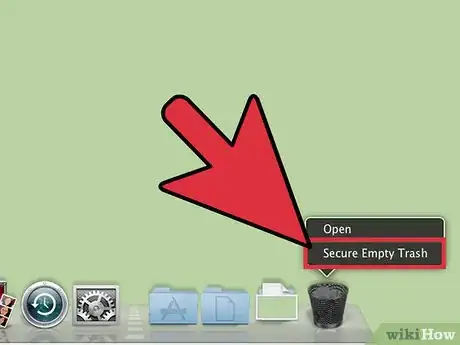
3Hold down ⌘ Command. Press ⌘ Command on your keyboard with the Trash menu still open. Notice that the "Empty Trash" option should change to "Secure Empty Trash."
-
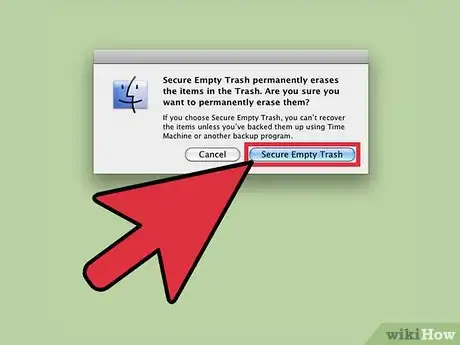
4Select "Secure Empty Trash." Click once on this option to securely and permanently delete the entire contents of your Trash from your computer.
- Note that this option will only allow you to permanently delete the entire contents of your Trash at once. You cannot use it to delete one or two particular files while leaving the rest of your temporarily deleted files untouched.
- This feature is only available starting from Mac OS 10.3 and up.
-
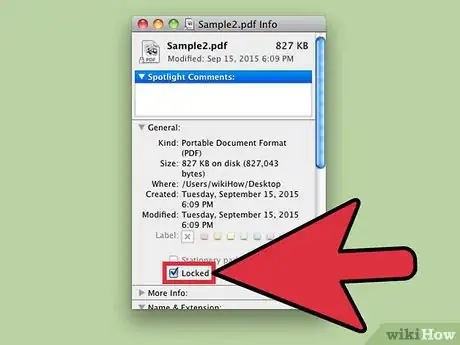
5Troubleshoot difficulty emptying trash. Some users may experience problems emptying trash and find a message like, "The operation could not be completed because the item '(item name)' is locked." In this case, first attempt to hold ⌥ Option and select "Empty Trash" from the "Finder" menu. If that doesn't work, something else may be interfering with your trash removal.
- Check to see if one or more of the trashed files are locked. Users with Mac OS X 10.1 (or later) should first try to press and hold ⇧ Shift+⌥ Option while selecting "Empty Trash." Users with Mac OS X versions 10.0 to 10.0.4 can instead try right-clicking the file and selecting "Show Info," after which they should make sure the box next to "Locked" is unchecked.
- Check to see if you have permissions to modify the trashed file(s). If not, you'll likely see a warning message indicating that your privileges or permission are insufficient. Users with Mac OS X 10.2 (or later) can begin by selecting "Applications," clicking on "Utilities" and then opening "Disk Utility." Then click the "Repair Disk Permissions" button.
Mac - Using Permanent Eraser
-
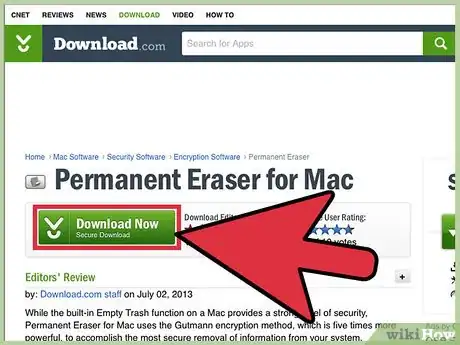
1Download Permanent Eraser. Permanent Eraser is a free secure erase program available for Mac. It securely and permanently deletes files, folders, and data from your computer, and can be used to clear the contents of your Trash or to delete a few select files on their own. You can download Permanent Eraser here: http://download.cnet.com/Permanent-Eraser/3000-2092_4-10668789.html[6] [7]
- This program deletes data even more securely than the "Secure Empty Trash" option does. The former overwrites data seven times, but this utility overwrites the data 35 times, scrambles the original file name, and truncates the file size to nearly nothing before unlinking it from the system entirely.
-
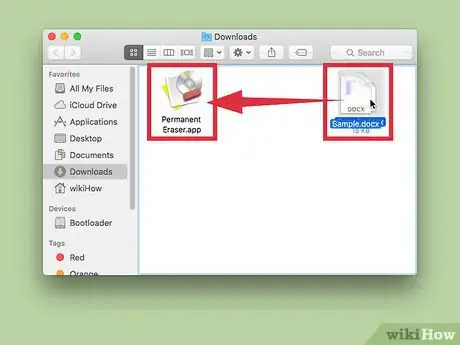
2Drag and drop files onto the Permanent Eraser icon. With the Permanent Eraser icon displayed, either within its original directory, on the Dock, or on the Finder's sidebar, navigate to the file or folder you want to delete. Click on this file and drag it over to the Permanent Eraser icon before releasing.
- When you do this, the program should kick in and begin immediately wiping that file from your hard disk.
- Place the Permanent Eraser icon on your Dock by navigating to the application and dragging the icon down to an empty space on your Dock.
- Place the icon on your Finder's sidebar by dragging it onto empty space on the sidebar and releasing it there.
-
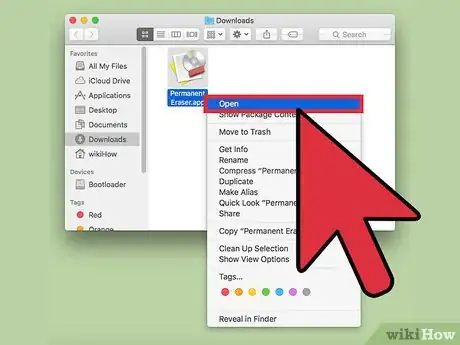
3Open Permanent Eraser to clear the contents of your Trash. From its original location, the Dock, or the sidebar, click on the Permanent Eraser icon to activate the program. After an initial prompt asking you to confirm your decision, the entire contents of your Trash will be permanently deleted. This option will wipe out all contents, not a single file or folder.
Linux - Using the Trash
-
1Select the file you want to delete. Navigate to the file or folder you want to delete and left-click on the name or icon once to select it. Note that this option is available through Gnome and other Linux platforms, but may not be available for all Linux platforms.
-
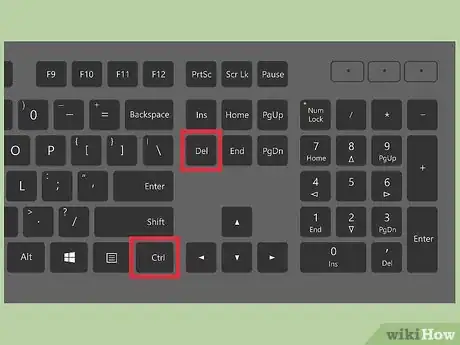
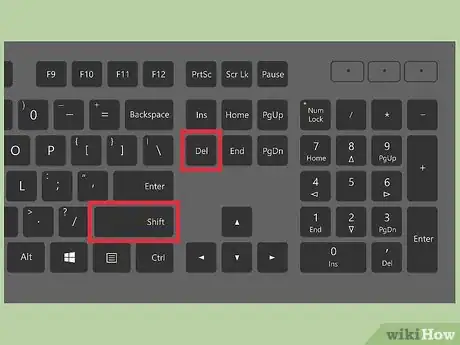
2Press Ctrl + Del or ⇧ Shift + Del. Pressing Ctrl + Del on your keyboard will temporarily delete the file and send it to your Trash, where it can be reviewed before permanent deletion. This is usually the preferred option.
-
3Press ⇧ Shift + Del on the keyboard if you wish to bypass the Trash completely. Press and hold ⇧ Shift first before pressing Del. You will be asked to confirm your request, and upon confirmation, the file or folder selected will skip over the Trash and be permanently deleted from your computer.
-
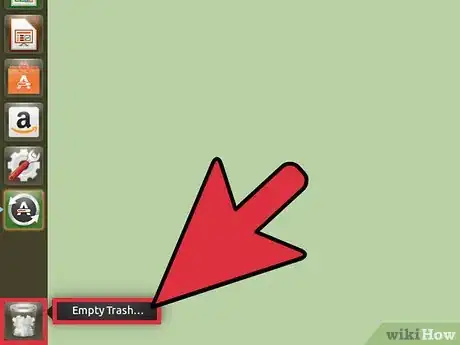
4If necessary, right-click the Trash icon to empty it. If you have deleted your files and folders the traditional way and they are waiting in your Trash for deletion, right-click the Trash icon in the sidebar and select the "Empty Trash" option that pops up.
- Depending on your Linux platform, this may or may not permanently and securely wipe the files from your hard disk. If it does not, it will only delete the link or pathway allowing you to access that data without deleting the data itself.
Linux - Using the Shred Command
-
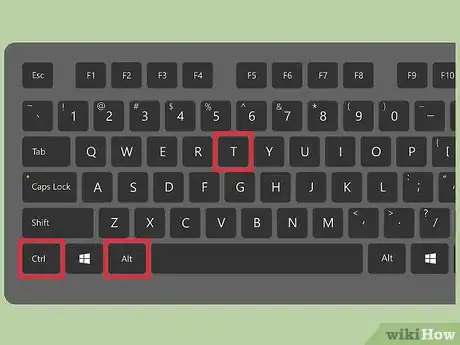
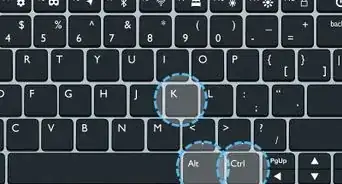
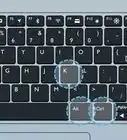
1Open the Terminal. Press Ctrl+Alt+T on your keyboard to open a Terminal window. Alternatively, you can go to "Applications" and select "Accessories." From this folder, locate "Terminal" and double-click to open up the Terminal window.
- Note that the Shred tool is available for Ubuntu and most distributions of Linux, but may not be available for all Linux-based platforms.
-
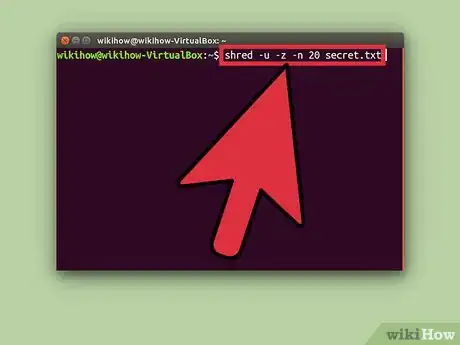
2Run the Shred command. Within the Terminal window, type the basic shred command, shred [OPTIONS] filename. The actual command itself is the shred part of the line. The [OPTIONS] part should be filled in with the options you might expect the use.
- -n [N] allows you to overwrite a file N number of times. If you wanted to overwrite the file 15 times, you would type -n 15
- -u instructs the tool to remove the file after it has been shredded.
- -z instructs the tool to overwrite the file with only zeros after shredding it with ones and zeros. As a result, it will appear as though it has not undergone a shredding process.
- For example, if you want to shred a file called "secret.txt" 20 times, you would type, shred -u -z -n 20 secret.txt
-
3Press ↵ Enter and wait. Hit ↵ Enter on your keyboard and let the tool run. Once finished, you should get a confirmation in your Linux Terminal that the action is done and the file is erased.
Linux - Using Secure-Delete
-
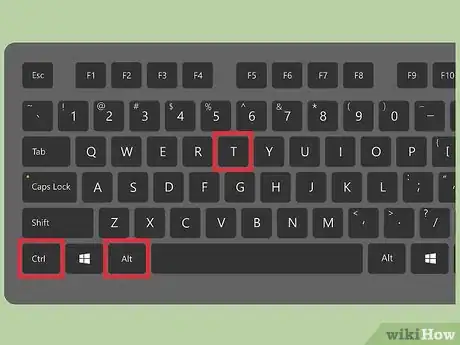
1Open the Terminal. Press Ctrl + Alt + T on your keyboard to open a Terminal window. Alternatively, you can go to "Applications" and select "Accessories." From this folder, locate "Terminal" and double-click to open up the Terminal window.
- Note that the Secure-Delete package of tools is available for Ubuntu and several other distributions of Linux, but may not be available for all Linux-based platforms.
-
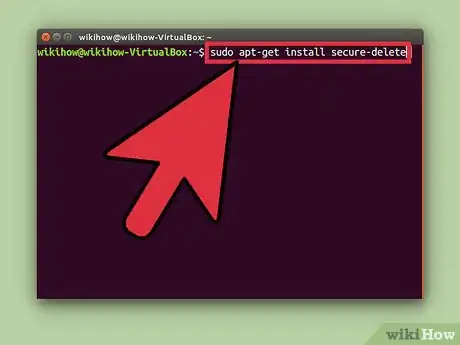
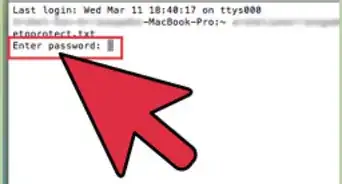
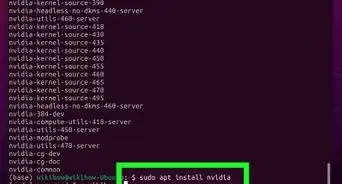
2Install the Secure-Delete Package. Within the Terminal, type apt-get install secure-delete. Hit ↵ Enter to instruct the Terminal to install the package. This package comes with four different commands.
- The one you need for the purpose of permanently deleting files from your computer is srm or "secure remove."
- Other options include smem (secure memory wiper) which wipes traces of data from the computer's memory, sfill (secure free space wiper) which wipes all traces of data from the free space on your disk, and sswap (secure swap wiper) which wipes all traces of data from your swap partition.
-
3Run the Secure-Delete command. To delete a file using the secure remove command, type srm myfile.txt in the Terminal. Replace myfile.txt with the actual name of your file.
-
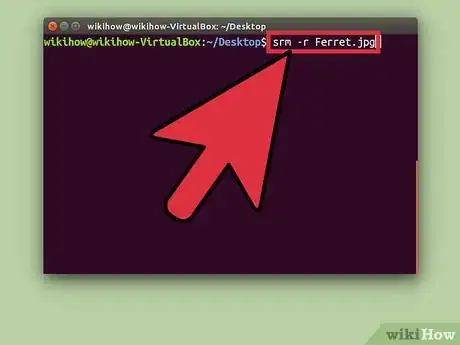
4Type srm -r myfiles/, replalcing "myfiles/" with the name of the actual directory. This will delete an entire directory rather than specific files. The package includes several other options:
- Type 'smem in the Terminal.
- Type sfill mountpoint/ in the Terminal.
- Type cat /proc/swaps in the Terminal.
-
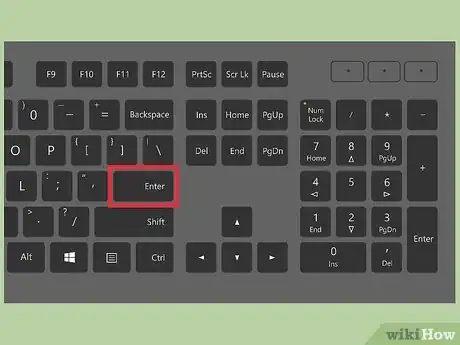
5Press ↵ Enter and wait. After typing your command, hit ↵ Enter. The utility should run and permanently, securely delete the file or directory specified in your instructions.
- You should receive a confirmation message within the Terminal once the action is complete and the data is gone for good. (In Ubuntu or some other dist. of linux you may receive the message "Couldn't find a free filename for 'dir' " but the process will be complete and your directory will be removed/shredded).
Expert Q&A
Did you know you can get expert answers for this article?
Unlock expert answers by supporting wikiHow
-
QuestionHow can I remove app data permanently from my iPhone?
 Gonzalo MartinezGonzalo Martinez is the President of CleverTech, a tech repair business in San Jose, California founded in 2014. CleverTech LLC specializes in repairing Apple products. CleverTech pursues environmental responsibility by recycling aluminum, display assemblies, and the micro components on motherboards to reuse for future repairs. On average, they save 2 lbs - 3 lbs more electronic waste daily than the average computer repair store.
Computer & Phone Repair Specialist
-
QuestionHow do I clear storage space on my iPad?
 Gonzalo MartinezGonzalo Martinez is the President of CleverTech, a tech repair business in San Jose, California founded in 2014. CleverTech LLC specializes in repairing Apple products. CleverTech pursues environmental responsibility by recycling aluminum, display assemblies, and the micro components on motherboards to reuse for future repairs. On average, they save 2 lbs - 3 lbs more electronic waste daily than the average computer repair store.
Computer & Phone Repair Specialist
-
QuestionIs it possible to retrieve deleted data from a hard drive?
 Gonzalo MartinezGonzalo Martinez is the President of CleverTech, a tech repair business in San Jose, California founded in 2014. CleverTech LLC specializes in repairing Apple products. CleverTech pursues environmental responsibility by recycling aluminum, display assemblies, and the micro components on motherboards to reuse for future repairs. On average, they save 2 lbs - 3 lbs more electronic waste daily than the average computer repair store.
Computer & Phone Repair Specialist
References
- ↑ http://www.recover-iphone-ios-8.com/delete-iphone-data-before-selling.html
- ↑ http://features.en.softonic.com/how-to-permanently-delete-files-on-android
- ↑ http://windows.microsoft.com/en-us/windows-vista/permanently-delete-files-from-the-recycle-bin
- ↑ http://www.pcworld.com/article/209418/how_do_i_permanently_delete_files_from_my_hard_disk.html
- ↑ http://www.labnol.org/software/delete-mac-files-permanently/20822/
- ↑ http://www.thewwwblog.com/securely-delete-files-mac.html
- ↑ http://www.edenwaith.com/products/permanent%20eraser/
About This Article
To permanently delete files from your phone or tablet, use Secure Delete for Android, or iPhone Data Eraser for iPhones/iPads.
If you're using a computer, delete the file normally, right-click the Trash or Recycle Bin, and select the Empty option.

