Print simple mailing address labels from Google Sheets with the free Avery Label Merge add-on
X
This article was co-authored by wikiHow staff writer, Nicole Levine, MFA. Nicole Levine is a Technology Writer and Editor for wikiHow. She has more than 20 years of experience creating technical documentation and leading support teams at major web hosting and software companies. Nicole also holds an MFA in Creative Writing from Portland State University and teaches composition, fiction-writing, and zine-making at various institutions.
The wikiHow Tech Team also followed the article's instructions and verified that they work.
This article has been viewed 103,510 times.
Learn more...
This wikiHow teaches you how to use the Avery Label Merge add-on for Google Docs to print address labels from Google Sheets data.
Things You Should Know
- To find the add-on, click the "Add-ons" menu in Google Docs, go to "Get add-ons," then search for "Avery Label Merge."
- Give your data useful column headers like Name, Address, and Phone number so they're easy to merge into labels.
- Once you've created labels with the add-on, they'll be easy to print right from Google Sheets.
Steps
Part 1
Part 1 of 4:
Install the Add-on
-
1Go to https://drive.google.com in a web browser. If you’re not already signed in to your Google account, follow the on-screen instructions to sign in now.
-
2Click New. It’s the blue button at the top-left corner of your Drive.Advertisement
-
3Click Google Docs. This opens a new untitled blank document.
-
4Click the Add-ons menu. It’s at the top of the document.
-
5Click Get add-ons…. A list of add-ons will appear.
-
6Type avery label merge into the search bar and press ↵ Enter or ⏎ Return. It’s at the top-right corner of the add-ons list.
-
7Click on Create and Print Labels. It’s the blue icon with a red and white Avery logo inside. This installs the add-on and displays a pop-up when finished.
-
8Click Continue on the pop-up. You’ll be redirected to the login screen.
-
9Confirm your login details and click NEXT. A permissions window will appear.
-
10Scroll down and click ALLOW. Now that the add-on is installed, you can use it to print labels from your Google Sheets data.


Advertisement
Part 2
Part 2 of 4:
Create an Address List
-
1Go to https://sheets.google.com. If prompted, log into the Google account in which you’ve installed Avery Label Merge.
- If you already have an address list in Sheets, follow along with this method to make sure the format is correct.
-
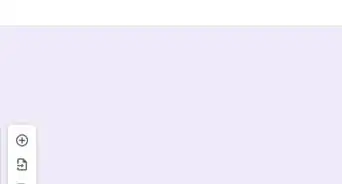
2Click +. It’s the first large box near the top-left corner of the page. This creates a new blank spreadsheet.
-
3Add your column headers. These are the names of the type of data in each column. Avery Label Merge requires a header at the top of each column.
- For example, if you want your labels to contain a United States resident’s name, address, city, state, and zip code, you may call A1 NAME, B1 STREET, C1 city, D1 state, and E1 zip.
-
4Type a name for your address list. To do this, click Untitled document at the top-left corner of the data, then type a name (e.g. Addresses). Google Sheets will save your data automatically.


Advertisement
Part 3
Part 3 of 4:
Create the Labels
-
1Go to https://docs.google.com in a web browser. If prompted to sign in to your Google account, sign in now.
-
2Click +. It’s at the top-left corner of the page. This creates a blank document.
-
3Click Add-ons. It’s in the menu bar at the top of the document.
-
4Click Avery Label Merge.
-
5Click New Merge.
-
6Click Address Labels. A list of sheet sizes will appear.
-
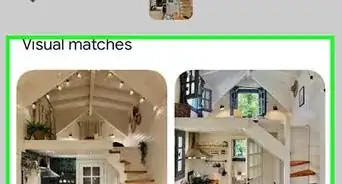
7Select a sheet size. Click each option to see a preview of the sheet.
- The options all begin with a 4-digit number that corresponds to an Avery product—if you’re printing to genuine Avery address stickers, refer to the packaging to find the correct sheet number.
- If you’re using a different brand of label sheets, find the option that best matches what you have.
-
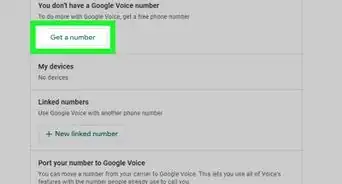
8Click Select. A list of spreadsheets will appear.
-
9Select your spreadsheet that contains addresses and click Select. Information about your sheet will appear on the right side of the document.
-
10Add the data to the label. You’ll need to add each of the column headers from the address list to its own line in the box at the center of the document. To add them, click each column header name in the right column (in the information about your spreadsheet) until all appear in the document.
- Make sure each column header name is on its own row or else the address will print as a single line.
-
11Click Merge. It’s at the bottom-right corner of Docs. This merges the addresses from the spreadsheet into the Google Doc, making it ready to print. When the merge is complete, a confirmation pop-up will appear.


Advertisement
Part 4
Part 4 of 4:
Print the Labels
-
1Insert your labels into the printer as indicated on the packaging. The steps will vary by printer and brand of labels.
-
2Click the print icon. It’s in the menu bar near the top-left corner of Google Docs.
-
3Select your printer. If you don’t see the printer you’re using next to “Destination” in the left column, click Change… to select it now.
-
4Adjust other print settings as necessary. Your options will vary depending on your data, printer, and label needs.
-
5Click Print. It’s the blue button at the top of the screen. This sends the labels to the printer.


Advertisement
Community Q&A
-
QuestionWhen I create the label, it only shows up on the first label on the sheet. I want a whole sheet of the same label. How can I do this?
 Community AnswerHighlight the information on the first label you have. Then copy and paste it onto the additional labels. This should be done only if you want the same information on each label.
 -
QuestionWhere does the zip code go?
 CuireuncrocoCommunity AnswerIn your spreadsheet, create a column named "zip", for example. Fill in the cells in this column with the zip code for each recipient. Then add this variable to your labels to have the zipcode variable populated.
 -
QuestionHow do I print a label with a return address in top left corner and mailing address more to the middle right?CuireuncrocoCommunity AnswerYou can use the formatting options available in the sidebar to place the return address in the top left corner and the mailing address to the middle right. Alternatively, use the Google Docs version of the add-on to create your labels in a more visual way. The Google Docs version will offer more formatting options.
Advertisement


About This Article

Nicole Levine, MFA
wikiHow Technology Writer
This article was co-authored by wikiHow staff writer, Nicole Levine, MFA. Nicole Levine is a Technology Writer and Editor for wikiHow. She has more than 20 years of experience creating technical documentation and leading support teams at major web hosting and software companies. Nicole also holds an MFA in Creative Writing from Portland State University and teaches composition, fiction-writing, and zine-making at various institutions. This article has been viewed 103,510 times.
How helpful is this?
Co-authors: 7
Updated: October 25, 2022
Views: 103,510
Categories: Google Applications
Advertisement