Save on ink costs by refilling your inkjet printer cartridges
This article was written by Luigi Oppido and by wikiHow staff writer, Kyle Smith. Luigi Oppido is the Owner and Operator of Pleasure Point Computers in Santa Cruz, California. Luigi has over 25 years of experience in general computer repair, data recovery, virus removal, and upgrades. He is also the host of the Computer Man Show! broadcasted on KSQD covering central California for over two years.
wikiHow marks an article as reader-approved once it receives enough positive feedback. This article has 17 testimonials from our readers, earning it our reader-approved status.
This article has been viewed 1,100,120 times.
This wikiHow shows you how to save money by refilling your own inkjet printer cartridges. Though refilling most cartridges is not usually advised by printer manufacturers, you can find reputable companies that sell printer ink refill kits that work just as well as replacement cartridges. If your HP, Canon, or Xerox printer is running out of ink, consider this easy method to refill the cartridges! This will work on any brand that uses inkjet cartridges.
Things You Should Know
- Many ink refill kits are universal, which means they'll work for any inkjet printer. Some kits only work for certain models and manufacturers.
- Printer ink is permanent, so you'll want to wear gloves and avoid spills.
- Most cartridges have fill holes which are under the sticker. If your cartridge doesn't have a hole, you can create one using the tool that came with your kit.
Steps
-
1Buy an ink refill kit for your printer. Many office supply, discount, and department stores carry these kits for a fraction of the cost of an official replacement cartridge. Kits usually come with everything you need to refill an existing cartridge, including ink, a syringe, seal covers, a manual, and a screw tool.
- Some ink refill kits are universal, meaning they are intended to work for all inkjet printer brands. Others are manufacturer or model-specific.
- Most printer companies advise against refilling your own printer ink. Instead, they recommend that you purchase new cartridges from them directly. Refilling your own cartridges may void your ability to receive tech support from the printer manufacturer, so refill at your own risk.
- Some major retailers like Walgreens and Costco will refill empty ink cartridges for you.
-
2Prepare your workspace. Ink can be messy, so lay down some newspaper or paper towels on a flat working surface. Then, grab your ink kit, more paper towels, a pair of gloves you don't mind getting dirty, some clear tape, and safety glasses.
- Printer ink will leave permanent stains on clothing and surfaces.
- Put on gloves to protect your hands. Though ink stains on your skin won't be permanent, they can definitely stick around a long time.
- Wear safety glasses to protect your eyes. In the event that ink sprays excessively, safety glasses will prevent the ink from getting in your eyes.
Advertisement -
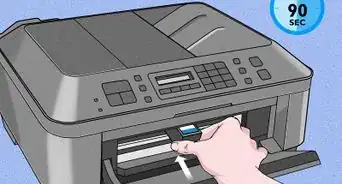
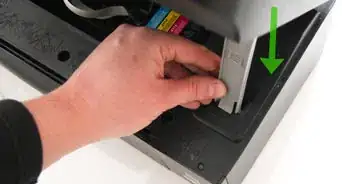
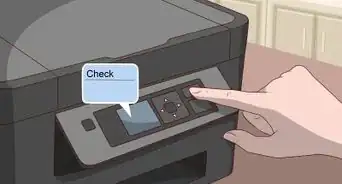
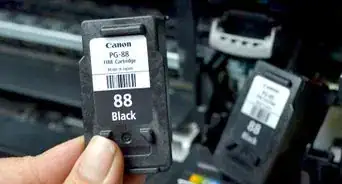
3Remove the printer cartridge. The steps to do this vary by printer, but the cartridges are usually not too difficult to remove. You may need to turn the printer on so the cartridges move to an accessible location.[1] Check your printer's manual to find the exact location of the cartridges and the steps for removal.
-
4Place the empty cartridge on a folded paper towel. Fold the paper towel in half twice to make an effective spill guard to work over.
-
5Read the refill kit's instruction manual. The manual will contain instructions specific to the kit, including information on how to use included tools. If the manual's instructions differ much from this wikiHow, stick to the manual's instructions.
-
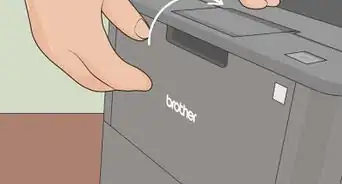
6Find the ink fill hole on the cartridge. Some cartridges, such as those made by HP, already have a fill hole that doesn't require you to puncture the cartridge.[2] Peel back the label from the top of the cartridge to find potential fill holes. If you're working with a cartridge that has multiple inks in a single unit, each color will have its own fill hole.
- If you find more than one hole, only one actually leads to the ink reservoir. Inspect each hole until you find one with a spongy material inside—this is the fill hole. You can verify by attempting to remove some existing ink with the syringe included in the kit.
- Some manufacturers place a twist-off cap on each cartridge that must be removed to expose the fill hole.
- If the fill hole is sealed, you'll just need to break the seal to fill it.
-
7Create a fill hole in the absence of one. If there is no fill hole on the cartridge (or the hole is covered with a seal), you'll need to puncture the plastic to create one yourself. The best way to do this is to use the screw tool or drill bit that came with your kit to pierce the top side of the cartridge. If your kit didn't come with a puncture tool, try a pen, toothpick, knife, or screwdriver. If you're filling one multicolor cartridge, you'll need to do this for each color.
- Be sure to follow any instructions in the kit that describe proper hole-making and placement.
-
8Fill the syringe with ink. Begin by pressing the syringe's plunger all the way in. Insert the long end into the replacement ink bottle and slowly pull the plunger away to fill the chamber with ink.
-
9Add the ink to the cartridge slowly. Insert the long end of the syringe into the fill hole on the cartridge until you hit the spongy bottom. Then, gently push the plunger down to add ink. Push slowly to avoid adding air bubbles, as they can break the cartridge.
-
10Stop adding ink when a little oozes out of the hole. This means you've reached the top. At this point, pull the plunger outward just a bit to suck out some of the excess ink, then remove the syringe from the fill hole.
- Clean the area around the fill hole with a paper towel. You'll want this area free of ink and dry before you plug it up
-
11Cover the hole with a small piece of tape. If your kit came with a seal/stopper that fits into the hole, you can insert it now. Sometimes tape creates a better seal, though. Once sealed, blot the top of the cartridge on the folded paper towel a few times to clear off any excess ink.
-
12Fill additional colors. If your kit came with more than one syringe, use a different one for each color to avoid mixing colors together. If not, thoroughly wash and dry your syringe between colors. Be sure to blot all excess ink off each cartridge before putting them back into the printer.
-
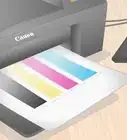
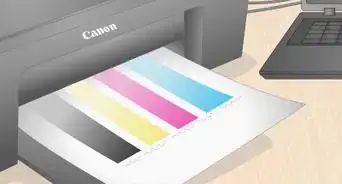
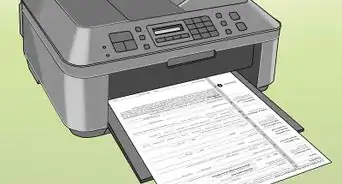
13Reinsert the cartridge(s) and print a test page. After putting the cartridge back in the printer, print something to get the ink flowing. If you refilled multiple colors, print something in both full-color and black-and-white to make sure all of the ink prints properly. You may need to print several test pages to get everything flowing properly.
- You’re done! You’ve successfully refilled your ink cartridges. Next, check out how to save printer ink.
- If the papers seem to be smudging ink, try cleaning the ink cartridges.


Community Q&A
-
QuestionWhat is the best printer with the cheapest ink cartridges?
 wikiHow Staff EditorThis answer was written by one of our trained team of researchers who validated it for accuracy and comprehensiveness.
Staff AnswerwikiHow Staff EditorStaff AnswerWith so many different printers available, with new ones coming onto the market regularly and prices changing constantly for both the printer and its ink cartridges, this is a difficult question to answer. The best option is to do a search online for the latest suggestions from consumer product review sites, which will often provide an updated list of current models and their ink prices. These reviews are usually updated yearly. Also, take a wander in your local box store or electronics store to check out ink prices and printers to see for yourself what is likely to fit your budget best. -
QuestionHow do you refill ink cartridges for Canon?wikiHow Staff EditorThis answer was written by one of our trained team of researchers who validated it for accuracy and comprehensiveness.
Staff AnswerwikiHow Staff EditorStaff AnswerYou’ll find step-by-step instructions for refilling Canon ink cartridges in this wikiHow: How to Refill Canon Ink Cartridges. -
QuestionCan I refill ink cartridges?wikiHow Staff EditorThis answer was written by one of our trained team of researchers who validated it for accuracy and comprehensiveness.
Staff AnswerwikiHow Staff EditorStaff AnswerYes, in many cases you can refill ink cartridges. However, if the cartridge has dried ink inside it, don't try refilling it as it will likely not work properly. For Inkjet printer cartridges, follow the step-by-step instructions explained above. Also, before refilling a cartridge, check the manufacturer’s instructions in case there are some specific things to be aware of. When refilling, be sure to do so where spills can be contained and won’t damage anything in your house or office.
Warnings
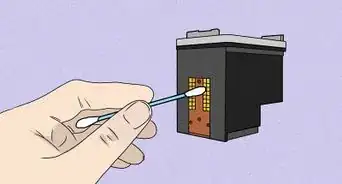
- Try not to touch the metal parts on the cartridge. Oil from your fingers can disrupt contact with the printer. You can use a cotton swab moistened with rubbing alcohol to gently clean these contacts.⧼thumbs_response⧽
- Overfilling a cartridge could cause it to stop working prematurely.⧼thumbs_response⧽
- Avoid letting your ink cartridges run dry. Check and refill them periodically for best results.⧼thumbs_response⧽


References
About This Article

1. Get an ink refill kit.
2. Remove the cartridge.
3. Locate or create the fill hole.
4. Fill a syringe with ink.
5. Insert ink into the fill hole.
6. Cover the fill hole with a seal.
7. Reinsert the cartridge.
8. Print several test pages.