This article was co-authored by wikiHow staff writer, Travis Boylls. Travis Boylls is a Technology Writer and Editor for wikiHow. Travis has experience writing technology-related articles, providing software customer service, and in graphic design. He specializes in Windows, macOS, Android, iOS, and Linux platforms. He studied graphic design at Pikes Peak Community College.
This article has been viewed 223,916 times.
Learn more...
Need to replace your empty ink cartridges? Each printer is a little different, but they all follow the same general steps. This wikiHow teaches you how to replace an empty printer cartridge.
Steps
-
1Write down the printer brand and model number. You will need to know both in order to find the correct replacement ink cartridges. If you can’t find the model number, check the user's manual that came with your printer. It may also be helpful to check the label on the ink cartridges inside the printer.
-
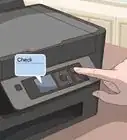
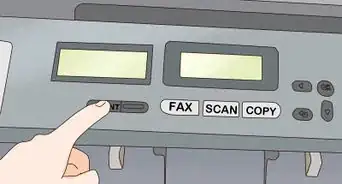
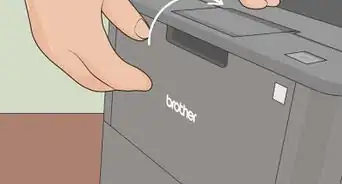
2Press the power button on your printer . Before attempting to access the ink cartridges, ensure your printer is turned on. This ensures that the print carriage is working properly. Your printer may also be able to tell you the exact ink levels and which cartridges need to be replaced. You can also check ink levels on a Windows computer. Generally, the power button has an icon that resembles a circle with a line going through the top.Advertisement
-
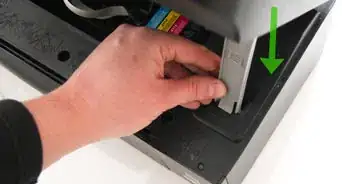
3Open the compartment that contains the ink cartridges. Each printer model is different. Some models have a lid on the top that opens. Others have a flap on the front that opens. Look for a release button or grip area where you can use to grab the lid or flap with your fingers. The carriage that contains the ink cartridges should slide into the access area on its own.
- If the print carriage does not move into the access area on its own, you may need to press the Ink change or stop button on the front panel of the printer in order for the carriage to move into the access area.
- Do not attempt to move the print carriage manually. It should move on its own when the compartment is opened or the proper button is pressed on the front panel of the printer.
- On some all-in-one printers, the printer cartridge compartment may be under the scanner. Lift the scanner to access the print cartridge.
-
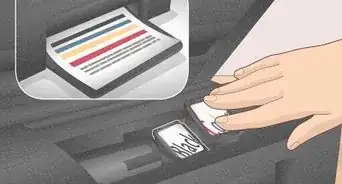
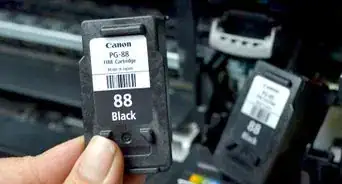
4Take note of the cartridge manufacture, model number, and color. The numbering and labeling systems vary by printer manufacturers and models. There should be a label on the printer cartridges. The label should list the manufacturer, a number, and the color. On some printers, all the ink is contained in a single cartridge. Some printers have a separate cartridge for colored ink and a separate cartridge for black ink. Other printers may have four separate cartridges for cyan (blue), yellow, magenta (pink), and black ink. The color should be indicated on the label.
- Do not remove the printer cartridge until you are ready to change the cartridge. On some printers, removing the cartridge for an extended period of time may dry out the print-head nozzle. Either write down the information on the print cartridge label or use your smartphone to take a picture of it.[1]
-
5Purchase new cartridges. Use the numbers you wrote down to buy either at an office store or online. You can also take your cartridges to an ink re-filler. If you are unsure, take the cartridge to the store and ask an employee to help you find the right match.
- Make sure you get cartridges from the correct manufacturer. Ink cartridges are not compatible with different brands. Often printer cartridges can vary within the same brand. Make sure you purchase a cartridge that contains the correct number and manufacturer.
- Alternatively, you can refill the ink or toner in the cartridge.
-
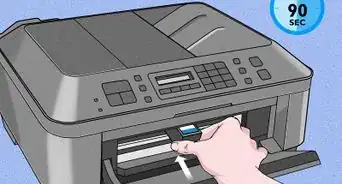
6Remove the cartridges you want to replace. Depending on the model printer you have, there may be multiple cartridges to choose from. The way you remove a cartridge will vary depending on the make and model of the printer. Consult the user's manual or manufacturer's web page for your printer if you need help removing the cartridges. There may also be instructions on a label inside the print cartridge compartment. The following are some of the ways you may need to remove the cartridge:
- Look for a release clip on the cartridge or carriage. Squeeze or push the release clip to detach the cartridge and then pull the cartridge out[2] .
- Push down on the cartridge to detach it and then pull it out at an angle from the point of attachment.[3]
- Lift the flap holding the cartridge in place to detach it. Then remove the cartridge.[4]
- For large inkjet cartridges press the release tab on the front of the cartridge. Gently pull it along the guide rails on the side of the cartridge.
-
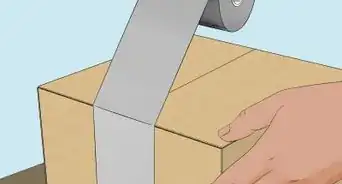
7Shake the new cartridge and then remove it from the package. Shaking will help the first few print jobs come out looking better. Be sure to shake before opening the bag to prevent leakage.
-
8Remove protective strips and tabs from the ink cartridge. These differ by brand, but almost all cartridges will have a protective sticker or piece of plastic or adhesive tape over the dispenser that needs to be removed before installation. Large inkjet cartridges may also have a tape strip you'll need to remove from the cartridge. Grab the loop or handle and pull it out of the cartridge. If you need assistance, check the instructions on the box or user's manual that came with the ink cartridge for assistance.
- Do not touch the copper connectors or print nozzles. This can lead to ink clots and bad electrical connections.
- Do not remove any tabs or strips that are not indicated in the instructions.
-
9Insert the cartridge into the printer. It should go in the reverse way that you remove it. Make sure the angle is correct. Most newer cartridges will lock into place automatically with a little pressure. If it is a large inkjet cartridge, use the guide rails on the side to slide the cartridge back in place. Press firmly until you hear it lock.
-
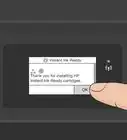
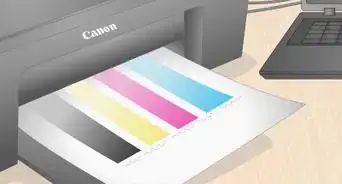
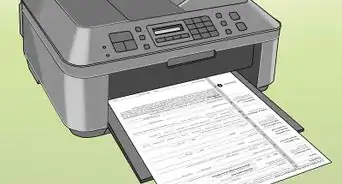
10Print a test page. This will make sure that the cartridges have been installed correctly, and will get the ink flowing before your first real document.
-
11Reconfigure printer heads for best quality. If you are noticing streaks, lines, or smudges, your print heads may be out of alignment or in need of cleaning. Check your printer’s documentation on how to do this for your model.


Community Q&A
-
QuestionHow do I refill an ink cartridge?
 Community AnswerIt depends on the type of cartridge and printer. If you no longer have it, look online for your model. There is probably a YouTube video that shows you how to do it. The printer's manual should also have that information.
 -
QuestionWhat do you do if you get a system failure error even after installing black ink?
 Community AnswerMake sure the black ink cartridge is installed properly, check the other cartridges and printer head, and if all else fails, Google the error.
 -
QuestionWhat if my ink cartridge is not empty?Community AnswerTry taking it out and putting it back in and see if you can print out the diagnostics page, a page you print when you get a new printer or ink cartridge.
Warnings
- Ink may leak out of your cartridge.⧼thumbs_response⧽

References
About This Article

1. Note the make and model of your printer.
2. Open the print cartridge compartment and note the manufacturer, color and number on the cartridges.
3. Purchase new cartridges.
4. Follow the instructions inside the printer compartment to remove the old cartridges.
5. Remove the new cartridges from their packaging and remove the protective adhesives and tabs.
6. Insert the new cartridges the reverse way they were removed.
7. Print a test page.