This article was co-authored by Christopher Batchelor, a trusted member of wikiHow's volunteer community. Christopher Batchelor is a wikiHow community member and technology enthusiast. He has experience using a range of different platforms and software, and likes to keep up with updates and new features.
This article has been viewed 269,309 times.
Learn more...
Word, although primarily a word processing software, also provides quite a few photo manipulation functionalities. Rotating images is a fairly simple process and can be done in a variety of ways to achieve a higher or lower level of precision. You can rotate images in Microsoft Word by manually adjusting the rotation with your mouse or by specifying rotation degrees. In Microsoft Word 2007 and later, you can also do 3D rotation.
Steps
Rotating with the Mouse
-
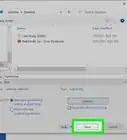
1Open your document. This guide will assume that you already have an image inserted somewhere in your document. If you need help with that, read our article about how to insert an image into Microsoft Word.
-
2Click the image. You will see an outline appear around the edges of the image, with boxes on the corners and midpoints of the outline. You will also see a circular arrow at the top of the image. This is what you will be using to rotate the image.Advertisement
-
3Rotate the image. Click on the circular arrow above the picture and drag in the direction that you would like to rotate the image. Move the mouse as if you were rotating a piece of paper on a table. The picture will rotate following your cursor.
- Rotate the picture by increments of 15 degrees by holding ⇧ Shift while rotating.
-
4Stop rotating. Stop rotating the picture by simply releasing your click-hold on the circular arrow.
- Rotating the image to a precise orientation will be harder to accomplish with the mouse. If you need to orient your picture to an exact degree, read the method about rotating your picture by degrees.


Rotating by Degrees
-
1Select the image. Click on the desired image and you will see a slight outline appear around the image. Any degree changes you make will be applied to the outlined image.
-
2Select the Format tab. From the ribbon of options on the top of the Word window, select the tab that says Format. It should be the furthest right tab.
-
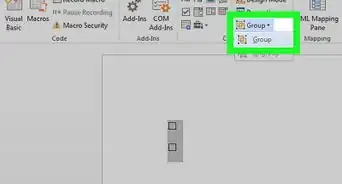
3Click the Rotate icon. In the third group of icons called "Arrange," click the icon that looks like two triangles next to each other. A drop down menu will appear.
- If you have trouble finding the Rotate icon, hover over each icon in the Arrange group to reveal a text box explaining what the icon is.
-
4Rotate the image by preset angles. In the drop down menu you will see 4 different basic options: Rotate Right 90, Rotate Left 90, Flip Vertical, and Flip Horizontally.
- Flip Vertical will essentially mirror the image along the X-axis.
- Flip Horizontal will essentially mirror the image along the Y-axis.
-
5Rotate the image by exact angles. From the same drop down menu, click More Rotation Options. Look for "Rotation." Specify the degree you would like to rotate the image by pressing the up and down arrows or by entering in a number. Positive numbers will rotate the image to the right and negative numbers will rotate the image to the left.
- Any degree greater than 360 degrees will be unnecessary since rotating the picture 360 degrees will only return the picture back to its original orientation.
- Press OK when you are done to apply the rotation.


3-D Rotation (Word 2007 & up)
-
1Right-click on the image and select "Format Picture". You will see a new panel open up either on the right side of the window or on the top of the window.
-
2Select "3-D Rotation". Depending on your version of Word, it will be in different place in the list. If you are using Word 2013, the most recent version, it will be the last option.
-
3Select a preset. Word includes quite a few different preset options for 3-D rotation. Scroll through the list by clicking on the icon next to "Presets."
-
4Manually enter in the degrees. Either press the arrows or manually enter in the desired degree in the input fields next to X-Rotation, Y-Rotation, and Z-Rotation.
- X-Rotation will rotate the image up and down, as if your were flipping an image away from you.
- Y-Rotation will rotate the image side to side, as if you were turning an image over.
- Z-Rotation will rotate the image clockwise, as if you were moving an image around on a table.


Community Q&A
-
QuestionHow do I rotate text in a Word document?
 SCTDerrickCommunity Answer1. Open Microsoft Word. 2. Click the insert button. 3. Click text box. 4. Click simple text box. 5. Resize your text box if needed. 6. Type in your text. 7. Find the rotate icon. 8. Rotate your text. Note: If you want to get rid of the outline, then just click on the text box and find the format button. Then just go to shape outline and click the white box.
 -
QuestionHow can I rotate all of the images at once in Microsoft Word?
 Community AnswerSelect all of your pictures, but make sure you set "layout option", not inline with text.