This article was co-authored by Paul Julch, MA. Paul Julch is a Personal Wardrobe Stylist, Speaker, and the founder of Urbanite | Suburbanite, a wardrobe styling business in the San Francisco Bay Area. With over 25 years in the fashion industry, Paul works with clients to make getting dressed easier, less time consuming, and more enjoyable. Paul has years of experience in retail visual merchandising - styling windows, displays, and floor sets for Banana Republic, Gap, and Express. He also has experience styling fashion photo shoots and corporate videos. Paul holds a BS Degree in Management from State University of New York at Binghamton, an MA in Clinical Psychology from Long Island University. He also studied Interior Design at the University of California, Berkeley.
This article has been viewed 34,239 times.
An espadrille is a type of soft shoe that’s usually made of natural materials like fabric, rope, and rubber. Modern espadrilles often include laces that go varying lengths up the leg. Once the shoes are on, you can play with the style and either wrap the laces layers around your ankle or criss-cross them up your calf.
Steps
Preparing the Shoes
-
1Sit on the edge of a chair. You’ll want to be able to reach the back of your leg, so find a chair to sit on while you tie your shoes. Scoot yourself forward to the edge so that you can easily bend over to reach the laces.[1]
-
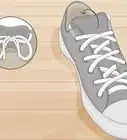
2Untangle the laces. The laces may already be tied or tangled depending on how they were left in the box. If the laces are just sewn onto the top of the espadrille, untangle the laces all the way down to the fabric of the shoe. If the shoe has eyelets that the laces weave through, undo any ties or knots down to the top eyelet.Advertisement
-
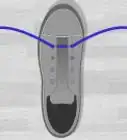
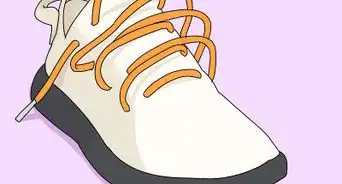
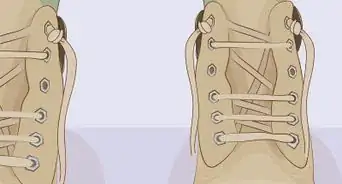
3Re-lace the eyelets if necessary. If your shoes have eyelets and the laces have become twisted or have been removed altogether, pull the laces out and start over. Fold the string in half and stick one half through the bottom eyelet on the left and the other half through the bottom eyelet on the right. Then criss-cross the laces up through the remaining eyelets.
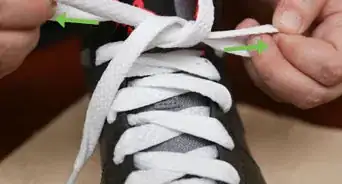
- Create different looks by starting the laces under the flaps and wrapping over them, or starting the laces over the flaps and wrapping under them.[2]
-
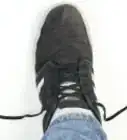
4Slide your feet into the espadrilles. Move the laces out of the way and put your feet into the shoes. You may need to loosen the laces if they go down the upper part of the shoe itself. Once your foot is inside, retighten from the bottom up, pulling the laces tighter at each eyelet.


Tying the Laces around Your Ankle
-
1Hold one end of the lace in each hand. Pick up the lace hanging off the right side of the shoe in your right hand. Then pick up the lace hanging off the left side in your left hand. Allow enough slack to be able to cross them.
-
2Cross the laces in front of your ankle. Cross one hand over the other so that the laces cross over your ankle. The cross should hit right at the crease where your foot creates a 90-degree angle with your leg. Lightly drop the laces once you’ve crossed them.[3]
- Depending on the design of the shoe, you may be able to skip this step. If the laces radiate out from a central point on top of your foot, you don’t need to cross them in front before pulling them behind your ankle.
-
3Pick up one lace in each hand again. Reach down and pick up the end that’s pointing to the right in your right hand. Pick up the end that’s pointing to the left in your left hand. Pull both ends tight enough that the laces are taught against your skin.
-
4Cross the laces behind your ankle. Exchange the laces behind your ankle, switching the one in your right hand over to your left hand, and vice versa. Cross the laces directly behind where you crossed them in the front, and pull them tight again.[4]
-
5Cross the laces in the front again. Pull the laces forward and cross them in the front again, directly over the spot where you crossed them in the front before. If you prefer, you could tie them just a little bit higher than the first cross to create a thicker-looking ankle strap.[5]
- Keep pulling them tightly enough that you can’t fit a finger between the laces and your ankle.
-
6Continue crossing until only a few inches of material remain. Keep going backward and forward, crossing the straps each time, either on top of the previous ones or slightly above them. Stop when you have only enough material to tie a bow, which should be a few inches.[6]
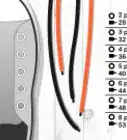
- Depending on how big you want the bow to be, you can adjust how much material you leave. For bigger bows, stop when you have about 6 inches (15 cm). For smaller bows, leave less than 3 inches (7.5 cm).
-
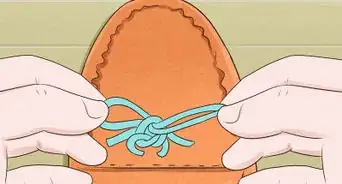
7Tie a bow in front of or behind your leg. Bring the material around your leg one final time, and instead of crossing the laces again, tie them together in a tight bow. You can do this in the front or the back depending on the look you like best.
- If you prefer the look of a bow in the front, but only have enough material to tie one in the back, unwrap the laces until you have enough to tie it in the front.


Tying the Laces Up Your Calf
-
1Cross the laces in front of your ankle. Holding the right lace in your right hand and the left lace in your left hand, cross the laces in front of your ankle, right where your foot forms a 90-degree angle with your leg. Once they’re crossed you can lightly drop them on the floor.
-
2Cross the laces behind your ankle. Pick up the lace that’s now pointing right with your right hand, and the lace that’s now pointing left with your left hand. Pull them both back toward your heel and cross them directly behind where the front cross is.[7]
-
3Exchange the laces between your hands. Maintaining the tightness of the crosses, hold one lace in between your thumb and index finger, and place the other lace in between your third and fourth fingers. Holding them this way will allow you to trade the laces between your hands without letting them go and losing their position.
-
4Pull the laces forward at a 45-degree angle. As you use both hands to pull the laces around to the front of your calf, angle them up at about 45 degrees rather than keeping them on the same plane as the laces around your ankle.
-
5Cross the laces over your shin. The laces should meet at a spot a few inches above the first cross in the front. The result will create a diamond shape between the two crosses. Keep the laces tight as you exchange them between your hands again.
-
6Pull the laces back at a 45-degree angle. After they cross, the laces should continue up at the same 45-degree angle as before. Pull them to a spot at the back of your calf where they will cross again.
- If you want a symmetrical look, the distance between the two back crosses should be the same as the distance between the two front crosses.
-
7Continue crossing until about 8 to 10 inches (20 to 25 cm) remain. Keep crossing the laces up your leg, front to back at a 45-degree angle. Stop when you have enough material to wrap around your calf one final time, with a little leftover to tie a bow.
- This amount will vary depending on the width of your calf, but aim for between 8 and 10 inches (20 and 25 cm) at the end of each lace.[8]
- You don’t have to keep going until you run out of material. If you prefer the way they look stopping at a lower point on your leg, that’s fine too.
-
8Wrap the laces around your leg in a horizontal line. If your last cross was in the back, bring the laces around to the front in a straight horizontal line. If the last cross was in the front, bring the laces to the back along the horizontal plane.
- Tying the ends around the top of your calf muscle, just below your knee, will help the laces stay up better.[9]
- If you decided to stop with lots of extra material to spare, you may need to repeat this process a few times, criss-crossing the laces on top of each other horizontally until only a few inches of material remain.
-
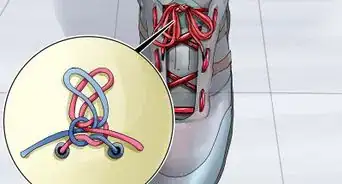
9Tie a bow in the front or the back. Depending on the look you like best, you can tie the bow in the front or the back. Tie it tightly enough that you can’t squeeze a finger between your leg and any section of the lacing.
- Tying a knot before you tie a bow will help the laces stay in place.[10]
- If you don’t have enough material to tie the bow where you want it, untie one of the crosses to give yourself additional material.
-
10Walk around in your espadrilles. Stand up and walk around the room to test the feel of the laces. They should feel snug enough to not slide down, but not so tight that they’re cutting off circulation in your legs.
- Try bending, squatting, and pointing and flexing your feet to feel for any unwanted movement in the laces.
-
11Adjust the lacing if necessary. If you find the laces sliding down your leg, untie them and try again, this time pulling them more tightly each time you cross them. However, if you find them too tight for comfort, try undoing them and tying them a bit looser. You may have to tie the bow a little lower after loosening the material.


References
- ↑ https://www.realsimple.com/beauty-fashion/ankle-wrap-shoe-tips
- ↑ https://www.fieggen.com/shoelace/lacingmethods.htm
- ↑ https://www.realsimple.com/beauty-fashion/ankle-wrap-shoe-tips
- ↑ http://glamradar.com/5-ways-to-wear-lace-up-heels-like-a-true-style-icon/
- ↑ http://www.refinery29.com/how-to-wear-gladiator-sandals
- ↑ https://www.realsimple.com/beauty-fashion/ankle-wrap-shoe-tips
- ↑ http://glamradar.com/5-ways-to-wear-lace-up-heels-like-a-true-style-icon/
- ↑ https://www.cdc.gov/nchs/data/nhsr/nhsr010.pdf
- ↑ http://www.refinery29.com/how-to-wear-gladiator-sandals
About This Article