Learn the quickest & easiest way to convert raster to vector in Adobe Illustrator
Explore this Article
IN THIS ARTICLE
Other Sections
Written by
Travis Boylls
X
This article was co-authored by wikiHow staff writer, Travis Boylls. Travis Boylls is a Technology Writer and Editor for wikiHow. Travis has experience writing technology-related articles, providing software customer service, and in graphic design. He specializes in Windows, macOS, Android, iOS, and Linux platforms. He studied graphic design at Pikes Peak Community College.
This article has been viewed 125,621 times.
Learn more...
Adobe Illustrator's Live Trace makes it easy to convert raster image files (JPEG, PNG, GIF, BMP, etc.) into vector-based images. We'll show you how to trace images in Adobe Illustrator with Live Trace.
Steps
1
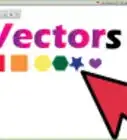
Place a raster image in your Illustrator file.
-
The best images to convert to vector are images with only a few colors, like logos or cartoon drawings. Converting complex photo-real images with lots of color and detail to vector may slow down your computer and/or cause Illustrator to crash. Select a high-resolution image for best results. To paste a raster image:
- Click File in the menu bar at the top.
- Click Place.
- Select a raster image file (.jpeg, .jpg, .png, .gif, .bmp, etc.).
- Click Place.

Advertisement
2
Select the placed image.

3
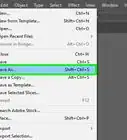
Open the Image Trace window.
-
To ensure the Image Trace tools are visible, you'll need to activate this window. You can do so by clicking the Window menu at the top of Illustrator and selecting Image Trace.
- If you are using an older version of Adobe Illustrator, click Object in the menu bar, followed by Live Trace, followed by Tracing Options.

Advertisement
4
Enable Image Trace previews.

5
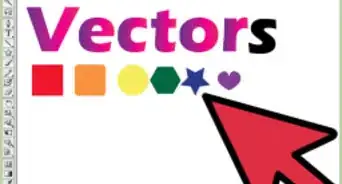
Try an image trace preset for a quick start.
-
You can select a preset which will set all the image trace settings for you. This is optional, but a simple way to start. Use the drop-down menu next to "Presets" to select a preset. Your options include the following:[1] X Research source
- High Fidelity: This preset preserves as many colors as possible. This is used for creating photo-realistic images, but may be taxing on your computer's processor.
- Low Fidelity: This preset reduces the amount of color in the final trace. This is good for creating a simplified photo-realistic image.
- 3 Colors: This limits the number of colors in the final trace to 3. This is a good preset for logos or drawings that only have a few colors.
- 6 Colors: This limits the number of colors in the final trace to 6. This is good for more complex logo designs as well as some cartoon drawings.
- 16 colors: This limits the number of colors in the final trace to 16. This is good for cartoon images that have a wide variety of colors.
- Shades of Grey: This creates a greyscale image trace, which includes black and white, and shades of grey to shade the image.
- Black and White: This creates an image that only uses black and white. There are no shades of grey with this option.
- Outline: This creates an image that is traced with black outlines.

Advertisement
6
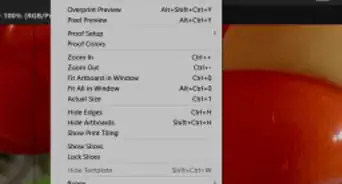
Select a view.
-
The view determines how the tracing will appear in your file. Use the drop-down menu next to "View" to select a preview mode, including:
- Tracing Results: This displays a preview that looks exactly like the image after it has been traced.
- Tracing Results with Outlines: This displays the tracing results with outlines around the shapes highlighted.
- Outlines: This only displays the outlines around the shapes that are traced.
- Outlines with Source Image: This displays the outlines that are traced around the shapes with the original raster image below the outlines.
- Source Image: This only displays the original raster image that is being traced.

7
Select a mode.
-
The mode options determine the color for the traced image. Use the drop-down menu next to "Mode" to select a color mode. Choose from any of the following options:[2] X Research source
- Color: This produces a colored image. When this mode is selected, a slider bar appears below the "Palette" drop-down menu that allows you to select how many colors you want to allow in your image trace.
- Grayscale: This produces a grayscale image that consists of black and white with shades of grey. When this mode is selected, a slider bar appears below the "Palette" drop-down menu that allows you to select how many shades of grey you want to allow in your image trace.
- Threshold: This produces an image that only uses black and white.[3] X Research source There are no shades of grey. When this option is selected, you can use the slider bar next to "Threshold" to adjust at which color value colors change from black to white.

Advertisement
8
Choose a palette.
-
You can choose a palette of color options if you set the mode to Color or Grayscale. Color palettes won't be available if you chose the Threshold mode. Use the drop-down menu next to "Palette" to select from the following palettes:
- Automatic: This automatically selects a color palette from the traced image.
- Limited: This option selects a limited number of colors from the source image to create a traced image to use in the color palette.
- Full Tone: This option uses the full range of colors from the source image to create a traced image.
- Document Library: This option allows you to select a pre-existing color palette from a list of palettes.

9
Fine-tune your tracing rules.
-
Use the Advanced panel to make more precise adjustments. If you find the traced image doesn't look quite right, you can click Advanced to additional sliders and tools you can use for a better trace.
- Paths: Use the slider bar to adjust the path settings. The higher the path settings, the shorter the distance between the traced shapes and the original raster image.
- Corners: This adjusts how likely a sharp bend will turn into a corner point.
- Noise: Use the slider bar next to "Noise" to specify how much a pixel area is ignored by tracing. A higher value results in less noise. Select a higher setting for higher resolution images and a lower setting for lower resolution images.
- Choose one of the two Method options to choose how paths are created:
- 'Abutting: This method has an icon of a circle cut out of a square. Use this method to trace shapes next to each other. The path of one shape matches the path of its neighboring shape. No shapes overlap.
- Overlapping: This method allows shapes to be created on top of shapes.
- If you want to turn regions filled with color into traced fill shapes, check the box next to "Fills."
- To add a stroke line around shapes that are traced, check the box next to "Stroke," and then use the arrows to define the thickness of the stroke line.
- Click the checkbox next to "Snap Curves to Lines" to specify if lines that are slightly curved are rendered as a straight line.
- Click the checkbox next to "Ignore Whites" if you want white areas of the original image to be ignored in the trace.

Advertisement
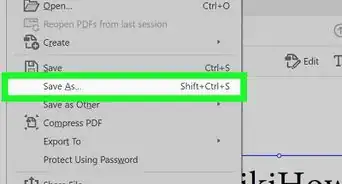
10
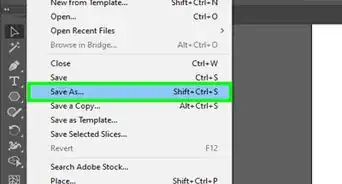
Trace the image.
-
Click Trace to start tracing. It's in the lower-right corner of the Image Trace window. This converts the raster image into a traced image.
- If you are not satisfied with the results of the traced image, select the traced image with the Selection tool. Click Object in the menu bar at the top and click Image Trace. Click Release Trace to discard the traced image in place of the original raster image.
- If you are satisfied with the traced image, you can expand it to convert it into standard vector shapes that can be edited with the Illustrator tools. Use the following steps to expand the traced image:
- Use the Selection tool to select the traced image.
- Click Object in the menu bar at the top.
- Click Image Trace
- Click Expand.


You Might Also Like
How to
Create Vectors in Adobe Illustrator
 How to Trace an Image in Photoshop on Windows or Mac
How to
Use Adobe Illustrator
How to
Add Fonts to Illustrator
How to
Remove Backgrounds in Adobe Illustrator
How to
Change the Background Color in Adobe Illustrator
How to
Add a Hyperlink in Illustrator
How to
Create an Outline in Adobe Illustrator
 2 Easy Ways to Wrap Text in Adobe Illustrator
How to
Warp an Object in Adobe Illustrator
 How to Add Artboards in Adobe Illustrator
How to
Add an Image in Illustrator
How to
Change Artboard Size in Adobe Illustrator
How to
Measure in Adobe Illustrator
Advertisement
References
About This Article

Written by:
Travis Boylls
wikiHow Technology Writer
This article was co-authored by wikiHow staff writer, Travis Boylls. Travis Boylls is a Technology Writer and Editor for wikiHow. Travis has experience writing technology-related articles, providing software customer service, and in graphic design. He specializes in Windows, macOS, Android, iOS, and Linux platforms. He studied graphic design at Pikes Peak Community College. This article has been viewed 125,621 times.
How helpful is this?
Co-authors: 7
Updated: June 9, 2022
Views: 125,621
Categories: Adobe Illustrator
Advertisement