This article was co-authored by wikiHow staff writer, Nicole Levine, MFA. Nicole Levine is a Technology Writer and Editor for wikiHow. She has more than 20 years of experience creating technical documentation and leading support teams at major web hosting and software companies. Nicole also holds an MFA in Creative Writing from Portland State University and teaches composition, fiction-writing, and zine-making at various institutions.
The wikiHow Tech Team also followed the article's instructions and verified that they work.
This article has been viewed 52,140 times.
Learn more...
You can use the Paths tool in GIMP to create straight or curved lines, shapes, and complex selections by connecting multiple points along a Bezier curve. If you're used to the pen tool in apps like Photoshop, Illustrator, and Inkscape, you'll feel right at home with the Paths tool. If you're brand new to GIMP and haven't used the pen tool in another illustration app, don't worry—we'll help you get started! This wikiHow guide will teach you how to start using the Paths tool in GIMP to draw and trace around objects.
Steps
Drawing a Path
-
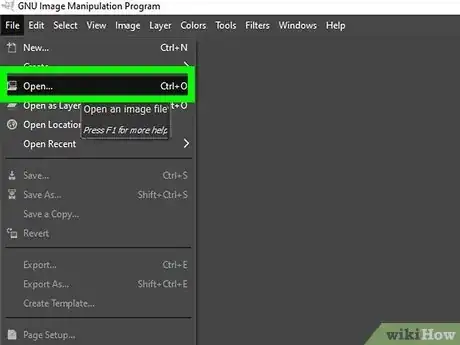
1Open an image in GIMP. The Paths tool is helpful for drawing a precise selection around an object, such as the subject on an image from which you'd like to remove the background. You can also use the tool to create shapes and illustrations. Start by opening your image (or creating a new drawing) in GIMP.
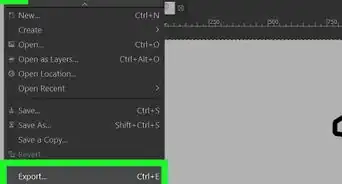
- To open an image, go to File > Open… and select your image.
- To create something new, go to File > New, choose your canvas size and settings, then click OK.
-
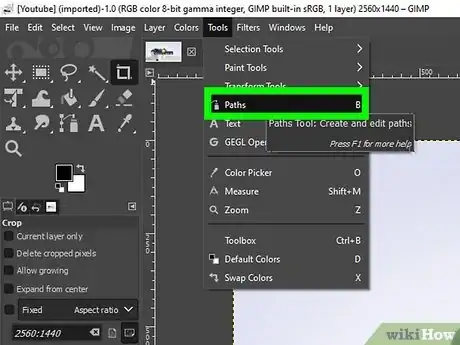
2Press B to start the Paths tool. You can also launch the tool by clicking the Paths tool icon on the toolbar (it's the dotted line and pen next to the text tool) or by clicking the Tools menu and selecting Paths.[1]
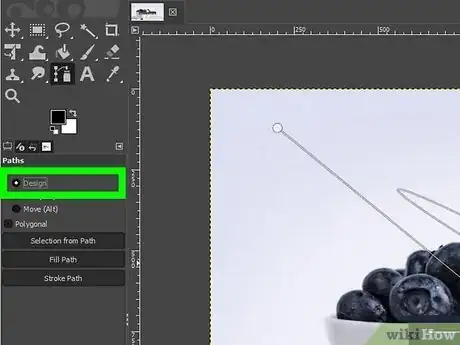
- When you start the Paths tool, the Paths panel will appear in the left panel. You'll see that there are three modes—Design, Edit, and Move. The Paths tool always starts in Design mode.
Advertisement -
3Click anywhere on the image or canvas to place your first point. If you want to select an object, click somewhere along the edge of the object you want to select. If you're drawing, click the place where you'd like your first line or curve to begin.
- Each point you place will be joined to the next point by a segment, or line. The lines between points can be straight or curved.
- If you're selecting an object, your goal is to place points around the entire perimeter of the object to surround it with line segments.
-
4Click another location to add a second point. Once you create your second point, you'll see that it's now connected to the first point by a segment.
-
5Click and drag to create a curved segment instead of a straight one. If you need the next segment to curve, you can easily curve the line in any direction. Move the mouse to the location where you'd like to place the next point, and then click and drag the cursor left (to curve the line right) or right (to curve the line left).
- You can drag the curve in any direction you'd like to properly wrap around an object or create a line that curves in the desired direction. The curve will always in the opposite direction that you drag.
- When you release the mouse button, you'll have a new point with a yellow directional line indicating the direction of the curve. At each end of the directional line, you'll see squares—these squares are called handles.
- You can move each of the handles to precisely shape the curve.[2] You can also hold down the Shift key as you drag a handle to move the curve symmetrically.
-
6Continue clicking points until you've come close to the original point. Place additional points until you've drawn your shape or surrounded the object you want to select.
- Depending on the shape you're drawing or the complexity of the object you're selecting, you may need to create more or fewer points to select the object accurately.
- You can undo a point you've placed by mistake by pressing Ctrl + Z (PC) or Command + Z (Mac).
- While you're adding points, you'll see a small + at the cursor's top-right corner. This + changes as you do other things with your path, which we'll get to in a moment.
-
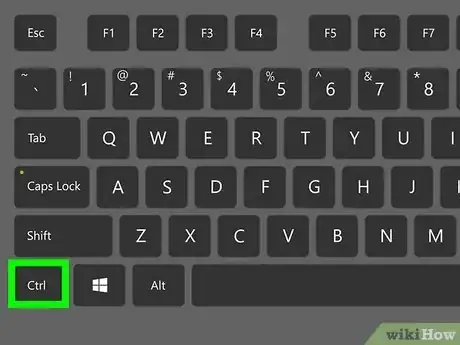
7Press Ctrl as you click the starting point to close the path. This creates the final segment and closes the path.
-
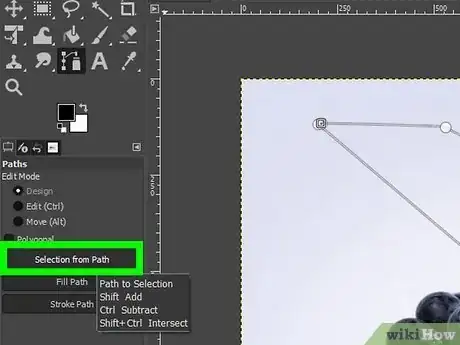
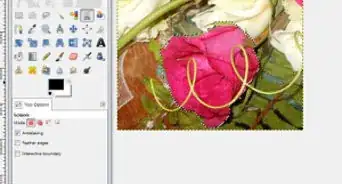
8Create a selection from the path. If you want to work with the path as a selection—such as if you want to extract, copy, adjust, or recolor the selected area independently of the rest of the image, you'll want to turn the path into a selection. Just click Selection from Path in the Paths toolbar on the left to do so.
- You can now adjust the selection using the options in the Select menu.
-
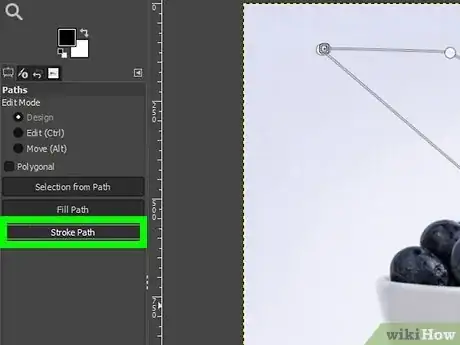
9Turn the path into a solid line (if you're drawing). If your goal is to create an illustration with the Paths tool, you can use the Stroke Path button in the left panel to customize the line that surrounds your path:
- Click Stroke Path to open the dialog box.[3]
- To use a standard customizable line, select Stroke line, then enter a line width. You can click the Line Style menu to choose other options, including a dashed pattern.
- To use a paint tool for your line, such as the pencil or paintbrush, select Stroke with a paint tool, then choose your tool. The Stroke Path tool will use the current size and shape of the tool you select, so you might want to close the window and choose your preferences before applying the stroke line.
- If you check the box next to "Emulate brush dynamics," the line will have a more realistic look—this is useful if you're creating a lifelike drawing.[4]
- Click Stroke to create your line.
Editing a Path
-
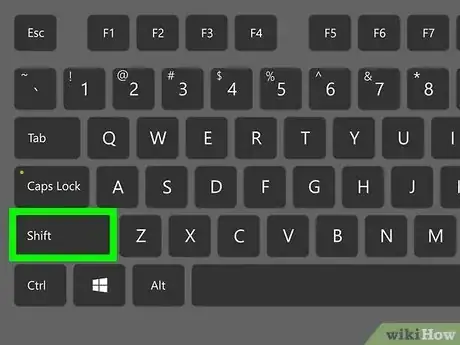
1Move a point. In Design mode, you can click and drag any point to move it. To move multiple points at once, hold down the Shift key as you click each point, then drag any point to move them all.
- If you switch to Edit mode, dragging a point will curve the previous segment instead.
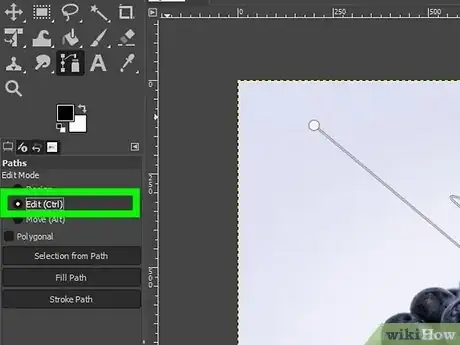
- Both Design and Edit modes allow you to make the most changes to the path, but each of these two modes have different features. The most notable difference is that in Edit mode, you can only work on the existing path—if you want to make changes to multiple paths at once, you should be in Design mode.[5]
-
2Add a new point. If you need to add another point, you can do so in both Edit and Design modes by holding down Ctrl as you click anywhere on a segment.
-
3Curve a line segment. If you need to curve any segment between two points after completing the path, it's easy to do in Design mode. Hover the mouse cursor over the segment until the small square next to the cursor turns into a crosshair with arrows, then click and drag the segment in the desired direction.
- If you hold down the Shift key while you do this, you'll create a symmetrical curve.
-
4Adjust a curve. If you want to change the direction of a curve, you can do so by dragging the handles from any of its points in the desired direction. This works the same in Design and Edit modes.
- Click a point to display its handles.
- Drag either of the handles in the desired position. Hold down Shift to curve symmetrically.
- If you want to remove a handle, you can do so by holding down Shift + Ctrl as you click the handle.
-
5Delete a segment. You can only delete a segment in Edit mode, so click Edit in the Paths toolbar. Then, hold down Shift and hover your mouse over the segment you want to delete. When you see a minus sign near the cursor, click to delete the segment.
-
6Delete a point. If you have too many points, deleting points is easy.
- In Design mode, select the point, then press Shift + Ctrl as you click the point.
- In Edit mode, select the point, then press Shift as you click the point.
-
7Move one or more points. Repositioning a point is easy—you'll just need to be in Design mode to do it. Just click and drag a point to move it.
- To move several points at once, hold down the Shift key as you click each point, then click and drag the selection.
-
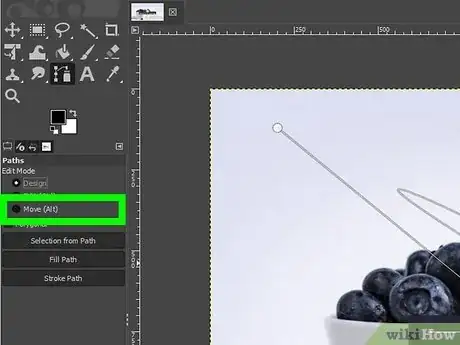
8Move the entire path. If you've been wondering about Move mode, now you can try it out. Select Move mode, then click and drag anywhere on the path to move the selection.
-
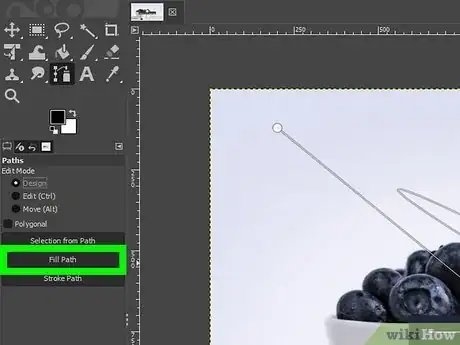
9Fill the path with a color or pattern. The Fill Path button in the left toolbar provides you with options for filling the path.
- To fill with a color, start by selecting a color—just click the top-left colored square in the left panel above the Paths panel, then choose a color. Next, click File Path in the left panel, select Solid color, then click Fill.
- To fill with a pattern, click the Patterns tab in the upper-right area of GIMP—it's the second tab in the right panel. Select a pattern to use, then click the Fill Path button in the left panel. Choose Pattern, then click Fill.
Community Q&A
-
QuestionWhat are some of the uses of the pen tool in GIMP?
 Community AnswerYou can use it to make vector art and graphics, make custom selections that are easier to change and manipulate (as selections aren't set in stone), draw straight lines, etc. It's like a Swiss army knife; it's rare that you don't find some use for it while you're working on a project.
References
- ↑ https://docs.gimp.org/2.10/en/gimp-tool-path.html
- ↑ https://www.linuxtopia.org/online_books/graphics_tools/gimp_advanced_guide/gimp_guide_node36_004.html
- ↑ https://docs.gimp.org/2.10/en/gimp-path-stroke.html
- ↑ https://docs.gimp.org/2.10/en/gimp-tool-dynamics.html
- ↑ https://docs.gimp.org/en/gimp-using-paths.html
- ↑ https://www.gimp.org/tutorials/Straight_Line/
