This article was co-authored by Josef Storzi and by wikiHow staff writer, Nicole Levine, MFA. Josef Storzi is an Apple and Mobile Phone Repair Specialist and the Owner of Imobile LA, a mobile phone repair company based in Los Angeles, California. Josef specializes in repairing screens, charging ports, batteries, water damage, speakers, and microphones on all mobile phone brands including Apple, Samsung, LG, Nokia, and Sony. He also specializes in tablet, laptop, and computer repairs as well as the pros and cons of recent mobile software updates.
The wikiHow Tech Team also followed the article's instructions and verified that they work.
This article has been viewed 905,954 times.
Screen resolution is a measurement based on the number of pixels on a display. The higher the number of pixels, the clearer the text and images on the screen. The resolution you can use on your computer depends on the capabilities of both your monitor and your video card. Operating systems automatically select the best possible resolution that both your monitor and video card can handle. When you find the resolution, you'll see it displayed as Width x Height in pixels (e.g., 1920 x 1080), or using terms like 4K/UHD (which means 3840 x 2160) or Full HD/1080p (which means 1920 x 1080). This wikiHow teaches you how to find out the resolution on your Windows PC, Mac, or Chromebook.
Steps
Windows
-
1Right-click a blank area of your desktop. A menu will expand.
-
2Click Display settings. This opens the Display settings panel.Advertisement
-
3Find the resolution under "Display resolution." The current resolution appears in this menu. If you see "(Recommended)" next to the resolution, you're using the highest possible resolution for your hardware.[1]
- If you have more than one monitor, you will see both listed at the top of the right panel. Select the monitor you want to check.
- The options you see are those supported by both your monitor and video card. For example, if you have a 4K monitor but don't see the option to change your resolution to 4K (3840 x 2160), it's usually because it's not supported by your video card (or vice-versa).
-
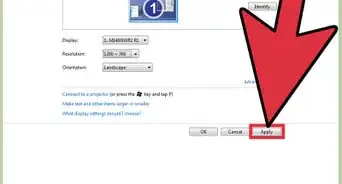
4Select a different resolution from the menu (optional). If you are using a resolution other than the recommended one, select the Recommended option for best results. Keep in mind that switching to a resolution that isn't the recommended one may result in a blurry, stretched, or squished image.
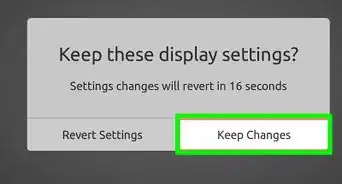
- After selecting a new resolution, it will change immediately. You'll also see a pop-up message asking if you want to Keep changes or Revert to the previous setting. If the new resolution doesn't look right, click Revert.
- If the screen goes dark after changing your settings, that resolution won't work with your display—after a few moments, Windows will revert to the previous resolution to correct the problem.


Mac
-
1Click the Apple menu and select About this Mac. The Apple menu is at the upper-left corner of the screen.
-
2Click the Displays tab. It's at the top of the window.
-
3Find the resolution for your display. The resolution appears next to the size of the display, for example, 23-inch (1920 x 1080).
- If you have more than one monitor connected to your Mac, you'll see each monitor listed in the window—each will have its own resolution beneath it.
-
4
-
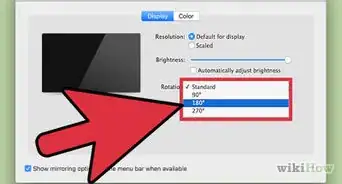
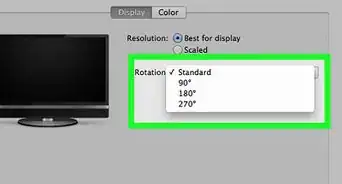
5Select Scaled and choose a different resolution (optional). If you want to change the resolution, you can do so once you select the Scaled option. The options you see are those generally supported by both your monitor and video card. For example, if you have a 4K monitor but don't see the option to change your resolution to 4K (3840 x 2160), it's usually because it's not supported by your video card (or vice-versa).
- To change the resolution for a second monitor, press and hold the Option key as you select Scaled.
- When you select a resolution, the change will take place immediately. If the screen goes black instead of showing you a new resolution, that resolution won't work with your monitor. This problem will usually correct itself in about 15 seconds by automatically switching back to the previous resolution.[3]
If it doesn't, press Esc to force the process along.
- If your image still won't revert, boot your Mac into Safe Mode, click the Apple menu, select System Preferences, choose Displays, and then click the Display tab. Then, select Default for display to reset the resolution. Finally, reboot your Mac normally.


Chromebook
-
1Click the time. It's at the bottom-right corner of the screen.
-
2Click the gear icon on the menu. This opens your Chromebook settings.
-
3Click the Device tab. You'll see this tab in the left panel.
-
4Find the resolution next to "Resolution." The current resolution is the one you see in the "Resolution" drop-down menu.
- If you want to change the resolution, click the menu and select another option. You'll see an instant preview of the new resolution, as well as a pop-up window asking if you want to keep it. Click Continue to keep the new resolution, or click Cancel to return to the previous setting.[4] If you wait 10 seconds, the resolution will automatically reset to the previous resolution.


Community Q&A
-
QuestionHow do I do this in Windows 10?
 Community AnswerVery simple. Go to 'settings,' then click 'system,' then click 'display,' then 'advanced display settings.' The recommended resolution is your native resolution, and the one that you should be using.
 -
QuestionWhat do you mean by resolution of the monitor?
 Community AnswerThe resolution of a moniter is simply the height and width of your moniter. The most common unit of measurement used is pixels. For instance, a "1920 x 1080" moniter will have 1,920 pixels across and 1,080 pixels vertically.


References
- ↑ https://support.microsoft.com/en-us/windows/getting-the-best-display-on-your-monitor-c7e01f63-9b51-2b23-0a0f-6b965af015a9
- ↑ https://support.apple.com/guide/mac-help/change-your-displays-resolution-mchl86d72b76/mac
- ↑ https://support.apple.com/guide/mac-help/picture-change-resolution-mchlp2660/11.0/mac/11.0
- ↑ https://www.youtube.com/watch?v=emC0nBW6ZFI
About This Article

1. Right-click the desktop.
2. Click Display Settings (Windows 10).
3. Find the resolution in the right panel.