This article was co-authored by wikiHow Staff. Our trained team of editors and researchers validate articles for accuracy and comprehensiveness. wikiHow's Content Management Team carefully monitors the work from our editorial staff to ensure that each article is backed by trusted research and meets our high quality standards.
The wikiHow Video Team also followed the article's instructions and verified that they work.
This article has been viewed 156,342 times.
Learn more...
If you are looking for a fun, easy origami project that you can also get daily use out of, consider making a wallet. An origami wallet is straightforward to make, can be customized to your tastes, and best of all, doesn’t cost more than a sheet of paper. There are a number of different ways to fold your wallet, and you can customize the finished product as much as you would like.
Steps
Making an Easy Wallet
-
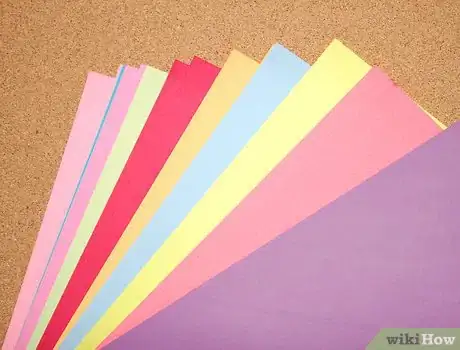
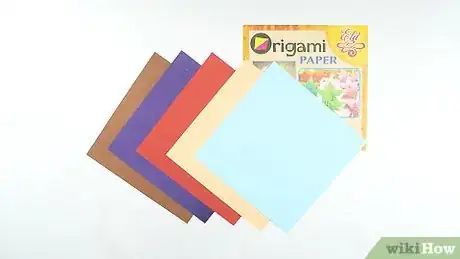
1Choose your paper. Origami is the art of folding any kind of paper. Different kinds of paper can help you make a wallet that is large and durable enough for your needs. Make sure your choice suits your intended use for the wallet. Whatever you choose, it should be sturdy and thick.[1]
- Origami paper. This is paper designed for origami artwork. It should fold easily, and you will have a wide range of options for color. On the other hand, this is a little more expensive than regular paper, and may only make a wallet large enough for coins and small notes.
- Paper bag. If you are looking for a larger and more durable wallet, you can use a medium-sized paper bag from the grocery store or other shopping trip. You will need to cut a square out of the bag, but you will have much more flexibility in wallet size.
-
2Fold the paper in half vertically. Start by laying the paper with the side you want facing outward down on the table. Make a good crease in the center, then unfold, back side facing out. This won’t be a final fold, just a mark in the middle for your next step.[2]Advertisement
-
3Fold the sides of the paper to the center. You will now fold the paper into fourths by folding each side into the center crease. Once you have done that, open the paper back up. You should have three creases, and the paper evenly divided into four parts.[3]
-
4Fold in each of the corners. These edge of these folds should line up with the folds you made in the last step. Make sure you get all four corners.[4]
-
5Fold the left and the right sides of the paper in to the center crease. They should be symmetrical. You should now have two flaps, with folded corners. Once you are done with these folds, flip the paper over.[5]
-
6Fold down the top part of the paper. This fold should be about 1/3 of the way down. A good rule to follow is to make sure a full triangle of the paper’s back side shows.
- As you are adding extra folds at this point, you may want to use a ruler or something else to help flatten the paper and keep the folds nice and tight.[6]
-
7Tuck the bottom of the paper inside the top flap. This is the last step to your origami wallet. You’ll take the bottom part of your paper and fold upward to hold everything together.[7]
- Fold the up the bottom part of the paper. This fold should slightly overlap the other flap. Crease the fold well.
- Insert the bottom triangle corners slide into the top triangle corners. You should be able to see a diamond showing the backside of the paper, with each of the corners in the color of the outside.
-
8Fold the paper in half. Use the first crease you made to fold in half and finish your wallet. Now you’ll be able to slide cards and coins into the pockets, depending on how big of a wallet you were able to make.[8]
- Once you are finished, you can also decorate the outside with drawings or stickers to help make your wallet ever more personal, or to remind you what is in there.
Making a Traditional Wallet
-
1Choose your paper. Again, your paper needs to be square to do the folds properly. If you are using something other than origami paper, like printer paper or a paper bag, you can use scissors to cut off parts of the paper so that all sides are equal.
-
2Fold the paper in half vertically. Start by laying the paper with the side you want facing outward down on the table. Make your crease in the center, then unfold again.[9]
-
3Fold the sides of the paper to the center. This will divided your paper into fourths by folding each side into the center crease. Once you have done that, open the paper back up. You should have three creases, and the paper evenly divided into four parts.[10]
-
4Fold the paper in half horizontally. You should be looking at a long rectangle showing the outside of your paper.
-
5Make a squash fold with the upper corners. This step gets a little tricky, but you should end up with a trapezoid with the bottom part showing the backside of your paper.[11]
- Fold the upper corners inward so that their sides match up with the creases from the second fold. Unfold these corners
- Fold the upper corners backward to the same point on the other side of your shape, then unfold.
- Make a squash fold using the two creases you just made. Push the creases you just made outward and fold over each other by squashing down the middle of the top. This should fold over the lower part of your paper, showing the back side.
-
6Fold the outer edges backward. Use your quarter creases to fold back and make a square. The top half of your square should be showing the front of your paper, and the bottom should show the back.[12]
-
7Create the outside lip of your wallet. This is the last step to firm up the opening for your wallet. These will be thick folds to help keep the pocket from opening up when you have stuff in there.
- Fold up the bottom corners to the middle of your square.[13]
- Fold up the bottom of this square. From about ¼ of the way down from the center of the paper, fold up the thick center triangle.[14]
- Apply another fold, this time in the center so that the thick part mostly covers the triangle you just folded.[15]
- Flip your wallet over and repeat these folds on the other side.[16]
-
8Flip your wallet around. You should have a pouch with thick folds on either side helping to keep it shut You have finished your traditional origami wallet.
- Once you are finished, you can also decorate the outside with drawings or stickers to help make your wallet ever more personal, or to remind you what is in there.
Community Q&A
-
QuestionCan I use A4 paper?
 Community AnswerOnly if you cut off the excess length to make it a square. You need to start with a square.
 -
QuestionHow do I perform the squash fold?
 Community AnswerLift the flap that is to be squashed towards you. Pry apart the layers of paper. Gently press down to squash the paper, creating two new mountain folds. Align the crease line on the top layer of paper with the layers of paper beneath.
 -
QuestionHow do I keep my money in the wallet?
 Community AnswerWhen you're finished with the origami wallet, you should end up with a pouch-like fold. Open it up and stick your coins or bills inside. Small, but efficient.
References
- ↑ http://www.cutoutandkeep.net/projects/diy-origami-cardholder
- ↑ http://www.cutoutandkeep.net/projects/diy-origami-cardholder
- ↑ http://www.activityvillage.co.uk/sites/default/files/downloads/origami_wallet_instructions.pdf
- ↑ http://www.activityvillage.co.uk/sites/default/files/downloads/origami_wallet_instructions.pdf
- ↑ http://www.activityvillage.co.uk/sites/default/files/downloads/origami_wallet_instructions.pdf
- ↑ http://www.cutoutandkeep.net/projects/diy-origami-cardholder
- ↑ http://www.activityvillage.co.uk/sites/default/files/downloads/origami_wallet_instructions.pdf
- ↑ http://www.cutoutandkeep.net/projects/diy-origami-cardholder
- ↑ http://www.cutoutandkeep.net/projects/diy-origami-cardholder
- ↑ http://www.activityvillage.co.uk/sites/default/files/downloads/origami_wallet_instructions.pdf
- ↑ http://www.origami-make.org/origami-wallet-traditional/page-04.php
- ↑ http://www.origami-make.org/origami-wallet-traditional/page-05.php
- ↑ http://www.origami-make.org/origami-wallet-traditional/page-05.php
- ↑ http://www.origami-make.org/origami-wallet-traditional/page-06.php
- ↑ http://www.origami-make.org/origami-wallet-traditional/page-06.php
- ↑ http://www.origami-make.org/origami-wallet-traditional/page-07.php
About This Article
To make an origami wallet, fold the paper in half vertically to make a good crease, then unfold. Next, fold the sides of the paper to the center crease and open it up again. Fold each of the corners in to line up with the 4 creases, then fold the left and right sides of the paper in to the center crease. Then, flip the paper over and fold down the top part of the paper ⅓ of the way. Tuck the bottom of the paper inside the top flap, and fold the entire paper in half to complete your wallet. To learn how to make a traditional wallet, keep reading!
-Step-18.webp)


-Step-18.webp)
