This article was co-authored by wikiHow Staff. Our trained team of editors and researchers validate articles for accuracy and comprehensiveness. wikiHow's Content Management Team carefully monitors the work from our editorial staff to ensure that each article is backed by trusted research and meets our high quality standards.
This article has been viewed 33,944 times.
Learn more...
The Nook from Barnes and Noble is an E-reader that lets you take books on the go. Taking the back cover off is a simple process, but it must be done differently for each version of the Nook. Take specific note of which type of Nook you have and follow the appropriate steps for that version. You will need a small, plastic prying tool, which is usually provided with the Nook. If you don’t have that tool, you can use another thin plastic tool, or sometimes a credit card or guitar pick. You will also need a size T5 Torx screwdriver.
Steps
Nook 1st Edition
-
1Locate the micro USB port. Hold the Nook upside down and locate the micro USB port, which is located next to the speakers and the audio jack. It looks like a rectangular hole that you plug a cord into.It is about ¼ inch (.6 cm) wide.
-
2Place your palm against the back of the nook. Hold the Nook securely with the screen against your non-dominant hand. Place the palm of your dominant hand in the middle of the back of the Nook. Use heel of your hand to create leverage when you pry the back off.Advertisement
-
3Hook the notch over the USB port with your fingernail. You’ll find a small notch on the bottom of the back cover, right by the USB port. Slide the fingernail of your middle finger over that notch. Place your other fingernails in line with the notch along the bottom edge of the Nook.
-
4Pry the back cover off. Gently pull at the notch with your middle finger and press against the back with the palm of your hand. As the cover starts to come loose, slide your fingers down along the edge to remove it completely. Pull the cover off slowly so it does not bend or break.[1]


Nook HD
-
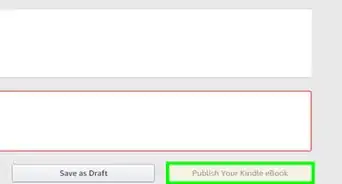
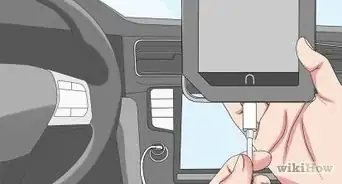
1Remove the screen frame. Use the plastic prying tool provided for your device, or another a thin plastic tool. A credit card or plastic ID will work. Insert it along the side, between the frame and the body of the Nook. Move the tool around the Nook HD to slowly remove the frame from the front of the device.[2]
- Go slowly and use care so you don’t break the frame.
- A guitar pick is also a great option for prying the frame off.
- There may be some glue attaching the frame, which will require you to take a little more time prying it off.
-
2Remove the screws around the edge of the Nook. Use a size T5 Torx screwdriver to remove all of the screws. Get a cup or bowl and place the screws in it for safekeeping as you remove them. There are seventeen screws around the edge of the Nook.[3]
- This type of screw can only be removed with a Torx screwdriver, so buy or borrow one if you don’t already have one.
-
3Pull the cover off slowly. Once the screws are removed, flip the nook facedown and gently pull the back away. It is attached to the motherboard by a cord, so don’t yank on the back cover or you may damage the cord.


Nook Color
-
1Lift the flap labeled “Nook.” Lay the Nook facedown and with the bottom closest to you. Find the flap in the lower right corner that says “Nook” on it. Lift this flap to reveal a memory card if your Nook has one. Remove the memory card. You’ll also see the two screws under the flap.
-
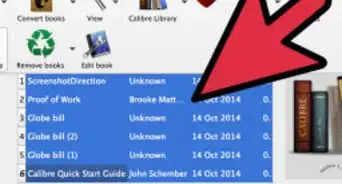
2Remove the two screws. If your nook has never been worked on, there will be one or two pieces of tape covering the screws. Remove the tape, but be wary that this voids your Nook’s warranty. Use a size T5 Torx screwdriver to remove both screws. Set them somewhere you won’t lose them.[4]
-
3Pry the corner of the back cover gently. Use the prying tool provided with your Nook, or a flat plastic tool. Do not use a metal tool as you could break the nook. Carefully insert the tool between the back cover and the Nook Color’s main body and begin prying the cover off.[5]
-
4Separate the back cover completely. Once the corner is pried off, slide the tool around one side to begin separating the back cover from the rest of the nook. When there is enough space in the gap, use your fingers to pry the back cover all the way off. Go slowly and be careful to avoid breaking the cover.


Nook Simple Touch
-
1Take the SD card out of the Nook. If your nook has an SD card, it is located on the right side of the Nook. Remove the SD card before you do anything else because removing the back can potentially break the SD card. Set it aside somewhere that you won’t lose it.
-
2Pry off the Power button carefully. Use the plastic tool that came with your Nook or another thin plastic tool. Don’t use a metal tool or you might scratch something. Locate the power button on top of the Nook. Insert the tool under the edge of the power button. Gently pop the power button off.[6]
-
3Take the screw out. The screw has a tamper sticker over it, so remove the sticker. Be wary that this voids your warranty. Use a size T5 Torx screwdriver to remove the screw. Make sure that you set the screw aside somewhere that you won’t lose it.
-
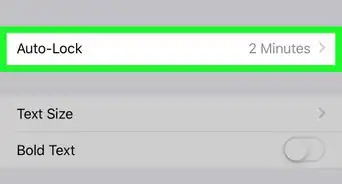
4Slide the back cover off of the Nook’s body. Place the Nook face down on a non-scratch surface. Gently press down on the back cover and push it toward the USB port. The back will slide off easily at this point.


Community Q&A
-
QuestionHow do I put an expanded cover back on my Nook Simple touch?
 Isabel WillemsCommunity AnswerIf it seems to have changed shape during the removal process, you will not be able to fit it back on properly. You will probably have to purchase another one.
 -
QuestionHow can I charge my Nook tablet without the charging chord?
 Community AnswerYou can't. You need the charging chord to charge your Nook.
Things You’ll Need
- Prying tool (or card or guitar pick)
- T5 Torx screwdriver
- Container for screws (optional)


References
- ↑ https://www.youtube.com/watch?v=H46BOlhemvo&feature=youtu.be&t=17s
- ↑ https://www.youtube.com/watch?v=lb3l8ZOuMSg&feature=youtu.be&t=1m43s
- ↑ https://www.ifixit.com/Guide/Nook+HD+Battery+Replacement/25671
- ↑ https://www.ifixit.com/Guide/Nook+Tablet+Back+Cover+Replacement/10935
- ↑ http://www.ebay.com/gds/How-to-Replace-a-NOOK-Screen-/10000000205233474/g.html
- ↑ https://www.ifixit.com/Teardown/Nook+Simple+Touch+with+GlowLight+Teardown/9301
About This Article