This article was co-authored by wikiHow Staff. Our trained team of editors and researchers validate articles for accuracy and comprehensiveness. wikiHow's Content Management Team carefully monitors the work from our editorial staff to ensure that each article is backed by trusted research and meets our high quality standards.
There are 7 references cited in this article, which can be found at the bottom of the page.
This article has been viewed 274,191 times.
Learn more...
As fast as technology changes, eventually you'll probably want to update the stereo system in your Corolla. Whether you're trying to install a software update on your existing Toyota audio system or you want to install a whole new stereo, we can have you listening to your favorite tunes in in no time!
Steps
Upgrading to an Aftermarket Stereo Head Unit
-
1Select the replacement head unit. You can obtain an mp3 and WMA player from for as little as $89. The most important features are the ability to play mp3 and WMA format files burnt on a CD but also from a USB drive (thumb drive or removable hard drive). Another important thing to consider when upgrading your head unit is what aftermarket unit will fit best.
- Head units come in three sizes - Single DIN, DIN and a half, and Double DIN. If your unit is Single DIN it will likely be compatible with most aftermarket head units. Otherwise you may need a mounting kit for your vehicle.[1]
-
2Get a wiring harness or adaptor. This will allow the car radio wiring to plug into the back of the new radio. These can sometimes be found for $4.99. Make sure that the plug is compatible with your car (check the list on the back of the box).Advertisement
-
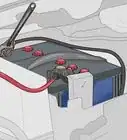
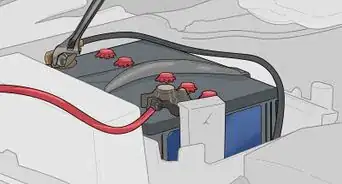
3Connect your new radio to the wiring harness. Twist the correct wires together and then solder them (or use wire nuts if you do not have soldering equipment). Cover the exposed wire with electricians tape or heat seal tape.[2]
-
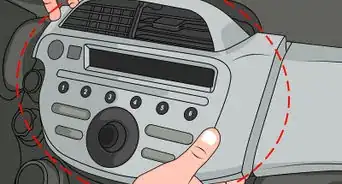
4Remove the factory installed radio. This will likely consist of having to pry away a plastic cover panel on the front of the radio and take out two screws. This will then allow you to slide the radio out of the dash. If you are unsure how your radio comes out, you should consult a service manual for your specific model.
-
5Remove the antenna wire from the back of the radio. This will be easily done once you slide the radio head out of the dash.
-
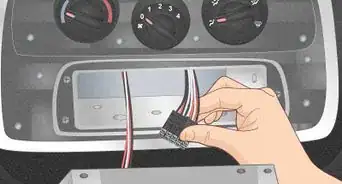
6Remove the wiring harness plugs. These plugs go to the back of the radio and can be released by pressing the release tab and pulling out.
-
7Remove any mounting brackets. If the sides of the radio have mounting brackets, remove them from the factory radio. make sure that you mark which one goes to the left of the radio and which one to the right.
-
8Plug the wiring harness adaptor into the wiring harness. This will allow you to fit your wiring harness to your new aftermarket stereo head.[3]
-
9Plug the other end of the wiring harness adaptor into the radio. There is a place on the back of the radio head for a plug. That is where you will plug the adaptor in.[4]
-
10Plug in the antenna wire. Do not forget to plug the antenna wire into the large round hole in the back of the radio head. This will allow you to pick up AM/FM stations.
-
11Test the radio. Be sure that you can hear sound through the speakers. See if the radio lights come on. This indicates that power is getting to the radio. Also confirm that the antenna is plugged in properly by tuning to different FM and AM stations.
-
12Slide radio into the head unit slot. Mount the new radio with the same screws as you took out of the old head unit, unless you had to use a mounting adaptor. Now you have installed your new stereo head unit.
- For most Toyota models, including Corolla, you will need to use a dash install kit for single or double DIN stereos.[5]
-
13Reinstall any panels or pieces of dash that were removed. This step varies by model, so be sure to consult your service manual if you are unsure about how to proceed.


Adapting Your Current Stereo to Meet Your Needs
-
1Consider your specific needs. Do you need the ability to play CDs? Do you want to hook up an MP3 player? The type of media that you wish to play will be crucial in helping you decide the best kind of adaptor to buy.[6]
-
2Know your adaptor options. There are several types of accessories and adaptors available to allow you to listen to a more varied media collection.[7] The most popular are:
-
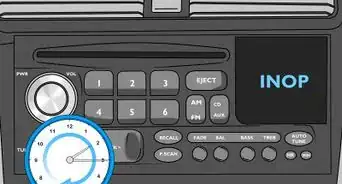
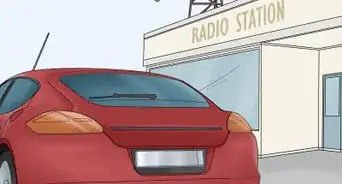
3Use an FM Transmitter to play music through your FM radio. This is likely the most universal adaptor since most cars are equipped with FM radios. The transmitter identifies an FM frequency that is not being used (at least near your) and casts music from your device over that frequency. The car radio can then pick up the waves and play the music just like any other radio station.The downside is that they are prone to interference.[8]
- If you choose to use the FM transmitter, you will have to set your radio to the same station the the adaptor is transmitting rather than plugging it into the radio directly.
- Though models vary depending on your accessories package, Corollas before 1999 may only have an FM stereo.[9]
-
4Use a cassette tape adaptor for a cassette deck. If you want to avoid the interference of random FM waves but have a very old sound system with only a tape deck, a cassette tape adapter will be your best friend. These adaptors are made to fit into a cassette player on one end and plug into another device at the other end. The music from your device can then be played straight through your tape deck as if it were a cassette.[10]
- From 1999 to 2009 the base model Corolla was equipped with a cassette deck.[11]
-
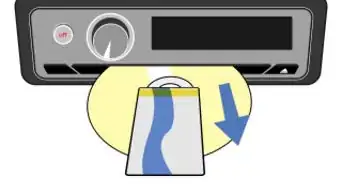
5Use a CD adaptor just like a cassette tape adaptor. Like the cassette adaptor, the CD adaptor is made to go into a CD player and allow you to play non-CD media. This also avoids the interference of FM waves. You will usually have a need for this if your car’s sound system was built after cassettes when out of style and before MP3 players were popular.
- In 2009, the base model Corolla was upgraded to a CD player.[12]
-
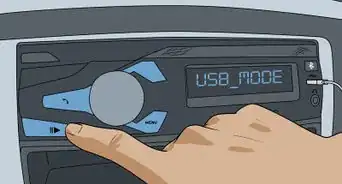
6Use an auxiliary or USB cord to connect any compatible media to your stereo. If you have a place to plug in other media, you only need an auxiliary cord or USB cord that fits your stereo and your media device. These cords became popular when car stereos were not equipped to play media from all devices, but manufacturer’s wanted to provide options to their clientele. It is the most ideal adaptor if your stereo is equipped with an auxiliary (aux) port.[13]
- Also starting in 2009, the base model Corolla was equipped with an auxiliary audio jack.[14]
-
7Purchase the appropriate adaptor. All of these adaptors are readily available and fairly inexpensive. You can usually find them at any store that with an electronics section.
-
8Plug in the adaptor. You will need to plug the cord of the adaptor into your media device, whether it’s a CD player, MP3 player, or other device. Then, insert the adaptor into your radio. Once your media is plugged into your radio, sit back and listen.


Updating Your Entune Software
-
1Check to see if your vehicle is Entune capable. Toyota debuted Entune software in their cars with the 2012 prius. Any toyota built from that point forward might be Entune capable. If you are unsure if your vehicle has this software capability or not, contact your dealer or Toyota customer service.
-
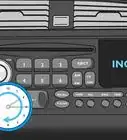
2Use a flashdrive to download the Entune update. Unfortunately, your Toyota isn’t yet connected to wifi. You will need a way to transfer the update file from a computer to the car.[15]
-
3Name the file. It is ideal to name the file the same way that Toyota names it. “FAT32” is the name Toyota uses when they send out the Entune update files.[16]
-
4Turn on the car. Start your car, but keep it in park. Also, do this in a well ventilated area. It is dangerous to leave a car running in a closed space.
-
5Insert the flashdrive into the car’s USB port. If your car does not have a USB port, it is not likely Entune capable.[17]
-
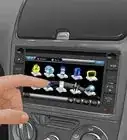
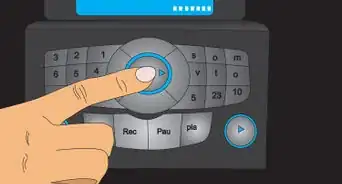
6Select ‘YES’ when prompted to update the software. When your system recognizes the Entune update file, it will ask you to confirm the update.[18]
-
7Allow the update to complete. Do not turn off the car or drive until the update is complete. Once it displays on the screen that the update is complete, you can remove the flashdrive and turn off or drive the car.[19]


Community Q&A
-
QuestionWhat color is the accessory wire to the stereo?
 Community AnswerIn Corolla models from 1984 to present, the switched power radio wire is grey. In some models, this is also the radio accessory wire. If you would like to further investigate wire colors in your Corolla, try searching online for a wiring guide for your Corolla model or looking it up in a service manual.
 -
QuestionIs it possible to install a cassette deck in my old Toyota Corolla?
 Chalkalate_milkCommunity AnswerYou can install both single and double DIN units in older Toyotas, I have a unit from a MK2 Celica in mine. Make sure the unit works, as the auto-rewind likes to go out on older units. Wiring is very easy, just identify the 12v main and 12v memory (amp) wire from the factory wiring harness and plug it into the rear of the new cassette player.
Warnings
- Disconnect the ground from your battery before changing radio heads.⧼thumbs_response⧽
- Do not leave any wires exposed. This can cause problems in your car’s electrical system and can be a fire risk.⧼thumbs_response⧽
Things You’ll Need
-
Upgrading to an Aftermarket Head Unit
- Aftermarket Stereo Head Unit
- Wiring Harness Adaptor
- Wire Cutters
- Electrical Tape
- Basic Wiring Tools
- Service Manual
-
Adapting Your Current Stereo
- Suitable Adaptor
- External Media Player
-
Upgrading Entune Software
- Flash Drive
- Entune Capable Toyota


References
- ↑ http://www.carstereohelp.com/aftermarket.htm
- ↑ http://ncstereoman.com/info/1279/
- ↑ http://ncstereoman.com/info/1279/
- ↑ http://ncstereoman.com/info/1279/
- ↑ http://www.crutchfield.com/S-ALU7Zh6on4X/learn/2003-08-toyota-corolla.html
- ↑ http://www.crutchfield.com/S-pQJPNxPGiBZ/learn/learningcenter/car/oem/connections_sound_quality.html
- ↑ http://www.crutchfield.com/S-pQJPNxPGiBZ/learn/learningcenter/car/oem/connections_sound_quality.html
- ↑ http://www.crutchfield.com/S-pQJPNxPGiBZ/learn/learningcenter/car/oem/connections_sound_quality.html
- ↑ http://www.edmunds.com/toyota/corolla/history/
- ↑ http://www.crutchfield.com/S-pQJPNxPGiBZ/learn/learningcenter/car/oem/connections_sound_quality.html
- ↑ http://www.edmunds.com/toyota/corolla/history/
- ↑ http://www.edmunds.com/toyota/corolla/history/
- ↑ http://www.crutchfield.com/S-pQJPNxPGiBZ/learn/learningcenter/car/oem/connections_sound_quality.html
- ↑ http://www.edmunds.com/toyota/corolla/history/
- ↑ http://www.autoevolution.com/news/how-to-update-toyota-entune-system-video-59588.html
- ↑ https://www.tacomaworld.com/threads/new-entune-3-1-update-info.310397/
- ↑ https://www.tacomaworld.com/threads/new-entune-3-1-update-info.310397/
- ↑ http://www.autoevolution.com/news/how-to-update-toyota-entune-system-video-59588.html
- ↑ http://www.autoevolution.com/news/how-to-update-toyota-entune-system-video-59588.html
About This Article