Simple ways to change the color of a car in Photoshop
X
wikiHow is a “wiki,” similar to Wikipedia, which means that many of our articles are co-written by multiple authors. To create this article, 10 people, some anonymous, worked to edit and improve it over time.
The wikiHow Tech Team also followed the article's instructions and verified that they work.
This article has been viewed 40,107 times.
Learn more...
Changing colors is lot of fun and easy to do on Photoshop! Take a car, for example; there are two methods to alter its color. The first one is bit a longer and harder than the second one. Pick a method and start from step one, below.
Steps
Method 1
Method 1 of 2:
Using Color Range and Brush tool
-
1Open Photoshop and an image.
-
2Duplicate the background layer by pressing Ctrl+J in Windows or ⌘ Command+J in Mac on the keyboard.Advertisement
-
3Go to Select → Color Range...
-
4Wait for the Color Range dialogue box to appear. It might take a few moment depending upon the computer.
-
5Choose Grayscale or any other preview from the drop-down list of Selection preview. Grayscale is the most preferred one.
-
6Choose Sampled Colors from the drop-down list of Select.
- "Yellows" will also work, but it will not give you control over it.
-
7Play around with the options.
-
8Change the Fuzziness and Range sliders until it looks good. Every image will differ.
- Normally the Fuzziness slider should be higher than the Range slider, but it depends on the image.
- Remember the lights (white) get selected and the darks (black) don't.
-
9Click on the eye-dropper icon on the right.
-
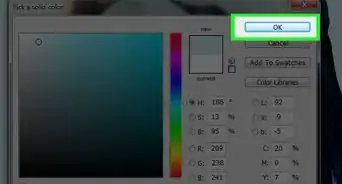
10Select the color you want to change by clicking or dragging on it. You can either click on the little preview on the dialogue box or click on the image itself.
-
11Click on the Plus Eyedropper icon. Because Photoshop does not select all the color automatically you want.
-
12Click on the rest of the color with the Plus Eyedropper Tool.
-
13Don't click on every part of the object. Instead play around with the sliders.
-
14When you're done, hit OK. It will load it as a selection.
-
15
Advertisement
Method 2
Method 2 of 2:
By Targeting the Color with Hue/Saturation Adjustment Layer
-
1Duplicate the background layer by pressing Ctrl+J in Windows or ⌘ Command+J in Mac on the keyboard.
-
2Click on the adjustment layer icon in the Layers panel. The adjustment layer panel will popup.
-
3Select Hue/Saturation... . Or go to Image → Adjustments → Hue/Saturation... (Ctrl+Uor⌘ Command+U).
-
4Wait for the Properties dialogue box to appear on the screen showing Hue/Saturation.
-
5Click on Masters and select the color of the object, in this case yellow (Alt+4).
- This will target only the yellows. But, you can also use the Eyedropper Tool or the Plus Eyedropper Tool by clicking on it to add to the color range.
-
6Move the Hue slider. As you move the hue slider left and right the color will change accordingly.
-
7Close the Adjustment layer panel by clicking on the double arrow on the top right corner, after choosing the color.
-
8Add a Layer Mask if required.
- Remove the excessive part of the color by painting black on the Layer Mask. Like the walls or sky or road, etc. Look at the GIF image above carefully.
Advertisement
Warnings
- Play around is a good thing. But do not mess with the Saturation and the Lightness sliders in the Hue/Saturation adjustment layer panel. If you do, it will be applied on the entire image, not just the color you want.⧼thumbs_response⧽
Advertisement
Things You'll Need
- Adobe Photoshop
About This Article
Advertisement


