X
This article was co-authored by wikiHow staff writer, Jack Lloyd. Jack Lloyd is a Technology Writer and Editor for wikiHow. He has over two years of experience writing and editing technology-related articles. He is technology enthusiast and an English teacher.
The wikiHow Tech Team also followed the article's instructions and verified that they work.
This article has been viewed 661,913 times.
Learn more...
This wikiHow teaches you how to install the Java Runtime Environment (JRE) on a computer running Ubuntu Linux. While the most common way to install the JRE is by installing the Java Development Kit (JDK)—which installs the JRE by default—you can also install Java by itself.
Steps
Method 1
Method 1 of 2:
Using Terminal
-
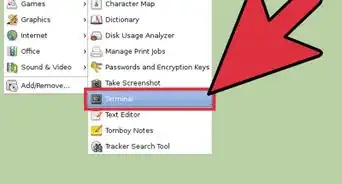
1Open Terminal. Click the Terminal app icon, which resembles a black box, in the bar on the left side of the screen.
- You can also press Alt+Ctrl+T to bring up the Terminal window.
-
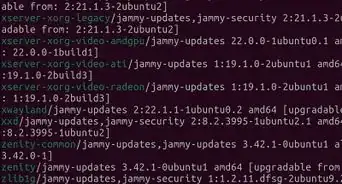
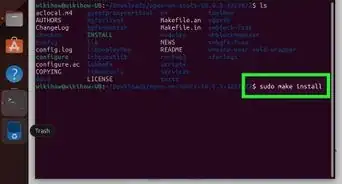
2Enter the Java install command. Type in sudo apt install jre and press ↵ Enter. This command prompts Linux to begin searching for the JRE installation site.Advertisement
-
3Enter your password when prompted. Type in the password you use to log into your computer, then press ↵ Enter. The installation will commence.
-
4Allow the JRE files to install. This will take a few minutes. When you see the terms of use prompt appear, you may proceed.
-
5Select <Yes> when prompted. Press the left arrow key, then press ↵ Enter. Java will resume installing.
-
6Wait for Java to finish installing. Once you see your username appear at the bottom of Terminal, you can continue.
-
7Check your Java version. Type in java -version and press ↵ Enter, then wait for the Java version number to appear.
- If doing this results in an error, Java didn't install correctly. You may need to try installing it manually.
-
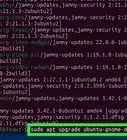
8Remove unnecessary files. You can get rid of temporary files installed by Java by doing the following:
- Type in sudo apt autoremove and press ↵ Enter.
- Type in y and press ↵ Enter.


Advertisement
Method 2
Method 2 of 2:
Installing Java Manually
-
1Open the Java download site. Go to https://java.com/download in your computer's web browser.
-
2Click Free Java Download. It's a red button in the middle of the page. Doing so opens the Downloads page.
-
3Click the Linux link. This option is near the middle of the page. Clicking it should prompt the Java folder to begin downloading.
- You may first have to click Save to prompt the download to begin.
-
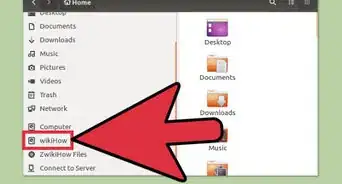
4Open the "Downloads" folder. Click the Files app icon—which resembles a grey filing cabinet drawer on the left side of the screen—then double-click the "Downloads" folder.
-
5Extract the downloaded folder. Right-click the "jre-#####-linux" folder, then click Extract Here in the resulting drop-down menu. You should see a new, regular folder with a similar name appear in the "Downloads" folder.
-
6Move the extracted folder if necessary. If you want to install Java in a location other than the "Downloads" folder, do the following:
- Click once the extracted folder to select it.
- Press Ctrl+X to cut the folder.
- Go to the folder you want to use as an installation location and open it.
- Press Ctrl+V to paste in the extracted Java folder.
-
7Find the extracted folder's "bin" folder. Open the extracted folder, then double-click the folder with the Java version number as its name. This will open the Java folder; you should see a folder entitled "bin" here.
-
8Find the "bin" folder's path. To do so:
- Right-click the "bin" folder.
- Click Properties.
- Expand the "Properties" window by clicking and dragging right its right side until the entire "Location" path is visible.
- Select the "Location" path by clicking and dragging your mouse across it.
- Press Ctrl+C to copy the path.
-
9Open the ".profile" document. The easiest way to do this is through Terminal:
- Open Terminal.
- Type in gedit .profile and press ↵ Enter.
-
10Create a new line at the bottom of the document. Scroll all the way down to the bottom of the document, then click below the bottom text entry.
-
11Enter the Java "Home" path. The home path is the line
export JAVA_HOME=/pathwhere "/path" refers to the path you copied from the "bin" folder; you can paste in the copied path by pressing Ctrl+V. Your end result should resemble something like the following:[1]- export JAVA_HOME=/home/name/java/jre1.8.0_181
-
12Press ↵ Enter to create a new line. This new line should be directly beneath the "export JAVA_HOME=" line.
-
13Specify the PATH variable. Type in PATH="$PATH:$JAVA_HOME/bin" and then press ↵ Enter.
-
14Click Save. It's in the top-right corner of the window. Doing so saves your changes to the ".profile" document.
-
15


Advertisement
Warnings
- Depending on your computer's specifications and your version of Ubuntu, you may not get the most recent version of the JRE when installing it. Java will automatically select the highest supported version of the JRE for you.⧼thumbs_response⧽
Advertisement
References
About This Article
Jack Lloyd
wikiHow Technology Writer
This article was co-authored by wikiHow staff writer, Jack Lloyd. Jack Lloyd is a Technology Writer and Editor for wikiHow. He has over two years of experience writing and editing technology-related articles. He is technology enthusiast and an English teacher. This article has been viewed 661,913 times.
How helpful is this?
Co-authors: 16
Updated: September 8, 2019
Views: 661,913
Categories: Ubuntu
Advertisement