This article was written by Jeremy Mercer and by wikiHow staff writer, Travis Boylls. Jeremy Mercer is the Manager and Head Technician at MacPro-LA in Los Angeles, CA. He has over ten years of experience working in electronics repair, as well as retail stores that specialize in both Mac and PC.
The wikiHow Tech Team also followed the article's instructions and verified that they work.
This article has been viewed 843,097 times.
Hard drives are data storage devices that a computer uses to store a computer's operating system, applications, and files. You may want to install a hard drive (HDD) or solid state drive (SSD) on your computer to gain additional storage space or to replace a faulty hard drive. The process of installing a hard drive is a little different from one computer model to the next, but it is generally pretty easy, especially in a PC. This wikiHow article teaches you how to install a hard drive in a desktop or laptop computer.
Things You Should Know
- Check to make sure you are able to install a new hard drive in your computer before you purchase a new one.
- Before installing a hard drive, make sure to ground yourself to avoid damaging your computer's components.
- You may need several different size screwdrivers to install your hard drive. You can purchase an electronics screwdriver kit from any major retailer.
Steps
Installing a SATA Drive in a Desktop
-
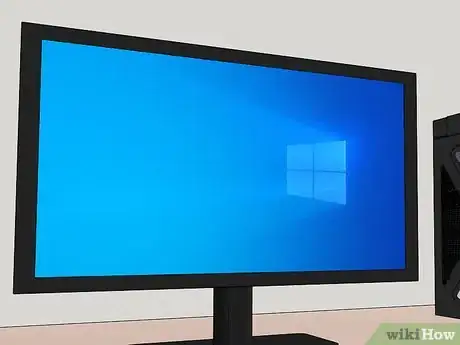
1Make sure that you're using a Windows computer. While it's technically possible to replace an iMac hard drive, doing so is incredibly difficult and could void your warranty. Windows desktop computers, on the other hand, tend to be fairly easy to tinker with.
- If you want to install a hard drive on a Mac computer, you can take it to an Apple professional and have them help you.
-
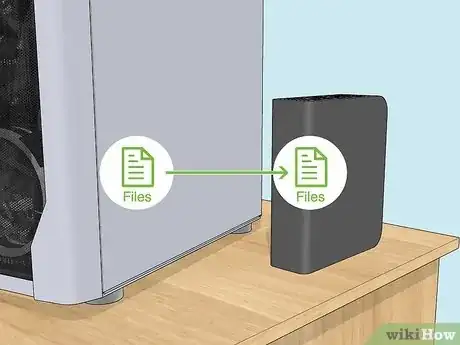
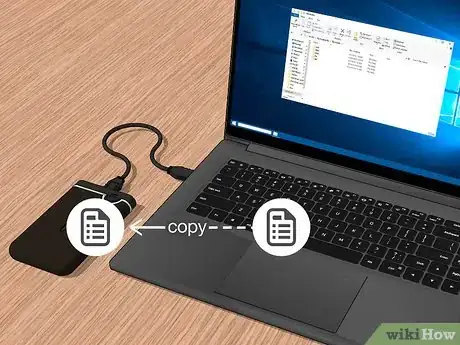
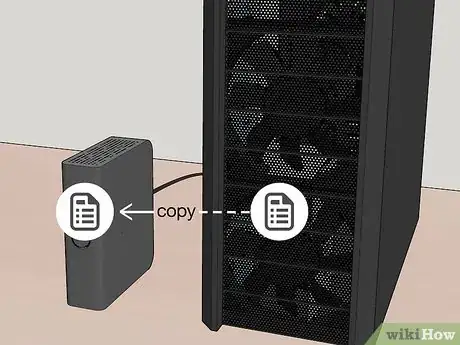
2Back up your computer's data. If you're removing an existing hard drive from your computer, back up its information so that you can restore the information later.
- If you want to keep your original hard drive installed, consider adding a second hard drive instead. Alternatively, you can clone an existing hard drive to a newer one.
- You can back up your data using another hard drive or external device, or using a cloud storage service, like Google Drive, iCloud, Dropbox, or OneDrive.
Advertisement -
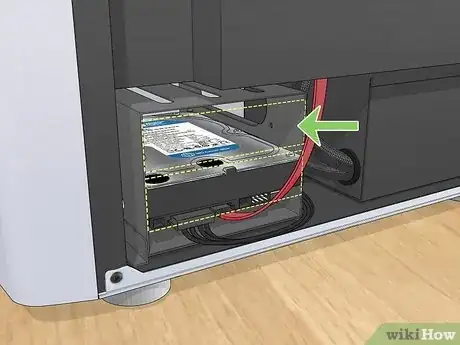
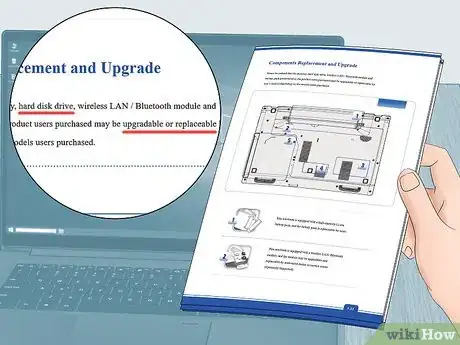
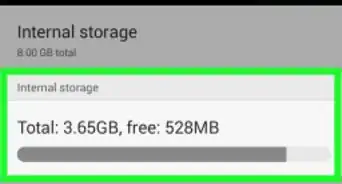
3Make sure you are able to install a hard drive on your computer. Before you go purchasing a new hard drive for your computer, make sure you are able to install a new hard drive on your computer. If you want to install a second hard drive on your desktop PC, make sure it has an expansion slot that allows you to install a second hard drive. If you have an all-in-one PC monitor, make sure the hard drive inside the monitor is replaceable.
-
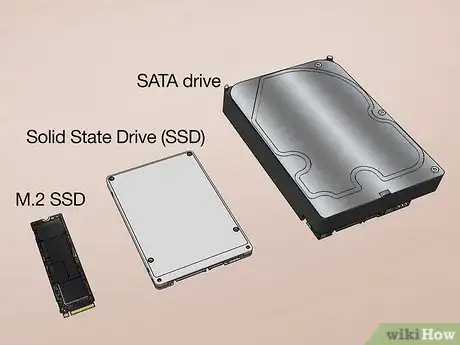
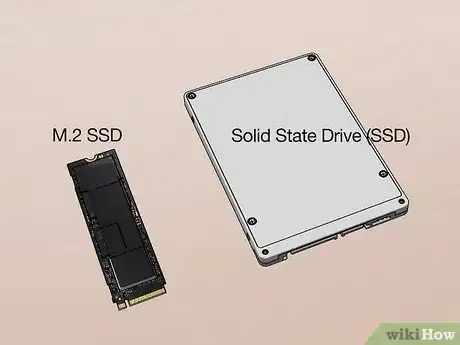
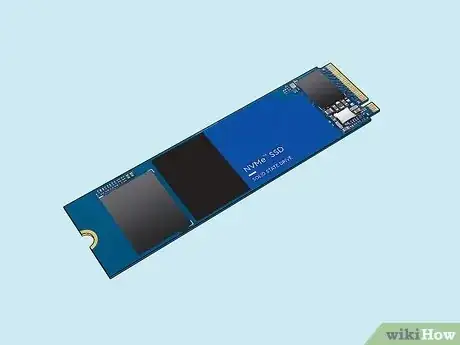
4Buy a hard drive that is compatible with your desktop motherboard. SATA is the most common hard drive type for modern computers, though many newer motherboards support M.2 SSD hard drives, which are much smaller and often faster than SATA drives (if the drive and your motherboard support NVMe).[1]
- SATA drives come in two sizes. 3.5 inch (8.9 cm) SATA drives are used in most desktop computers. All-in-one PC monitors may require a 2.7 inch (6.9 cm) SATA drive.
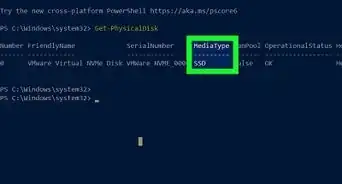
- Solid State Drive (SSD) vs. Hard Disk Drive (HDD): Hard Disk Drives are mechanical disk drives. They are usually slower, but less expensive. Solid-state drives have no moving parts. They are much faster, quieter, and more expensive. You can also purchase a hybrid HDD/SSD drive.
-
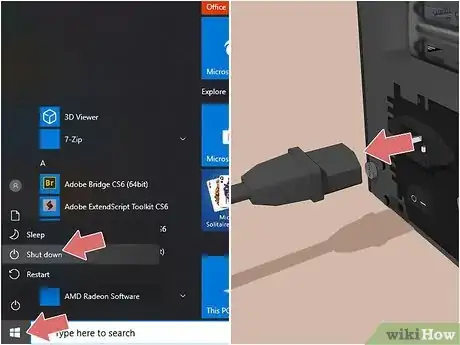
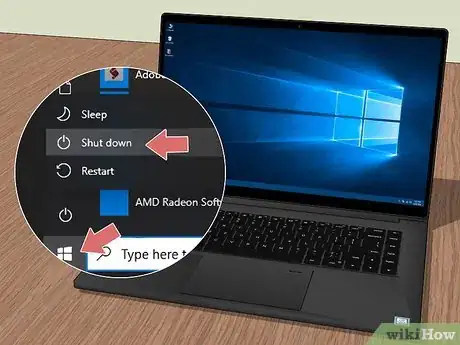
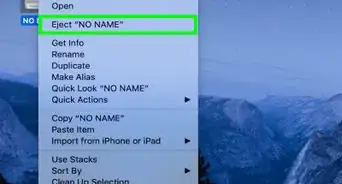
5Shut off and unplug your computer. To shut down your computer, click the Windows Start icon and the power icon in the Start menu. Click Shut Down to turn off your computer. You can also press and hold the power button on your laptop keyboard, or desktop PC tower to shut down your computer. Unplug your computer and press the power button to exhaust any residual electricity in the computer electronics.
-
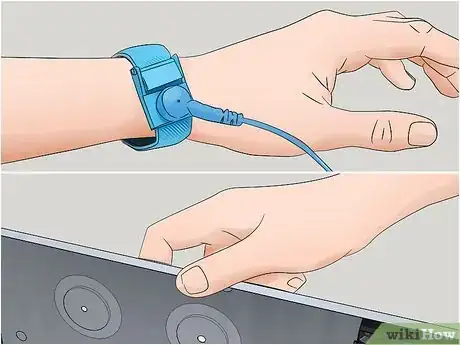
6Ground yourself. This will prevent electrostatic shock from damaging the components of your computer. You can ground yourself by touching something metal while you work, or purchasing static wrist bands that you wear while you work inside your computer.
-
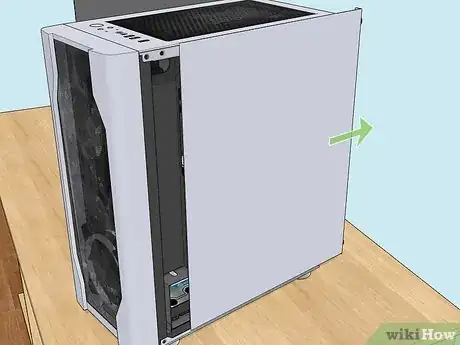
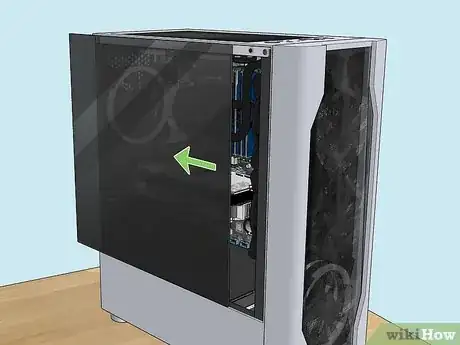
7Remove your computer panel. You will most likely need a Phillips screwdriver. Remove the side panel of the computer tower. You may need to remove both sides of the computer tower.
-
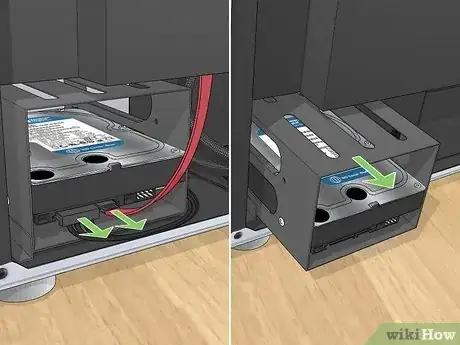
8Remove the old drive. The way a hard drive is mounted varies from one computer case to the next.[2] If you are removing an old hard drive, make sure any and all cables are disconnected from both the motherboard and the power supply. You may need to remove more cables or cards in order to access the hard drives in a tight case.
- Drive Bays: Some computer cases have a drive bay that you slide the hard drive into and then secure it by fastening it to the chassis with screws. If this is the case, remove the screws and then slide the hard drive out of the drive bay.
- Drive Cages: In some computer cases, the hard drive is mounted to a metal or plastic drive cage that is then inserted into the computer case. The hard drive may be secured to the drive cage using screws, or it may be a toolless drive cage that uses pins and clips that fasten to the hard drive. If your computer case uses a drive cage, remove the screws or detach the clips that secure it to the computer chassis, and then slide the cage out with the hard drive inside.
-
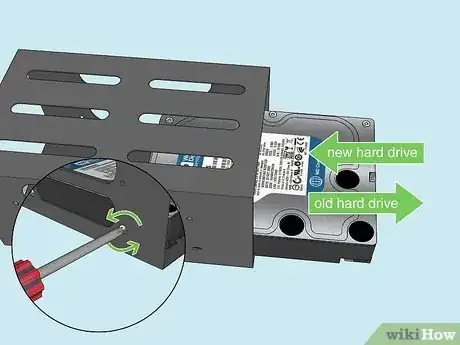
9Transfer the drive cage to the new hard drive (if present). If your computer case uses a drive cage, remove all the screws and pull the old hard drive out. Place the new hard drive in the same enclosure and secure it with the screws. If you have a toolless drive cage, pull the sides away from the hard drive to unfasten it, and then slide the hard drive out of the drive cage.
-
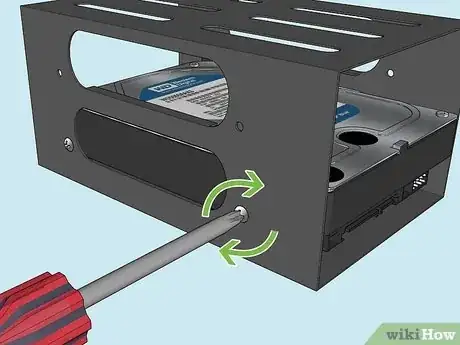
10Secure the hard drive. Once the hard drive has been inserted, use the screws that came with it to secure the hard drive in the drive cage. Ideally, you should use two screws on each side of the hard drive. If the hard drive is loose, it can rattle and cause more noise and lead to physical damage.
- Tighten the screws to a firm tightness but don't over-tighten as that may cause damage as well.
- If you are using a toolless drive cage, make sure the hard drive is securely fastened to the clips and pins of the mounting bracket.
-
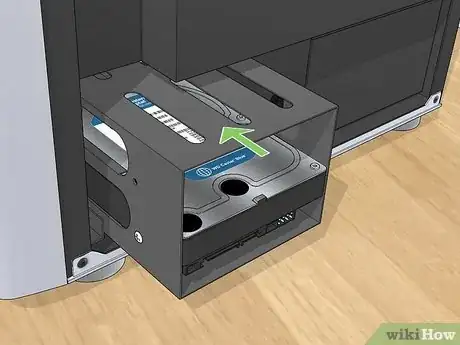
11Slide the hard drive back into the case. Go ahead and slide the hard drive back into the hard drive bay in the computer chassis. If needed, secure it using screws.
-
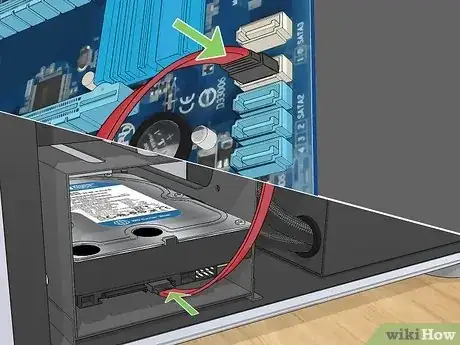
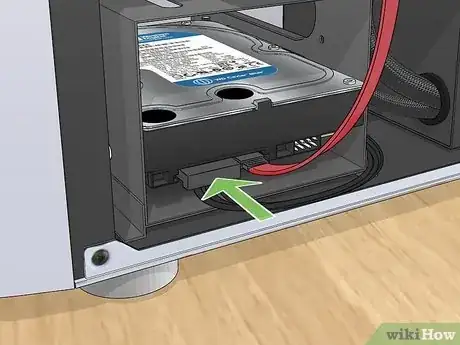
12Attach the drive to the motherboard. Newer hard drives will use SATA cables, which are thin and resemble USB cables. Use a SATA cable to connect the hard drive to the motherboard. SATA cables can be connected in either direction.
- If you are connecting your primary hard drive, the SATA cable should be plugged into the first SATA channel. This may be labeled SATA0 or SATA1. Refer to your motherboard documentation for detailed information on your motherboard.
-
13Connect the power supply to the hard drive. Most newer power supplies have SATA power connectors, though older power supplies typically only have Molex (4 pin) connectors. If this is the case, and you are installing a SATA drive, you will need a Molex-to-SATA adapter.
- Ensure that none of the cables can come undone by wiggling them a little bit.
-
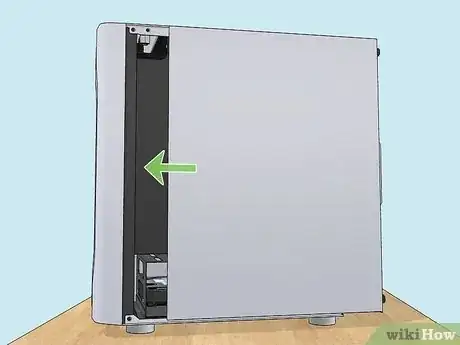
14Close up your computer. Replace the case sides and reconnect your cables if you had to move the case to work on the inside.[3]
-
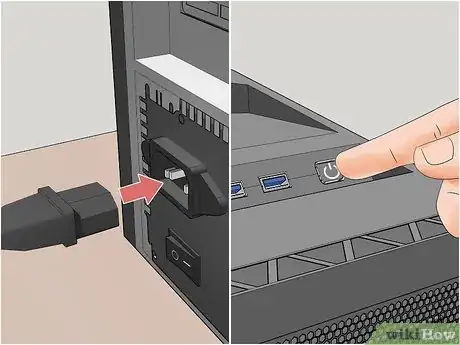
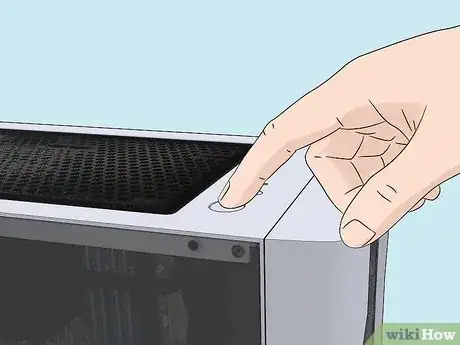
15Plug in your computer and power it back on. You should hear the hard drive begin to spin up.
- If you hear beeps or any jarring noises, immediately turn off the computer and check the hard drive's connections.
-
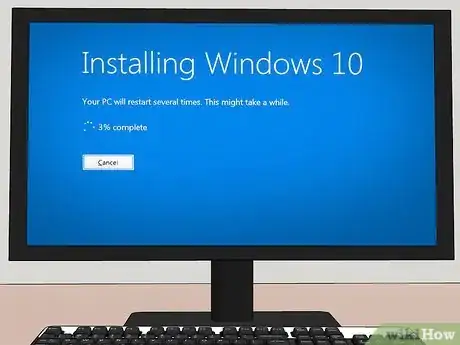
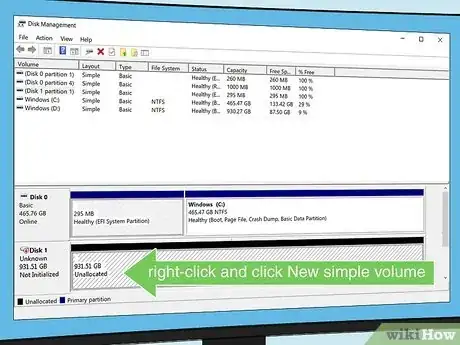
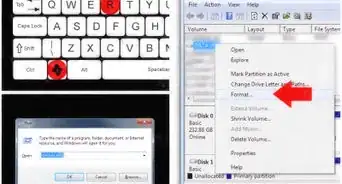
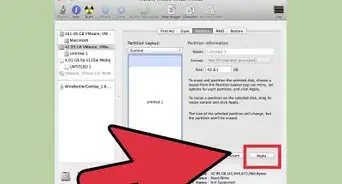
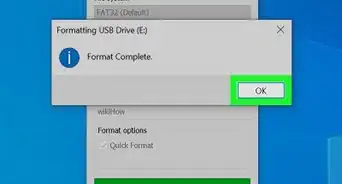
16Format the hard drive. If you are installing a new primary hard drive, you will need to install Windows. If you are installing the new hard drive as a secondary drive, you will need to format the new hard drive. Use the following steps to do so on Windows:[4]
- Right-click the Windows Start menu and click Disk Management.
- Locate the new hard drive. It will probably be listed as "Unallocated."
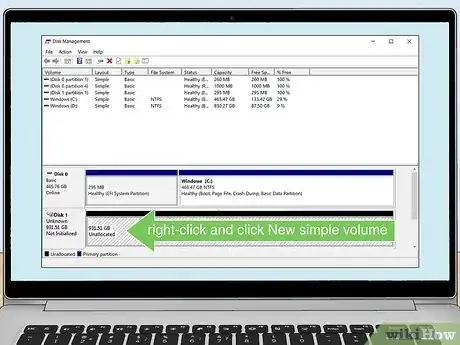
- Right-click the new hard drive and click New simple volume.
- Click Next in the dialog box.
- Leave the drive space as it is and click Next.
- Enter a new drive letter (or leave it as it is) and click Next.
- Click Next and then click Finish.
Installing a SATA Drive in a Laptop
-
1Back up your laptop's information. If you're replacing a laptop's hard drive, you'll want to back up the information that's on the hard drive so that you can restore it onto the new hard drive later.
-
2Make sure you can add or replace the hard drive in your laptop. Before you purchase a new hard drive for your laptop, check the user's manual to make sure you can replace or install a second hard drive. The majority of laptops do not have an expansion slot to install a second hard drive. On some newer laptops, the hard drive may be soldered in place and/or not replaceable.
- Additionally, check your warranty. On some laptops, opening your computer and tinkering inside may void your warranty.
-
3Buy a hard drive that is compatible with your laptop model. Most modern computers and laptops use SATA drives. Search for a hard drive that works with your model of computer, then purchase your preferred option. Most laptops use a 2.7 inch (6.9 cm) SATA drives. Some newer laptops use M.2 SSDs, which are much smaller and faster than SATA drives.
- Solid State Drive (SSD) vs. Hard Disk Drive (HDD): Hard Disk Drives are mechanical disk drives. They are usually slower, but less expensive. Solid-state Drives have no moving parts. They are much faster, quieter, and more expensive. You can also purchase a hybrid HDD/SSD drive.
-
4Turn off your laptop. Disconnect your laptop from its charger, then press and hold the Power button until the laptop turns off. You can also use the laptop's Power settings to turn it off:
- Windows - Click the Windows Start menu, click the power icon, and click Shut down.
- Mac - Click the Apple icon in the menu bar, click Shut Down..., and click Shut Down when prompted.
-
5Ground yourself. This will prevent you from accidentally harming your computer's delicate internals with static electricity. You can ground yourself by touching something metal or by purchasing static wrist bands that you wear while you work on your computer.
-
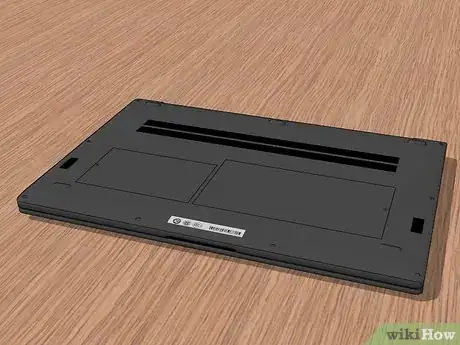
6Turn over your laptop. Shut your laptop's lid, then flip it over so that the bottom of the laptop is facing up.
-
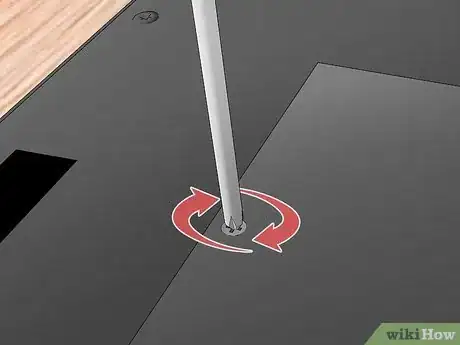
7Remove the bottom of the laptop. This will vary from laptop to laptop, but you'll usually need a screwdriver to remove the case. Use a plastic pry tool to carefully go around the edges of where the bottom panel is attached to the keyboard and carefully pry it loose.
- Be careful of any ribbons or cables attached to the motherboard from the bottom panel. If you find any cables or ribbons attached, make a note of where they are attached, and carefully remove them.
- Many laptops require special screwdrivers, such as Pentalobe models, or a tri-wing screwdriver to unlock the case.
- Some laptops, such as Mac laptops, will require you to unscrew several screws around the border of the case.
-
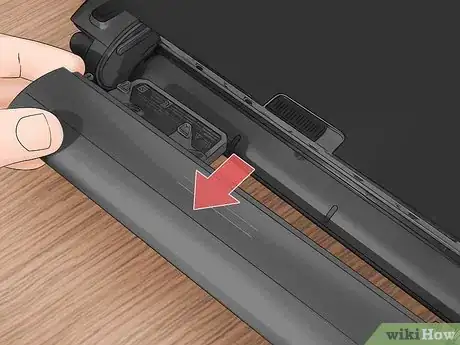
8Remove the battery if possible. Most laptops will allow you to remove the battery, which will prevent you from inadvertently shocking yourself during the hard drive installation.
-
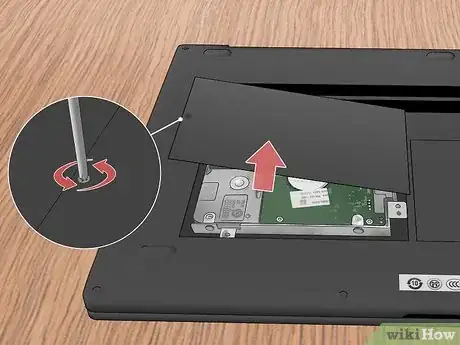
9Open the hard disk panel (if present). On some laptops, the hard drive may be housed inside a special panel. The panel can usually be identified by the hard drive logo printed next to it. You will usually need a small Phillip's head screwdriver in order to remove the screws and the panel.
-
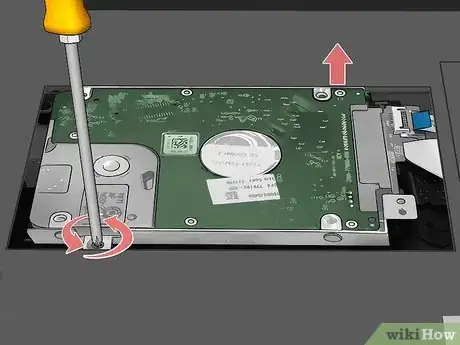
10Unscrew the hard drive. Depending on the laptop, the hard drive may be secured in place with screws. Remove all screws holding the laptop in place.
-
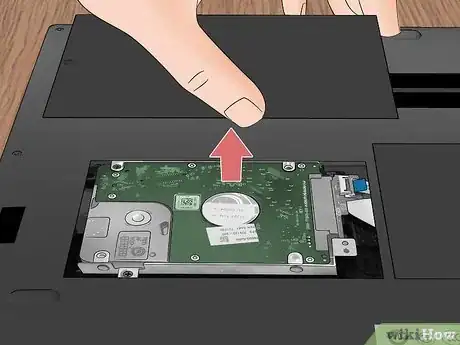
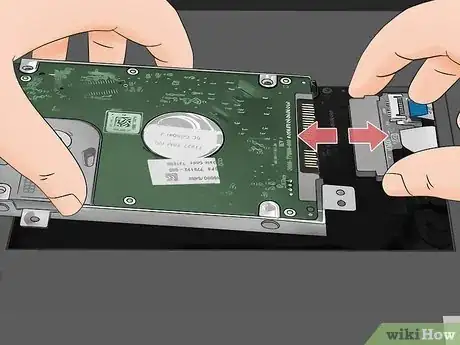
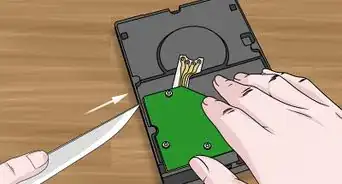
11Remove the existing hard drive if necessary. Slide it out from the connection port that it is attached to. There may be a release latch or ribbon you pull to disconnect the hard drive. The hard drive will pop back about half an inch, allowing you to remove it from its housing.
- You may also need to disconnect your hard drive from a wire or cable.
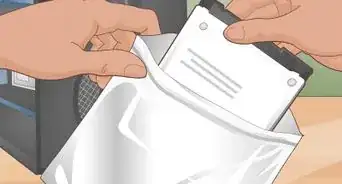
- It's best to place your old hard drive somewhere safe in case you need to retrieve data off of it.
-
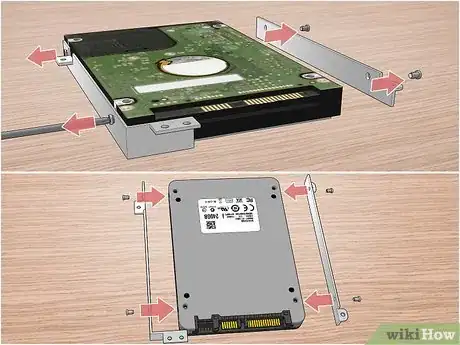
12Transfer the hard drive cage to the new hard drive (if present). Some computers use a drive cage to secure the hard drive. If your hard drive has a drive cage, remove all the screws and pull the old hard drive out. Place the new hard drive in the same enclosure and secure it with the screws.
-
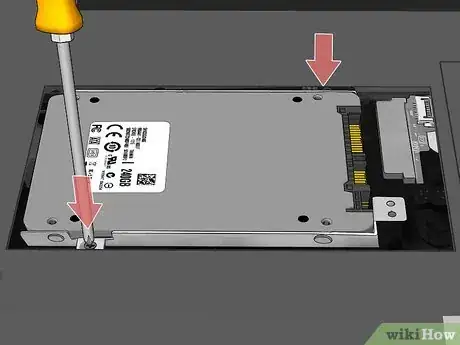
13Insert your new hard drive. Ensure that you insert it with the correct side facing out, then press it firmly into the connectors. Do not force the hard drive, or you may damage the connectors.
- If you had to remove screws to remove the original hard drive, screw them back in as well.
-
14Connect any wires that you unplugged. If you had to detach any wires or cables from the original hard drive, reattach them to the new hard drive.
-
15Close back up your laptop. Replace the bottom of the case and any screws holding it in place.
- If you needed to disconnect any ribbons or cables to remove the bottom panel, be sure to reconnect them before closing the laptop.
-
16Format the hard drive. If you are installing a new primary hard drive, you will need to install a new operating system. If you are installing the new hard drive as a secondary backup drive, you will need to format the new hard drive. Use the following steps to do so on Windows:[5]
- Right-click the Windows Start menu and click Disk Management.
- Locate the new hard drive. It will probably be listed as "Unallocated."
- Right-click the new hard drive and click New simple volume.
- Click Next in the dialog box.
- Leave the drive space as it is and click Next.
- Enter a new drive letter (or leave it as it is) and click Next.
- Click Next and then click Finish.
Installing an M.2 Drive
-
1Back up your computer's data. If you're removing an existing hard drive from your computer, back up its information so that you can restore the information later.
- If you want to keep your original hard drive installed, consider adding a second hard drive instead.
- You can back up your data using another hard drive or external device, or using a cloud storage service, like Google Drive, iCloud, Dropbox, or OneDrive.
-
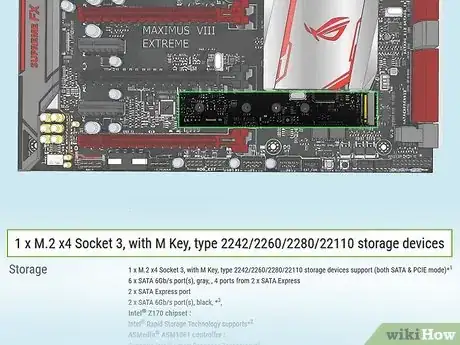
2Check what kind of M.2 drive is compatible with your motherboard. To do so, consult the user's manual or manufacturer's website, or open your computer to see what size M.2 is compatible with your mother. In order to install an M.2 SSD, you'll need to see if your motherboard has an M.2 connector slot, and what size SSD the motherboard supports. Some older motherboards only use SATA drives
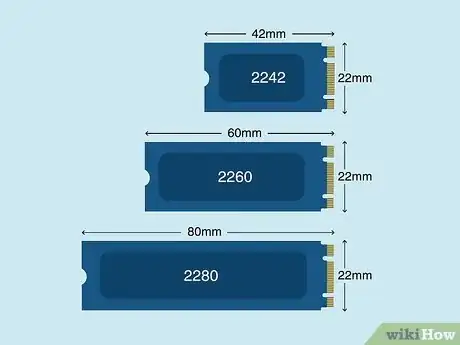
- M.2 SSDs come in a variety of sizes. This size of the drive is coded using a 4-digit number. For example, a 2280 M.2 drive is 22x80 mm, and a 2260 M.2 device is 22x60 mm. 2280 is the most common size for desktop computers.
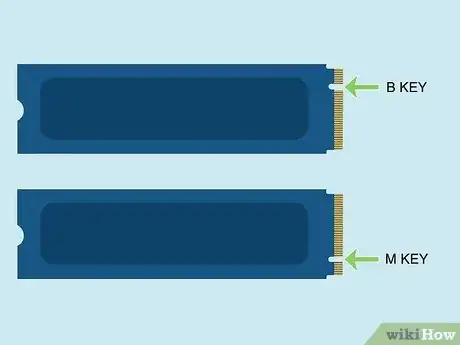
- You'll also need to check if the M.2 connector slot on your has an M or B key slot. An M.2 SSD with an M key slot will not fit in a B key connector. Check the manual for your motherboard and make sure the M.2 SSD you purchase is compatible with your motherboard. [6]
-
3Purchase an M.2 drive that is compatible with your computer. Once you know what size M.2 drive your computer will support, go ahead and purchase the proper sized M.2 drive for your computer
-
4Shut off and unplug your computer. To shut down your computer, click the Windows Start icon and the power icon in the Start menu. Click Shut Down to turn off your computer. You can also press and hold the power button on your laptop keyboard, or desktop PC tower to shut down your computer. Unplug your computer and press the power button to exhaust any residual electricity in the computer electronics.
-
5Ground yourself. This will prevent electrostatic shock from damaging the components of your computer. You can ground yourself by touching something metal while you work, or purchasing static wrist bands that you wear while you work inside your computer.
-
6Open your computer. If you are using a desktop computer, you will need to remove the panel from the computer case. If you are using a laptop, turn the laptop over and remove the screws from the bottom. Remove the bottom panel and carefully detach any wires, ribbons, or cables that are attached to the top of the computer. Note where they are attached so that you can reattach them later.
- Check your warranty before opening your computer. It is possible you may void your warranty by opening it up and tinkering with it.
-
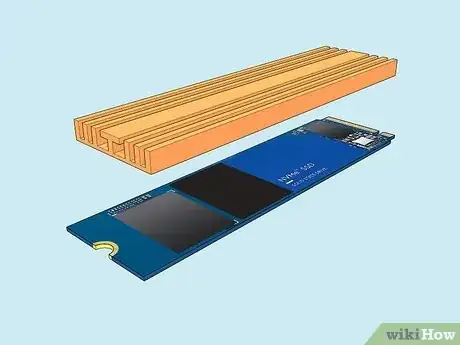
7Find out if you need a heatsink. Some M.2 drives come with heatsinks. Some motherboards have extra heatsinks for the M.2 drive. If this is the case, go ahead and unscrew it from the motherboard and put it off to the side for now. If you don't have any heatsinks, you may want to consider purchasing one before you continue.
-
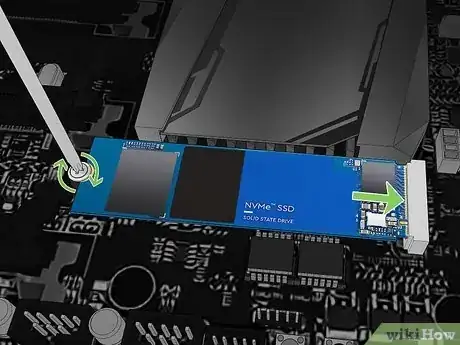
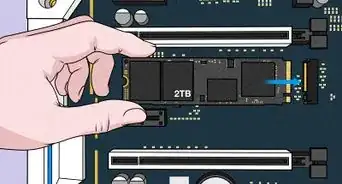
8Insert the M.2 drive To install an M.2 SSD, simply insert the SSD into the M.2 slot at a 30-degree angle. Press down on the other end of the SSD and screw it to the motherboard.
- If the M.2 drive doesn't fit into the M.2 slot, you may be inserting it upside-down, or you may have the wrong size M.2 drive.
-
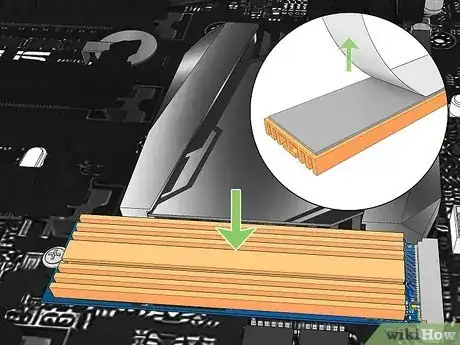
9Add the heatsink to the M.2 drive. The way you apply the heatsink varies from one M.2 model to the next. Typically, you will remove the protective tape and screw the heatsink to the top of the M.2 drive. Consult the instruction manual that came with your M.2 drive for more information about how to apply the heatsink.
-
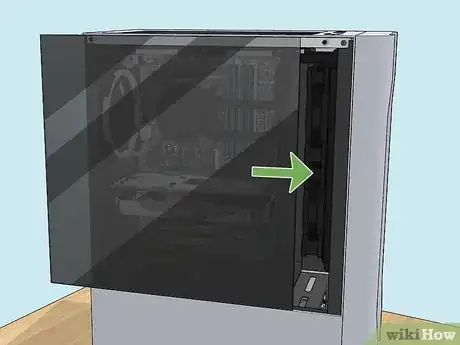
10Reassemble your computer. If you are using a desktop computer, go ahead and put the panels back on and plug it back in. If you are using a laptop, make sure you reconnect any cables, wires, or ribbons that you needed to disconnect, reattach the bottom panel, and then plug it back in
-
11Power on your computer. Once everything is reassembled, go ahead and press the power button to power on your computer.
-
12Format the hard drive. If you are installing a new primary hard drive, you will need to install a new operating system. If you are installing the new hard drive as a secondary backup drive, you will need to format the new hard drive. Use the following steps to do so on Windows:,ref>https://support.microsoft.com/en-us/windows/create-and-format-a-hard-disk-partition-bbb8e185-1bda-ecd1-3465-c9728f7d7d2e</ref>
- Right-click the Windows Start menu and click Disk Management.
- Locate the new hard drive. It will probably be listed as "Unallocated."
- Right-click the new hard drive and click New simple volume.
- Click Next in the dialog box.
- Leave the drive space as it is and click Next.
- Enter a new drive letter (or leave it as it is) and click Next.
- Click Next and then click Finish.
Community Q&A
-
QuestionDo hard drives come with the needed cables or will I need to purchase them separately?
 Community AnswerThey don't. You either get the cables with the motherboard or you buy them separately.
 -
QuestionCan I take an old hard drive out of one computer and put it in as a backup storage drive in a new computer with a different operating system?
 Community AnswerYou'll have to reformat your hard drive, but yes, you can use that hard drive as extra storage for almost any PC.
 -
QuestionHow can I find out which hard drive I need for my Laptop?
 Community AnswerTalking to a tech professional (like a specialist at a store selling computers and related items) would be best. However, the word 'need' is misleading, as you can use a lot of different hard drives in some laptops.
Warnings
- Hard drives emit heat when they are running. If your computer has multiple hard drive bays, consider positioning your hard drives so that there is empty space between them to help keep your computer running cooler.⧼thumbs_response⧽
- Pay close attention to static electricity when working with the inner components of your computer. You can use an anti-static strip or touch the screw on an active light switch cover to ground yourself before touching the components and cables inside your computer.⧼thumbs_response⧽
- Check your warranty before doing any work inside your computer. It is possible that you may void your warranty by opening your computer and tinkering with it.⧼thumbs_response⧽
- Not all computers will support having their hard drives replaced, especially in the case of laptops.⧼thumbs_response⧽
References
- ↑ https://www.youtube.com/watch?v=SP0Brsc0dMY
- ↑ https://www.ifixit.com/Wiki/Installing_a_Hard_Drive
- ↑ http://lifehacker.com/137179/hack-attack-how-to-install-a-hard-drive
- ↑ https://www.dummies.com/article/technology/computers/operating-systems/windows/windows-10/how-to-install-a-second-internal-hard-drive-on-your-windows-10-device-255316/
- ↑ https://support.microsoft.com/en-us/windows/create-and-format-a-hard-disk-partition-bbb8e185-1bda-ecd1-3465-c9728f7d7d2e
- ↑ https://www.youtube.com/watch?v=SP0Brsc0dMY
About This Article
1. Make sure your computer has an expandable hard drive slot or replaceable hard drive.
2. Back up all your data.
3. Purchase a hard drive that fits your needs and is the right size for your computer.
4. Shut down your computer.
5. Remove the side panel on your desktop tower or bottom panel on your laptop.
6. Disconnect the SATA cable and power supply cable from the old hard drive.
7. Remove any screws or the special enclosure holding the old hard drive in place.
8. Place the new hard drive in the enclosure, or hard drive slot.
9. Attach the SATA cable and power supply cable.
10. Secure the hard drive in place with screws.
11. Replace the side or bottom panel on your desktop tower or laptop.
12. Power on your computer.
13. Install a new operating system on your computer.
