This article was co-authored by wikiHow staff writer, Travis Boylls. Travis Boylls is a Technology Writer and Editor for wikiHow. Travis has experience writing technology-related articles, providing software customer service, and in graphic design. He specializes in Windows, macOS, Android, iOS, and Linux platforms. He studied graphic design at Pikes Peak Community College.
The wikiHow Tech Team also followed the article's instructions and verified that they work.
This article has been viewed 72,668 times.
Learn more...
Removing a hard drive from your laptop is pretty simple, especially if your hard drive has an external access panel. We'll show you how to take the hard drive out of laptop so you can install another.
Steps
-
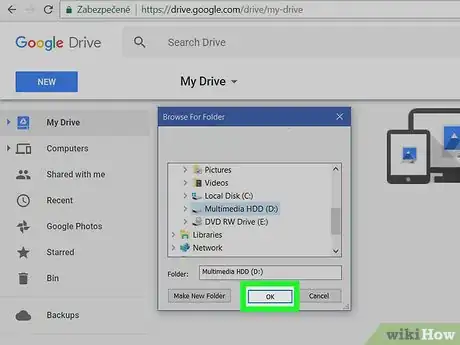
1Backup your files. Before you remove the hard drive from your laptop, make sure you backup all the files in case something goes wrong. You can backup your files using an external hard drive, a USB drive, or using cloud storage like Google Drive, or Dropbox.
-
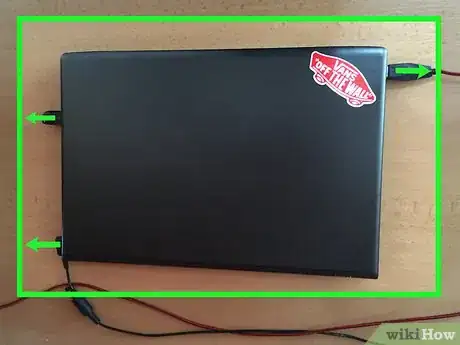
2Disconnect all cables. Remove any cables connected to your laptop. This includes the power cable, any USB cables, network cables, phone lines, and any other attached devices.Advertisement
-
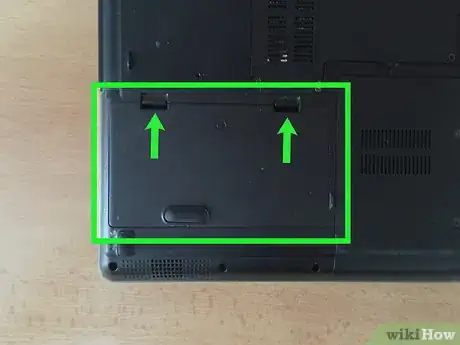
3Remove the battery. In most cases, the battery has one or two release latches that you press to remove the battery. Press the release latch(es) and pull the battery out of the bay.
-
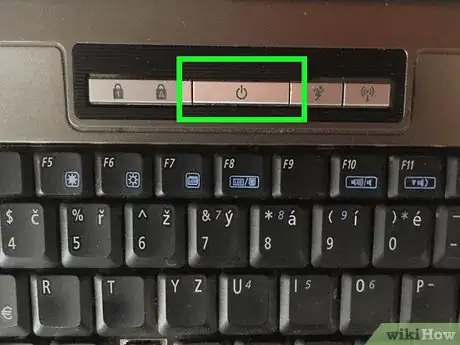
4Press and hold the power button for 15 seconds. This will drain any remaining electricity in the laptop. This will prevent you from getting shocked while working on the laptop.
-
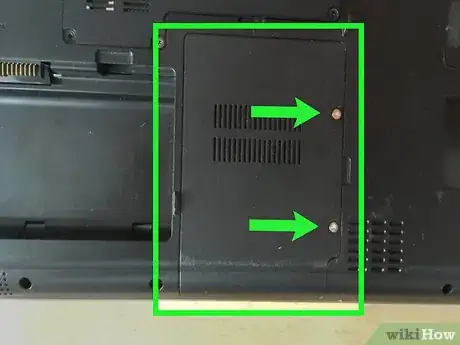
5Unscrew and remove the main access panel. The access panel is located either on the bottom of the laptop or on one of the sides, depending on the brand and model of your laptop. There may be a symbol that resembles a stack of CD's on the access panel.
- In some cases the hard drive is located under the motherboard or the keyboard. If this is the case, it will be much more difficult to remove the hard drive. If so, consult your user's manual or take your laptop to a professional.
-
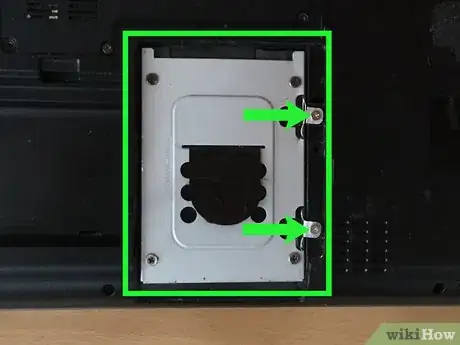
6Remove the hard drive mount. The hard drive may be held in place by an additional mounting mechanism, which can vary from one laptop model to another. You may need to remove some additional screws, but on some laptops, there might be a button that you press or a latch to release the hard drive.
-
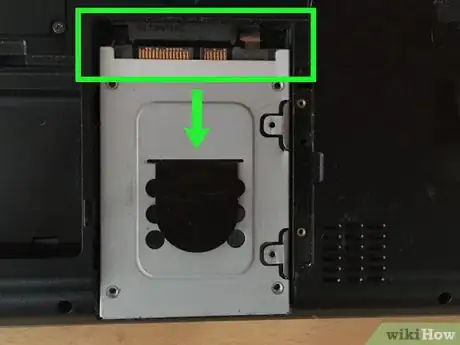
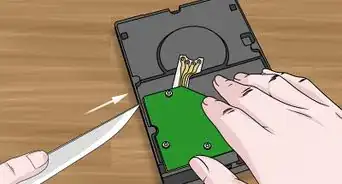
7Separate the hard drive from the connectors. Pull the hard drive away from the connectors to disconnect the hard drive and remove the hard drive from the bay. There may be a tab on the hard drive that you can pull to remove the hard drive more easily, but in some cases, you may need a flat-bladed tool to remove the hard drive.
-
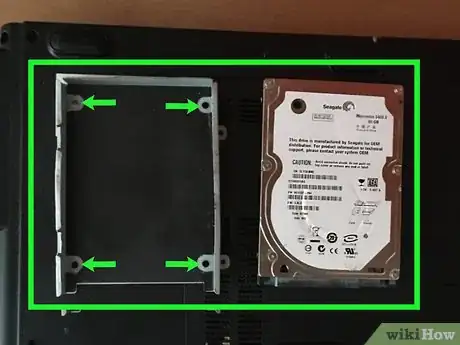
8Remove hard drive bracket from the drive. Once the hard drive is disconnected, if the hard drive bracket is still fastened to the hard drive you will need to remove it so you can install the new hard drive. Typically brackets are held on by four screws on the sides of the hard drive. Remove the screws to separate the hard drive from the bracket. If you are replacing the hard drive, you will place the new hard drive inside the bracket to install it.
